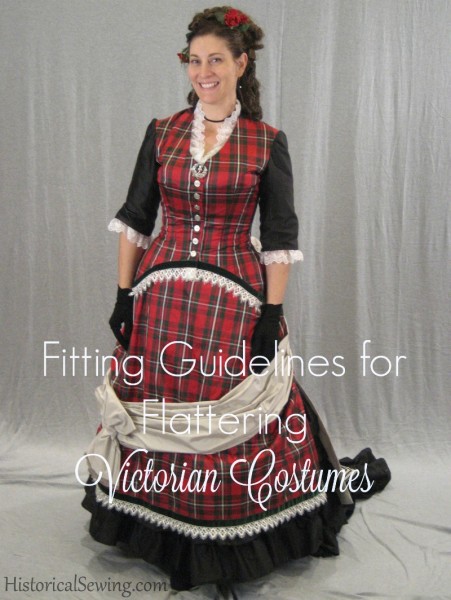
Seems every one of us who make reproduction historical garments are after that crown jewel of construction – The Perfect Fit. Of course we are.
Now, I’ll admit that after sewing and fitting for a while you can begin to recognize good fit on yourself and others too. But even “good fit” isn’t perfect.
Our ancestors in the 19th century made clothes to fit the individual body. Sometimes they got it right and other times you’ll see photos with horrible fabric puckers and corset lines. So taking this thought, “perfect fit” is relative to what you want to achieve in your costume project.
What if we, instead of “perfect”, strive for a comfortable and flattering fit of our time travel clothes? Ones that build our dressmaking skills and ones that allow us to move when driving our modern cars and playing croquet at the picnic?
I’ve put together a new list here to help you fine-tune the look of your Victorian garments. Note that it takes time to really learn how to manipulate fabric to fit a figure. Keep at it though! With each project you get better at knowing what techniques work for your particular figure and soon you’ll have a closet full of beautiful – and comfortable – historical ensembles.
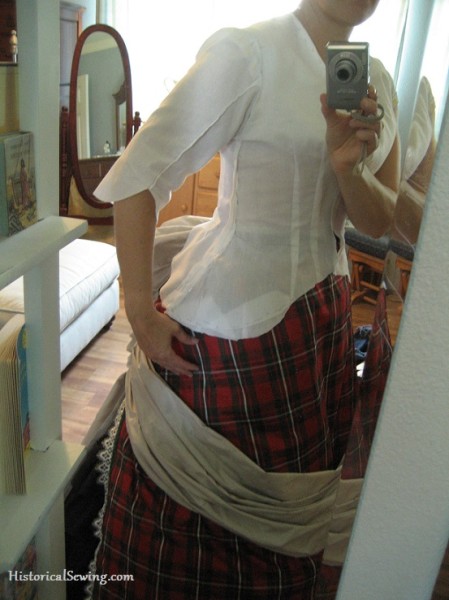
General Guidelines
- It’s about proportions. Having a bodice that’s too long in the torso for you causes unsightly horizontal folds. And too short a bodice doesn’t settle properly over your corset making the proportion of your upper body look weird – for YOU – in comparison to your lower half.
Skirts that are too short or too long for your height cause the eye to jut about trying to make sense of the visual appearance. Alter those patterns in proportion to your height for a flattering look. Alter width proportions of design details like collars and pockets to keep them from overwhelming a small frame or disappearing on a large one.
- Wear proper undergarments! – It’s not just about fitting fabric over your figure. You need to start with the historical silhouette you want to build on. A corset does wonders for getting you to “look period”. But for fitting reasons, it creates a horizontal waistline from which the fashions radiate and balance from.
- Strive for “white space” between the body and arms (bodice and sleeves) at the waistline in any Victorian decade.
- Remove your 21st century perceptions of how the clothing “should” fit. Also be careful in saying “that’s how they did it” as an end-all to fitting discussions. Despite the plethora of photographs and surviving garments we have today for research, it doesn’t mean other methods of fitting and dressmaking were produced.
- Select flattering styles for your own figure. Just as you select colors and particular cuts in your modern wardrobe, take that frame of mind into the past and apply it to your time travel wardrobe.
- Don’t skimp on fabric or trim. These create a believable ensemble and flatter your figure into the proper historical silhouette.
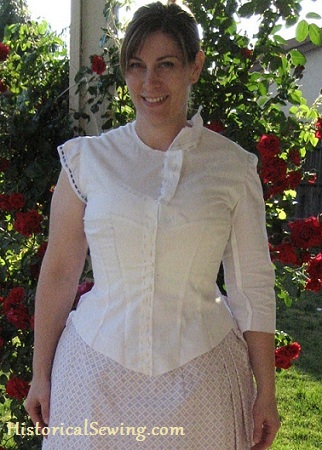
Bodices
- Pay attention to grainlines. Cut bodices on-grain or at least the underlining on-grain. If a bodice is cut on the bias (such as 1830s & 1840s), use the bias to sculpt the fabric over the bust and shoulders. Put in waist darts as needed.
- Adjust shoulder seams to smooth excess fabric around the upper chest & back. Many shoulder and chest fitting issues can be solved by taking in or letting out the shoulder seams to curve naturally over the body. Draw in and cut a new neckline to accommodate this change.
- If taking up or letting out the shoulder seams doesn’t work, try the traditional method of altering length across the upper bodice portion of the pattern about half way between apex line and shoulder point. True the armhole back to the original position afterwards.
- Curve the center front seam above and below the full bust/apex line to fit to the curvature of the body.
- If a bodice rides up it generally means you don’t have enough width in the hip area for it to sit smoothly over the skirts, petticoats and under structure. Open up those seams from hip line tapering to waist area. (This could also indicate not enough width at the full bust line.)
- Cut underarms higher than you think for freedom of movement. Take a look at my secret for moving in tight Victorian bodices.
- If you get a horizontal fold from armhole to bust you need to add more width to the bodice for a bigger cup size. A full-bust adjustment is the solution. Re-draw the armhole so it stays high up under the arm.
- Add padding to the inside of the bodice right above the full bust line and over to the armhole seam. This will help smooth out the chest hollow that is more prevalent when wearing a corset.
- Use two, or even three, darts to bring in the excess fabric from a large bust to a smaller waist.
- Speaking of darts, don’t just follow the lines drawn in on the pattern. Mark them on your mockup but then pinch up the excess fabric of the bodice to fit YOU. Work with the fabric as you pin. The top points of where you pinch up and create the darts show you exactly where the dart points should end – just below the full bust line. See more of this in my video on fitting a bodice on yourself.
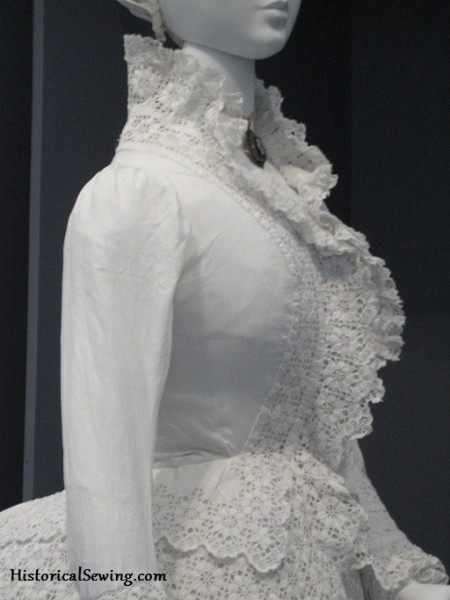
Sleeves
- When lengthening or shortening a sleeve do so with half the adjustment above the elbow point and the other half below it. Take separate measurements from shoulder to elbow and elbow to wrist to determine which section of the sleeve you need to alter.
- Watch the top of your sleeve (the cap). If it sticks out or up too much you have too much length in the sleeve cap. If the sleeve has too many gathers or too much ease, then there is too much width in the sleeve cap. Try these suggestions for removing that excess width.
- The sleeve cap seam line (around the top of the sleeve) should be at least 1/2″ or longer than the bodice armhole seamline. If it’s 1” or more you’ll start seeing gathers in the sleeve. Decide how much you want for the look you are going for and adjust as necessary.
- On puff sleeves, keep all gathers and tucks away from the very bottom of the sleeve that sits in the armpit of the body. This is the all-important “white space” area between the arm and body.
- Sleeve fitting begins with good bodice fitting. Work on getting the bodice set in place over the figure. Adjust the armhole placement based on high or sloping shoulders or rotated shoulders. The bodice should fit snug around the arm on the bottom half – between break points. The key is to “separate the arm from the body” when fitting fabric over both parts. A more tightly fitted bodice under the arm and up to the break points on front and back will give more freedom of movement in the sleeve.
Skirts
- Save yourself time and effort by measuring for your skirt length BEFORE you cut the skirt panels. Hems in the 19th century were done first then length adjusted at the waist. Measure over your corset and petticoats, with shoes on, from waist to floor/desired hem length at the center front, sides (do separate left and right measures if you have a high hip), and center back (over any bustle or pads). Measure your pattern pieces, allowing for seams and hem allowance, then adjust your pattern in length as necessary.
- Cut waistbands according to your waist measurement over corset and undergarments plus historical ease. Fit top of the skirt with darts or tucks or at the seams to fit.
After you’ve completed fitting your mockup and pattern, follow these 10 basic steps for sewing up that Victorian bodice. And remember to add hem facings to your skirts after flatlining the panels.
What fitting tips have you picked up over time that you use consistently in your historical sewing?

Hi I’m fairly new to sewing but I adore Victorian coats. But, I can’t seem to get the fathers on the shoulder to stand. I’m trying to get them to stand almost upright, I don’t know if you know what I mean. That little piece of fabric that I assume gets gathered inside the shoulder, would this work kind of like modern day padding? To raise the shoulders? Am I making the shoulder length too long? Is that why the shoulders end up flopping over the arm instead of raised? Is the fabric too heavy? Please help I’d be so grateful for your advice
There’s a couple of things here in your questions.
1) Are you wanting the excess gathered area at the top of the sleeve to be “pouffed out” in a nice, full silhouette? Yes, then add a bit of netting or even gathered bit of stiff fabric like organdy to the top. Cut an oval and fold in half lengthwise; gather the rounded edge and tack along the armhole seam line with the fold laying into the sleeve head. You could also try flatlining the upper portion of the sleeve to hold out the full width (see this post for tips). Flatlining even without the need to “hold up gathers” will help shape and hold your sleeve.
2) Is the sleeve flopping down onto the upper arm and you don’t want it there? That is a length issue in the sleeve cap that requires more fitting. This post may help get you started.
Good luck!
Thanks for yet another fantastic article. Your writing generally inspires me and this in particular encouraged me to pin baste fit rip rinse and repeat til I got my bodice and sleeves right before touching the fashion fabric!
Good luck Ardis!