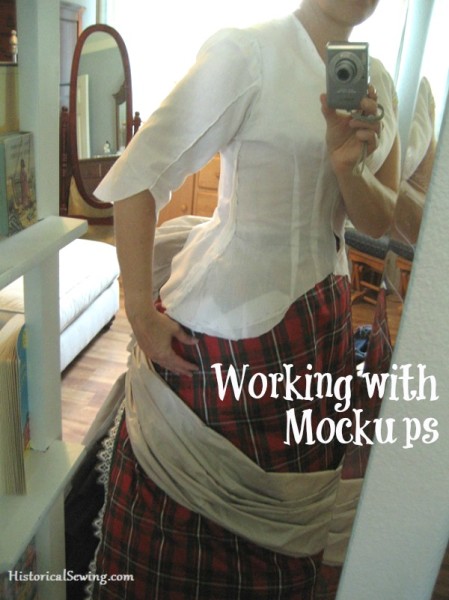
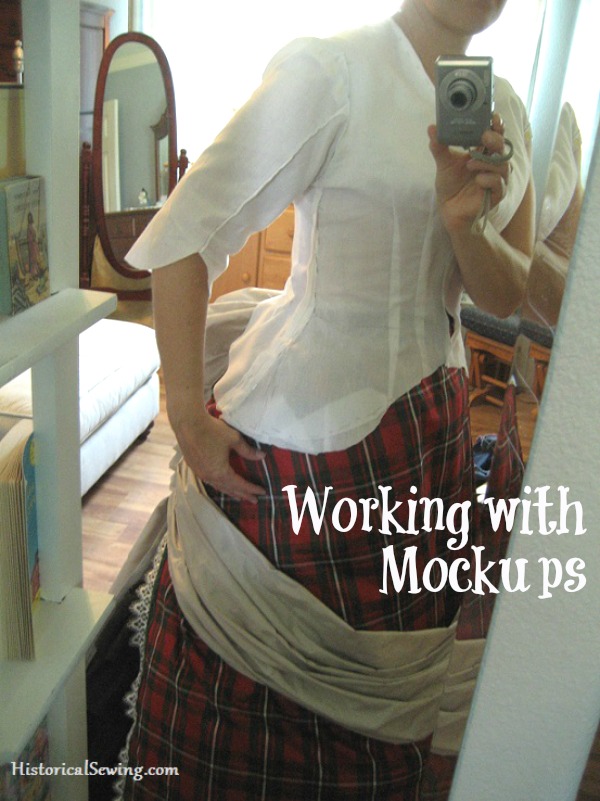
If you’ve been around garment sewing, and especially historical sewing, for any length of time you’ve probably heard of mockups, aka toile (pronounced twal), muslin, run-through, or fitting test garment. The purpose is to do a test run of the pattern for sewing errors and also to fine-tune the fit to a body.
Mockups are VITAL to creating a well-executed design.
I’ve put together some pointers for you for working with mockups so your next project will start off on the right foot.
If you have known fitting issues such as sloping shoulders, a wide back or are short-waisted, alter your pattern first before making the mockup. You basically want the pattern close to what you want before going into the first mockup fitting. If you are using a new pattern, sometimes you can’t do any adjustments until you make that first mockup.
Fabrics for Mockups
First let’s talk appropriate fabrics for mockups. This can be a big, confusing issue for some especially those fairly new to making test-runs of a project.
The common fabric that gets thrown around for mockups is muslin (calico). This plain, even weave cotton fabric is marvelous but not always a good choice for garment testing.
The key is to use a fabric that mimics the drape and hand of your final fashion fabric.
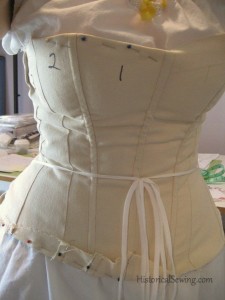
Meaning, don’t choose a thin muslin for a corset mockup or heavy denim for what will become a sheer summer bodice. If you have silk taffeta for the dress then choose a sturdy cotton like poplin or even lightweight twill for the mockup. A corset mockup requires heavy bull denim or duck cloth.
If your mockup fabric does not reflect the fashion fabric then all sorts of issues could arise – both during the fitting and also appearing in the final garment.
To be honest, I use a lot of basic cotton (muslin, batiste, poplin) for my bodice and skirt mockups. Sometimes twill if I have a really heavy fashion fabric. Corset mockups are done with bull denim or duck. Many costumers use old bed sheets to use for practice garments.
I also don’t pre-wash my mockup fabrics. However, I do press them before cutting out garment pieces. There’s no need to pre-wash or pre-treat as I’m not making a final garment.
Mockup Construction Tips
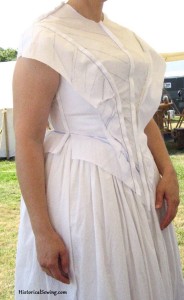
Before you sew the mockup pieces together and begin fitting, draw in the grainline, especially near center front and center back. Grainlines are VERY important for how a garment hangs on the body. When they’re off, so will the fit be. (You don’t need to do this if you have a striped mockup fabric or gingham.)
For mockups, use the main pattern pieces that will help you test fit, proportion and design details. No need to add a lining (or to flatline the mockup) or have facings. If unsure of elements like pockets, collar or cuffs, add them to the mockup for evaluation.
Sew the mockup with a regular or slightly longer stitch length. The seams need to be sturdy enough to handle fitting without stretching or ripping, but with enough ease to let out if needed.
Draw in design details and any sewing marks that aid in putting together the garment. It’s helpful to mark stop & start points of gathers, ease stitches and pleated areas.
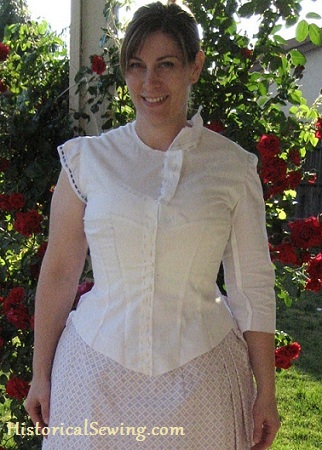
You’ll also need to think of how you’ll close the mockup for the fitting. Most often I pin the center front line together. Be sure to draw in the center front line if you want to close the mockup this way. Don’t guess the seam allowance. Draw it in so you know exactly where it is.
If you have a back closing bodice, an option would be to cut the mockup on the fabric fold on the center back line then open up the front of the bodice at the center front and add a seam allowance for pinning shut for fitting.
Another cool trick I learned from another costumer a few years ago is to add a separating zipper to your mockup opening. This can be either in the center front or center back but makes getting the mockup on and off very easy.
In sewing the mockup, staystitch the edges to reduce stretching during fitting. Staystitch is a regular stitch sewn on the seam line. Do this at the neck, around a shaped hem and top of the skirt (if not set onto a waistband). It doesn’t hurt to staystitch all the raw edges either. But definitely do the really curved ones for support.
Fitting and Finalizing the Mockup & Pattern
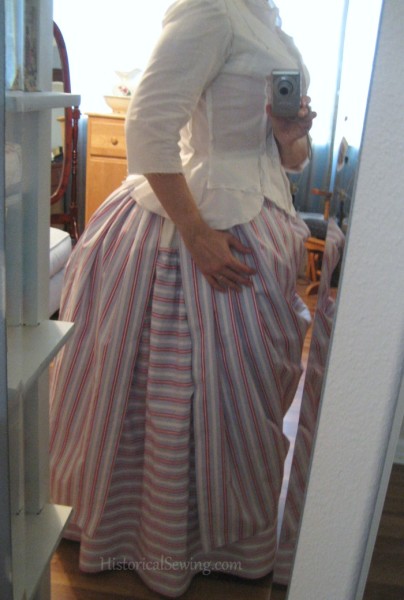
After you’ve sewn up your sample garment from well-chosen fabric, it’s time to fit to the body over all undergarments. (These can include chemise, drawers, corset, silhouette structure such as hoop skirt or bustle, and petticoats.) If fitting a bodice mockup, you’ll need to have your final skirt made and on the body so the bottom of the bodice will be fitting correctly over the layers of skirts & petticoats.
For fitting I recommend my more specific articles:
Fitting Guidelines for Flattering Victorian Costumes
Fitting a Victorian Bodice on Yourself
Tips & Tools to Reduce Stress During Fittings
When you’re ready to fit the mockup here’s a few tools to have handy: straight pins, scissors, marking pencils and colored pens, and seam gauge. Don’t be afraid to write on your mockup. Draw on it; write notes directly on the fabric. Develop your own key like stars to indicate the area to take in or little squares that mean “start adding fabric at this point.”
Utilize colored pencils or pens to indicate various changes that need to be made.
Don’t hold back in manipulating the mockup to get it where it needs to go. Of course, this naturally means you may need to make more than one sample garment as you tweak and adjust the design.
Don’t be afraid of this! If your goal is to have a garment that fits well then you’ll need to spend time in the adjustment stage…. at the mockup point. Sure, some tweaks can be made during a final fitting but really only minor seam adjustments in or out. It’s super difficult to add width or even take it out at the final fitting.
Use the mockup to tweak all those various figure allowances from the start. The final fitting should really only be for how the overall ensemble looks and to move any trim or closure placements.
Follow my tutorial on using a needlepoint tracing wheel to transfer all fitting marks on your mockup back to the paper pattern to finalize.
And I know it’s popular (because… time saver!) and even historically correct to use the fitting muslin as the lining in your final garments. This, however, I cannot support. The mockup can become stretched or twisted during fitting, not to mention all the new lines drawn, taken in, or slashed apart. A clean, fresh lining is best.
Although, historically, people were used to fitting with linings to bodies they already knew how to fit clothing to. Most modern costumers don’t make clothes on a regular basis so mockups tend to get messy. If you have a bodice from a previous project, use that pattern to make a new mockup to fine-tune. If it fits well enough, go ahead and use it as the underlining layer. However, I still recommend cutting new fabric for the final garment.
And what to do with your mockup after fitting and the project is made?? Keep for future reference of garments made from the same pattern or toss into the rag bag.
Do you have any other mockup tips to add? What has worked for you in making mockups?

Do you have a suggestion for what type of fabric to use to mock-up a dress that will be made out of stretch satin? I’ve never made a mock-up before or sewn with satin. Thank you!
Stretch satin will be a challenge! You might look at a lightweight denim/chambray that has spandex in it. Or even a garment cotton that is listed as “stretch”.
I made my first Victorian bodice (circa 1880) last year using a stiff muslin as a mock-up, which went so well (and I was in a hurry) that I pulled out the basting and used it for my flat-lining. The project went together really well, and I finished in time for the event! After a second wearing, I decided to spot-clean the bodice to freshen it up–the outer fabric was completely washable, but the seams were still raw–and the bodice developed some weird wrinkles where it got wet. The more I pressed it (with a steam iron) the worse the wrinkles got. I thought maybe the fashion fabric was some weird mystery synthetic, until I realized that the lining was tight while the outer fabric bunched up between the seams and darts. Then I realized:
My lining had shrunk! and guessing from how stiff the leftover muslin was, it might have even been severely starched and stretched when I got it. It took months to puzzle this out and a few more months to get up the courage to fix it, I slashed the front darts on the fold, stopping an inch from the point, marked all the darts OUTSIDE with a sewing marker, then took out ALL the stitches except the buttonholes and placket. After a thorough pressing of both lining and outer fabric, I hand-basted the lining in, keeping a close eye on the under-arm seam allowances (already trimmed). At most of the seams, the lining was a quarter-inch smaller than the outer fabric. Then I reassembled the entire thing, using the markings to show me where my darts were. Except for putting the sleeves in wrong once (since all my notches were trimmed off) it went together pretty well, just in time to wear it for the same event this year!
Lesson learned: if the mock-up has any chance of being used for the lining, I will always pre-wash it…probably twice.
Wow – good for you for figuring it out and taking time to fix! And yeah… will agree with you to prewash even mockup fabric if one thinks it will be used in the final garment.
We are about to fit my first mockuo ever. I wish I had read this helpful post first and gotten some poplin to imitate the fashion fabric instead of the muslin I used. Should I start over completely or is there anything to be learned from trying to fit the muslin version?
I also am quite confused by the two part sleeves and how the seam placement should fall. The only pattern direction was that the inner arm seam should match to a notch. There was quite a lot of extra fabric in the sleeve (the sleeve is a less fitted style) to be massaged around the shoulder hole and the outer seams could end up just about anywhere. I assume I should aim for the center back of the arm and clip a placement notch for that outer into the mockup?
So happy you are pushing your skills and making a mockup!
Yes, you will learn from even the basic muslin one you have.
In a two-piece sleeve the inner seam lands about 3″ up to the front from the lowest, bottom-most point on the bodice. (In Victorian bodices the side seam may or may not be at this lowest point.) I look at that seam placement first and pin around (underneath) to the back then fit the gathers/pleats or the ease in the sleeve head to what’s left of the armhole. The back sleeve seam may or may not line up with the side back or shoulder seam. It’s all in however it fits YOU. There’s no definite match point here on the back.
For the sleeve head excess my post on how to deal with that will be helpful to you. And best of luck!!
I just got my Victorian Corset Sewing Workbook and am ready to make a mockup of the corset. This is my very first corset, and I think I’m ready. I’ve looked at some videos and read through the book, and am an intermediately-skilled (is that a term?) seamstress. Thinking of what fabric I could use for the mockup without going out and buying something, I wondered about using the 100% cotton twill that I have left over from making cushion covers. Do you think that would be an appropriate fabric to use? I got it 10 years ago from Jo-Ann Fabrics; it’s probably what they called “bottomweight” but I’m not sure. What do you think?
Yes, you can use that. Be careful of any natural bias stretch of the fabric. Cut exactly on the grain as you can. Good luck!
Most helpful! Thank you very much for the comprehensive post – I sew regular non-historical clothes, but this came in very handy 🙂
Congratulations about the baby! I am so thrilled for you. (My husband and I were never blessed that way.) It is going to be great.
Thank you so much! 🙂
Why do I feel like I missed an important announcement?
I had mentioned the news in my monthly newsletter last week. After nearly 15 years of unexplained infertility, my husband & I have the surprise miracle of expecting a baby girl this summer. 🙂
Congratulations!!! May God continue to richly bless you in the future!
P.S.
Shame on me for not subscribing to your newsletter! I must cure this problem.
Thank you!
And you can sign up here: https://historicalsewing.com/free-article-request
We had the same timing experience! Our in-vitro daughter is now 28 and married. Her sister is about to turn 27. Congratulations, and happy parenting!