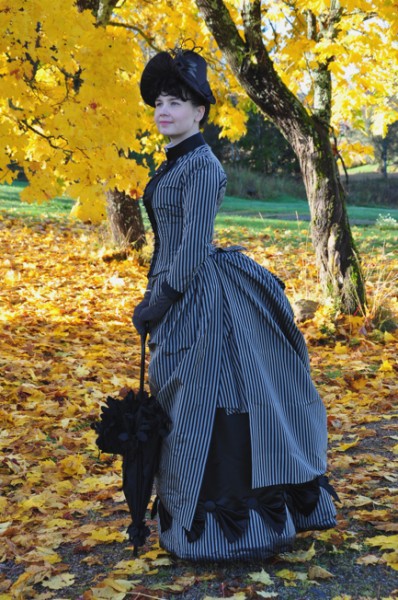
“WOW! That costume is amazing!!” I said out loud, wiping the drool from my keyboard.
I don’t know if you’ve come across Merja’s Instagram or her Blogger site, but she is a superbly talented costumer. I think what attracts me most to Merja’s work is the incredible fitting job. Truly stunning!
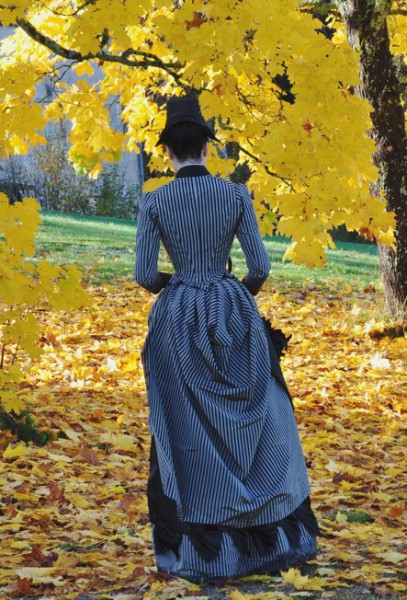
With her projects it’s quite easy to see she has achieved an excellent fit of her pattern – the fabric conforms to her curves. The smooth neckline lays flat. The sleeves have no puckering.
But what about the rest of us… those whose costumes may be fitted but fall short of the “Excellence” category. How do we tell where we messed up? How can we help others who ask us where they need to fine-tune their fit?
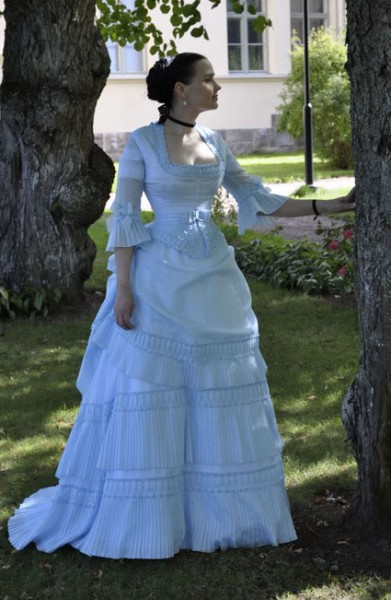
Many people have asked how one knows if the fit is good when viewing a costume on someone (or themselves). How do we know if it’s right? Or is it so obvious we’re overlooking it? If you see someone in a drool-worthy bustle, why does it look good to us?
Perfect fitting, of course, is that elusive but attainable goal of everyone who makes historical clothing. We want our costumes to truly reflect the time period – and be recognized as such even by those who may not really know what they are looking at.
I believe many elements go into making a stunning historical costume. The list of common mistakes we all make on our path to get there is lengthy. But as so many costumers (myself included) strive for that “perfect” outfit, Fit and Silhouette are the features that stand above the rest.
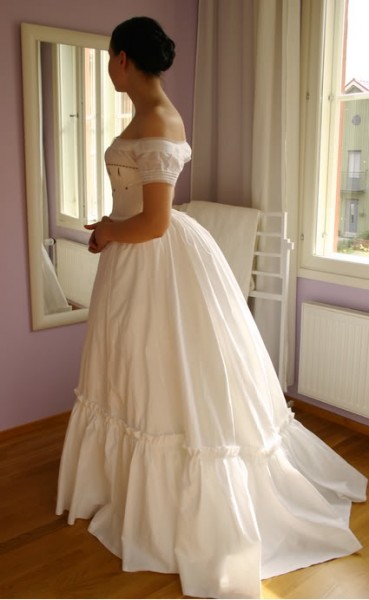
First you have to get the silhouette correct. That has a lot to do with an exceptionally fitted garment. It’s the foundation of getting to that excellent fit of a dress. And petticoats play a HUGE role in this.
Ask yourself: What silhouette am I trying to create? Doesn’t matter if it’s 1852 or 1987 – the fit of clothing reflects the contemporary silhouette. You shape the fabric around that silhouette to produce the look you want. THAT’S the fit!
So what features do you need to concentrate on to get that silhouette?
The Waistline
Especially within the 19th Century, we all gravitate toward the waistline. That seems to be the area we judge first as to whether or not the costume reflects a well-fitted dress.
The waistline placement tells us a great deal about which time period the costume is representing. Obviously a high Regency waistline is drastically different from the 1840s dropped one. So how do we discern if it’s an excellent fit?
Well… is the dress cut close to the figure? That’s the first clue. Again, it’s all about the waist in the 1800s. So if the dress is poufing out around the midsection or at the sides, even a modern fashion victim will notice it looks like an adult-sized doll dress rather than an article of clothing. That snug center is KEY to anyone noticing the costume is fitted well.
To help with that tight waist, you must achieve “white space” around it to produce a fitted look. Yokes can help immensely with this when applied to your petticoats. In the meantime, focus on procuring a well-made corset to help emphasize the waist.
Remember that this is the area everyone analyzes first in historical clothing. The side seams must lay flat and smooth to the body. The back seams allow the fabric to hug the figure over the corset. When making your next dress, pay special attention to pinching in those darts and side seams!
The Bust Area
What else would show your great uncle Albert your costume has an excellent fit? The bust line of course. He’ll notice that area whether you want him to or not (ack!). It needs to be flattering – not baggy, not too tight where you’re spilling out of it, but just enough to emphasize your natural assets.
Have you noticed a particular bodice at a ball that’s cut a bit too low and has all the men buzzing?
Sexiness in Victorian dress has its place, to be sure. But the goal is to match to the period silhouette and not modern bodice-ripping film making. Despite the plethora of Victorian low-cut bodices, they still effected propriety.
A first-rate fit anyone would recognize has the fabric hugging the bust, the darts allowing for the swell above the waist, and the neckline being cut of the era and not over-exposing the cleavage. The buttons don’t pull apart. And there is no room for a pack of pistols but one.
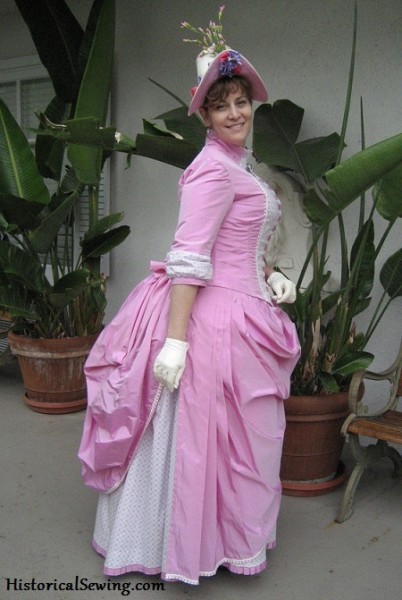
The Shoulders and Neckline
Another area that represents good fit is around the shoulders and neckline. Modern T-shirts and baggy button-down blouses do nothing to emphasize the shoulders. Unless you make your own, they hang loose over the shoulders. Don’t let this happen to your historical bodices.
All 19th C. bodices were fitted around the neck and shoulders. The fabric smoothed up and over the top creating a graceful line. An untrained eye will see a baggy shoulder or upper chest area and perceive that it’s a size or two too big – even if your waist is a perfect fit.
Pull up that shoulder seam. Pinch up the center front above the bust. Make the bodice fit your shoulders and people will appreciate that they just don’t make clothes that like anymore! (Hence catapulting your outfit into a time long past.)
Skirt Lengths
A final area the amateur eye will noticeably focus on is skirt length. High-water jeans today produce the same questioning look as a skirt showing too much ankle. Same goes for the reverse – a skirt hem dragging the ground in front will look wrong.
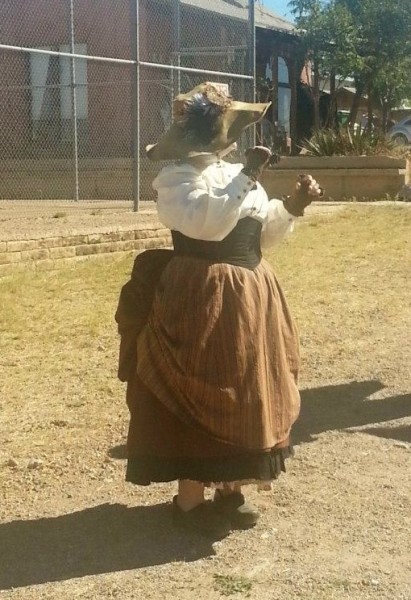
I think many of us costumers struggle with where to put our hem line. How far up from the floor should it be and still look period accurate?
But for someone who doesn’t know better, that hem pooling on the floor, even an inch or two, will scream poor fit, especially when you trip over it when walking down the hall.
Only slightly better is a skirt that’s a wee bit too short. At least with that you can declare it’s a walking skirt or so others won’t step on the hem at the ball. But too short and it’ll start looking like a doll’s dress (just like the poufy waistline).
All the above sections are essential to pulling off a period look to anyone, including those who could not care less. And you can only do so much with accessories to hide a bad fitting job.
Strive for the period silhouette you want. Analyze how surviving garments are displayed on museum mannequins and viewed in period photography. Start with the appropriate foundation undergarments. Then reflect that historical silhouette as you fit your mockup.
Pay attention to the waistline and the excess (or lack) of fabric around the bust. Pull up the shoulder seams so it doesn’t look like you rented your costume. Afterwards delight in the compliments from your co-workers exclaiming that you look like you came from a movie set. 🙂
Train your eye on period silhouettes and do your best work, allowing your garments to manifest that historical form.
Do you wonder why some costumers seem to “get it right” and now you realize it’s a matter of fit to a particular silhouette? Is this something you need to work on in your own projects?

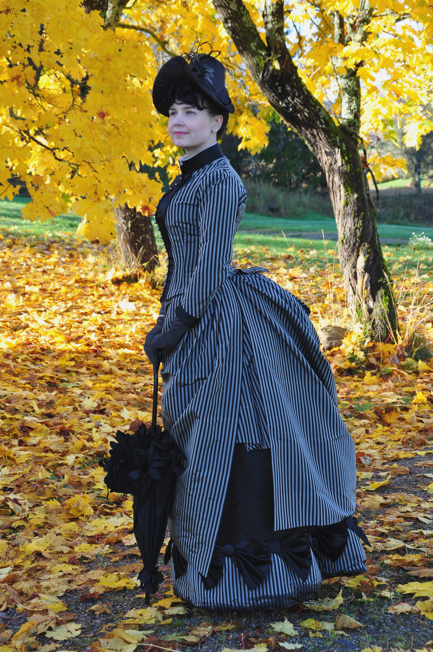
Wouldn’t it make sense just to make a full cast of your own torso and use that as your dress dummy? Wouldn’t that make fitting so much easier?
Of course you’d have to have several different ones with different corsets on for different eras 😉
Also, it’s all very well to achieve a perfect Victorian silhouette when you have the ample bosom and tiny waist like Merja. But fitting a less ideal figure is more of a challenge I think. I would argue that when fitting an asymmetrical body (like mine) you need to be careful not to OVER-fit; you want to camouflage flaws, not highlight them. What do you think?
You definitely want to be careful of over-fitting! And it can happen to any figure type. And any figure – be it ample or slender – can have a multitude of fitting issues. It’s about looking at where the fabric is pulling or twisting and opening it up or pinning to fit over the curves of the body. I myself have a high right hip but I don’t always allow for that in my fitting. But if one’s flaws effect their confidence when wearing a particular garment then yes, they would want to compensate for the flaw in such a manner to be more pleasing to them. I think we see our flaws personally with a much more critical eye than how others see us.
Thank you so much for your sharing on this site – it has helped me tremendously. I’ve gone from being a Cavalry reenactor to being a camp wench (er, the guys tell me “aide de camp” sounds better) due to a terrible car wreck last December (is talking on your cell phone while catapulting 70mph down the interstate worth it? No, as someone who has been rear-ended by such a person, no, it is not), and creating a corset, instead of wrapping my breasts with ACE bandages, and wearing skirts (watch out for those campfire edges!) has been a learning experience.
I have been sewing for a long time, and I was having issues with all the gatherings at the waist. My waist went from 26 inches to 35 just with the hoop, petticoat and pantalet layers. A yoke will certainly solve all of that!! I was in a hurry and due to the accident cannot sit at the machine for long periods, so I just folded over the top and made drawstrings on everything. Yep, that didn’t work so well.
Your instructions are clear and your style of writing is very enjoyable, and I thank you again for sharing your knowledge with the rest of us!
You are welcome Angie. So glad you’re back to sewing. May you continue to heal from your injuries (both physically and emotionally). Happy to have you in our community here!
Excellent post! I interned at a historical costume shop 10 years ago and loved it! Now I’d like to get back into it but there’s a lot I need to research first. It’s much easier as an intern!
Wow, her fit IS amazing!
I think you are so right. A proper foundation is incredibly important, and so frequently overlooked. I have watched many modern fashion shows, and many times a garment that looks wonderful on the dress form looks horrible on the model, and almost all the time it is because they aren’t wearing any foundation garments! (they also lack Merja’s skill, no doubt 😉 Thank you for another helpful, informative post.
What I’ve done over the years that has helped me most with the fit of my garments, without a doubt, is have a fitting buddy. I don’t mean to say that I rely on my friends to fit my garments for me, rather, that we learn from each other and that seeing each others’ garments from angles we can’t see our own from is quite the eye-opener. Thanks to friends communicating to me where my own fitting challenges lay, I am more aware when I fit myself and can produce better results. Additionally, having a well-fitted garment to compare to a muslin helps me make adjustments when it is on my body or on my table. I highly recommend having a girl’s day in for fitting to anyone, especially if you’re just starting out!
Another great article! Merja’s fitting IS exquisite. And you’re right, her foundations are impeccable!
A tip for mid-Victorian clothing, particularly before the bustle. In those years, part of the silhouette is having a small, snug waist and then lots of fluff immediately below the waist. Full, tightly-gathered petticoats are important to getting that look. To keep waistbands from stacking on each other, though, make the bands about 1″ bigger than the skirt/dress waist. That keeps the appropriate fluff below the waist, but also avoids any extra material at the waist itself. Another tip is using a small bustle pad to give a wee bit of loft in the center back. A bustle is important for pre-crinoline years, but a small one is a good idea even with a crinoline. Mine is no bigger than my two fists put together, but it keeps the back waist of my skirts from being too flat.