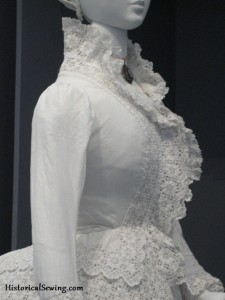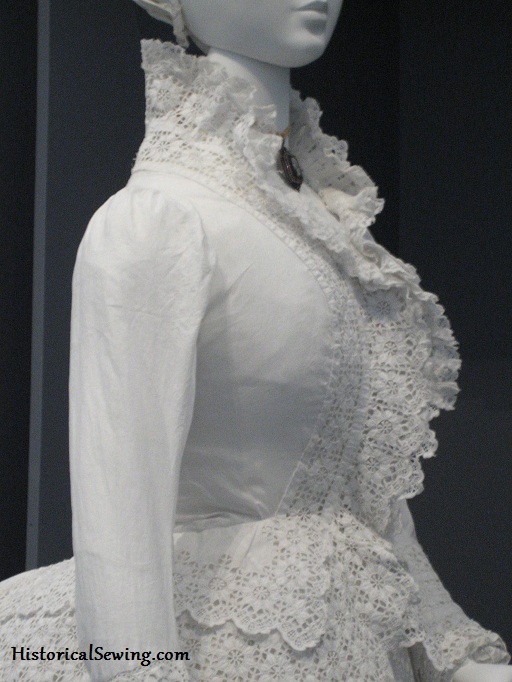
Sleeves can be one of the most frustrating elements of a bodice. The pattern can be too long, they hang funny and there is this struggle with getting them set into the armhole and still look nice.
Many times a sleeve has to be enlarged in width to fit a larger bicep measurement (a very common adjustment & problem for costumers). Or you might have small arms and the sleeve cap has simply way too much fabric in it to set it in smoothly and not be puffy.
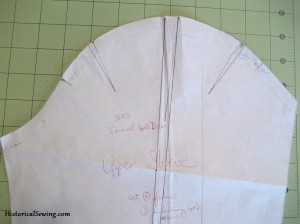
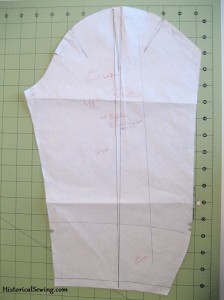
In this new video tutorial, I share 3 techniques you can do to handle that extra fabric across the sleeve cap. (The cap is the top of the sleeve from the underarm/bicep line up to the top edge.


And when sewing, try putting in two basting lines on either side of the seamline (as you would to gather) to help smooth in that extra width (ease).
Aside from width, what other issues do you have with making sleeves?


Thank you so much for sharing your love of this beautiful art form. For a beginner, sleeves are a problem. But watching this shows me that everyone has had problems with sleeves at some point or the other… and that is very reassuring to hear. I love Victorian Gowns and I guess I can say that I love cosplay and cross dressing. Wish me luck on this wonderful journey.
For method three, would you never take out the same width all the way down the entire sleeve (slim rectangle rather than a triangular dart)?
Not usually. If you did that it would make the entire sleeve narrower – at the elbow and wrist lines. If you need that alteration below the bicep line, then yes, you would/could take the same dart width (rectangle) all the way from top sleeve cap to hem. But if you are merely reducing sleeve cap width then taper the dart shape to nothing at the hem.
makes sense. thank you so much!
Hi! Thank you so much! I was gathering and gathering and gathering – ugh! puffy, puffier, puffiest! Did not even think about darts. So clean and neat!
Hi Jennifer, I am making the TV403 Vested Bodice and am having issues with sleeve fitting which may be in part due to my lack of knowledge of the style. The sleeve is in two parts and the under seam connects to a notch toward the front of the arm hole. There is a good bit of ease which I will attempt to reduce using your tips. However, I am unsure where the back seam should fall on the arm at the shoulder. It also seems that arm hole opening falls about an inch below the actual top of her shoulder. I don’t know if a dropped shoulder is the style for this 1872 bodice as it was in the Civil War era bodices or if I need to take in the arm hole seam at the top? There also seems to be too much fabric between the top of the bust and the shoulder in the front. I assume I could would remedy this by taking in the seam s at the shoulders first, but this would cause even more sleeve ease to need to be taken out. Thanks for any tips you can offer on the order of operations, etc.
The back sleeve seam can land anywhere from just below the side back seam to the shoulder seam. It varies based on the figure and actual shaping of the sleeve pieces. You will still see a slight dropped shoulder in the earlier 1870s but it was quickly fading up to the shoulder. I wouldn’t make it too far off the shoulder. Many Truly Victorian patterns for the 1870s have too long of a shoulder seam.
(For more specific fitting tips on your personal project I can gladly help out in my online Bustle Day Dress Class.)
Hi Jennifer, I have a jacket I am altering and it has tucks in the shoulder cap but wanting to smooth it out to take the bulk away and it is a heavy fabric. How can I do that and not lose the movement in the sleeve when it will be worn?
The movement does not come from the sleeve head (think large 1890s sleeves); it comes from how the under part of the armhole fits the body. You can rip off the top part and trim down to take out some of the cap but keep the bottom half in place. Here’s another post that covers movement in tight sleeves.
Thanks Jennifer. I also had to reduce the armscye to make it easier to raise my arms when dancing. I added material to the underarm area, and used darts on the cap as you did.
Isolating the arm from the body is key for movement. I talk about that in my BFF post here:
I have a RTW sweater that is beautiful but has LOTS of gathered knit at the top of the sleeve cap (at the shoulder). I think it was an ’80s kind of big-shoulder design. The wool is in great shape and I love the color so my heart’s desire is to alter it and bring it into the 20-teens. I measured, laying flat and unstretched, and there is a 7.5 inch (WOW!) difference. I want the sleeve cap to be flat, not puffy and there’s too much to ease in. Oh, woe is me! Do you have any advice for me?
Sorry, I can’t help you much as I don’t have experience with knitted items. Perhaps sew darts into the shoulder area?? Good luck in working with it.
Thank you so much Jennifer!! I was having serious trouble trying to fit the sleeve of my 1845 dress into the armscye of the bodice. Now I can’t wait to use your technique. Thank you again!!! 😀
Thank you Jennifer, I will use this information for my next project.
Thank you for this article and video. I have a few questions.
Regarding your 3rd method, will sewing a dart all the way done to the hem make the sleeve look like a 2-piece sleeve and may not be aesthetically pleasing?
How much ease to add at the side seam of the sleeves per 1-inch of dart at the cap sewn all the way to the hem in #3? Will this alter the sleeve style to be more straight than tapered?
Can one who drafts sleeves add this dart in #3 in the design itself? For someone with a large bicep and 3-in bicep ease, I have found that drafting a sleeve cap ends up with about 3-4″ ease at the cap.
Thank you for your time.
Oh! No, that dart from top to bottom is only done on the pattern. You fold up your pattern and smooth it out then cut your fabric. The sleeve does not have a dart there – which you are right would look bad.
Not sure about your 2nd question on adding ease to the side seams to accommodate the dart take up at the cap. Why would you dart up the pattern to remove the excess only to add it back in at the side seams? That’s confusing to me.
Yes, you can add cap width by slashing the pattern into small darts at the top (the reverse of the video demo). And in my experience with Victorian sleeves, 3 inches is a huge amount of ease for around the bicep. My own are usually 1 to 2″ and I also have a larger upper arm measurement.
Thank you so much for this! I am posting a link on my blog as well…I wish I would have seen this when I was up to all hours the night before the “big event” trying to fit way too much sleeve cap into a much smaller arm opening.
Great video.
Perfect timing, I have a sleeve mock-up I just set and its way to puffy on top… i was looking through my books to see how to fix the issue but couldnt really find any helpful information. I was looking through my email and there was your post on sleeves!! Thank you so much!! I just watched the tutorial and will use your suggestions tonight!
¡Genial! Gracias.
Love it love it! I have been sewing for 40 years, and this wonder woman teaches me something new every time I see her!
Why, thank you Nancy! Glad to hear you are enjoying the posts. 🙂
Once again, thank you, thank you, Jennifer.
Thank you, Jennifer. I’m going to try that next time I do sleeves. I usually end up trying to alter the sleeve itself, but will try and remember to do it in my pattern first.
Thank you Jennifer, that was a real help.
I love the video tutorials!