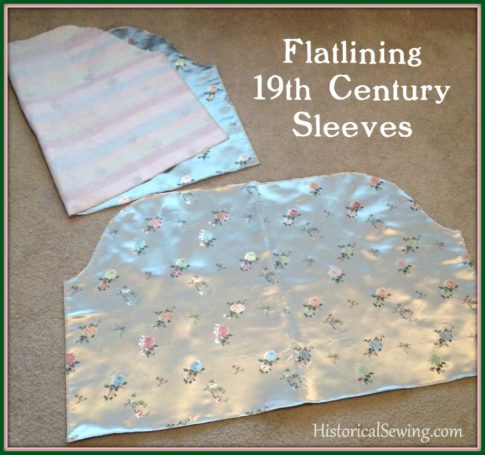
Flatlining – or the process of mounting an underlining to a fashion fabric – is a hallmark of garment construction in the 19th century. You find it everywhere in all decades of this era – in bodices, skirts, collars, reticules… and also sleeves.
Essentially, flatlining in these antique pieces is what we’d call putting in a lining today. Although, with flatlining, the underlining fabric and fashion fabric are treated as one piece throughout construction versus the lining fabric sewn in at the end.
You’ve probably read about how to flatline bodices and my post on flatlining skirts, now let’s take a look at this process with sleeves.
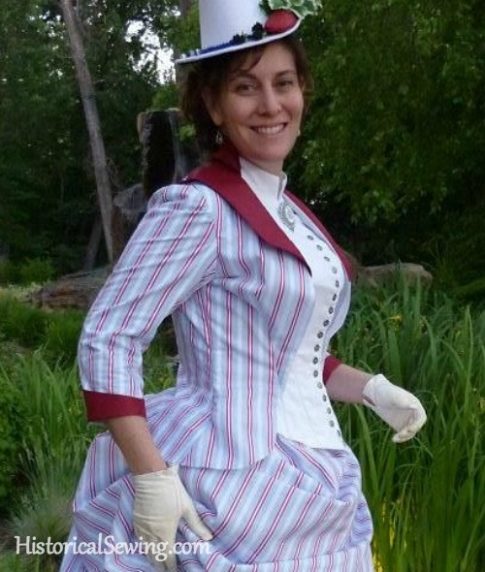
Sleeves in the 1800s vary quite a bit in shape and fit – from form fitting to huge & puffy, and sheer to covered with trim. Each one demands a flatlining treatment (or not) to work with the silhouette you’re creating. The underlining is there to support the fashion fabric you are working with.
Most of the time, except for the sheerest sleeves and blouses, you’ll want to flatline.
If you have a sheer, primarily fitted, sleeve – either short for Regency dress or long for 1880s dinner wear – keep to that one layer of fashion fabric.
Or another option for those sleeves that don’t need to be fully flatlined is to sew in a generic straight, short sleeve inside the armhole to reduce the wear that naturally happens under the armpits and even around the armhole seam itself. You see this undersleeve often on sheer bodices throughout the Victorian Era.
Fabrics for Sleeve Underlinings
At times you may have a fashion fabric that is sturdy on its own accord to provide the puff or fit desired. Silk taffeta comes to mind. That material can hold up a beautiful puff with no underlining!
Although, it’s good habit to flatline even that stiff silk.
As mentioned in my other posts on flatlining, here are several fabrics you can also use as underlining for a 19th century sleeve.
Remember to keep them light! (Bad habit of beginner historical dressmakers, you know.)
Your main structure is in your bodice and skirts, not so much the sleeve as you need to still move and bend your arm.
Silk Organza – beautiful for light but firm support of silk and cotton fashion fabrics; works well for sheer sleeve fabric where structure is needed; use for light cottons to silk taffeta.
Tissue Silk Taffeta (also China/Habotai Silk) – if you really want silk in your sleeves you can use a lovely tissue taffeta or thin silk (No polyesters!) for flatlining sleeves that need only a little support from an underlining.
Cotton Batiste – a light cotton perfect for lightweight fashion fabrics in silk and cotton. Possible option for underlining tropical weight wools.
Batiste is commonly sold today as a poly/cotton blend. While I don’t recommend using polyester for inner construction of historical garments (because: not accurate and HOT/un-breathable) this is one area you could use it simply for budget issues and if you really can’t find appropriate 100% cotton in your price range. The poly content may also help you slip the sleeve over your arm and chemise sleeve.
(Avoid using cotton voile as an underlining as it’s too soft for support. Use batiste instead.)
Cotton Organdy – a starched even weave cotton that comes in soft and stiff finishes; finish may be permanent or wash out after a few washings – check when you purchase and/or test before sewing. Simply lovely for silks, cottons and wool.
Cotton Sateen – only the light hand variety will do; be aware if it’s a “bottom weight” sateen; good for underlining both cottons and silks (and wool too) when firm structure is needed; also helps you slide your arm into the sleeve.
Polished Cotton – a period correct underlining fabric; it is firmly woven and carries some body and weight. Use with firmly woven fashion fabric that needs little drape. Good for mid-century sleeves from the 1840s to 1880s. Our polished cottons today are much heavier than what our ancestors used, so keep that in mind when using.
(Check out the Resources page for fabric vendors.)
Quilting/Kona Cotton – your basic, even weave, 100% cotton; when you need good, but not too stiff, support under all fabrics depending on sleeve style.
Quilting cottons can be heavy or super soft with some drape, the latter is generally more expensive. Be cautious of this and how a particular cotton drapes with your sleeve fashion fabric. I generally don’t use quilting cotton for sleeves as it’s simply too thick and heavy.
Plain Muslin/Calico – other basic cotton on a budget; stay with thinner or lighter weights for flatlining sleeves.
Linen – use tightly woven and lightweight stuff for cotton or wool or other linen fashion fabrics (although I generally use cotton to flatline linen). Pre-wash linen a couple of times to take out sizing and shrink it down as it tends to stretch over time and wearing.
How this list for sleeve underlining fabrics differs from those recommended for bodices and skirts is that there is no twill or denim or poplin or other heavier fabrics listed. This is because you probably still want to bend your elbow while wearing your bodice. 😉
Can You Skip Flatlining Sleeves?
Yes. Do so in sheer sleeves when you truly want the arm visible or it’s for extreme hot weather. Sheer or thin puff sleeves in the Regency generally don’t need an underlining. Super full 1890s sleeves in silk taffeta or organdy might not need to be underlined either.
How to Flatline Sleeves for Specific Eras
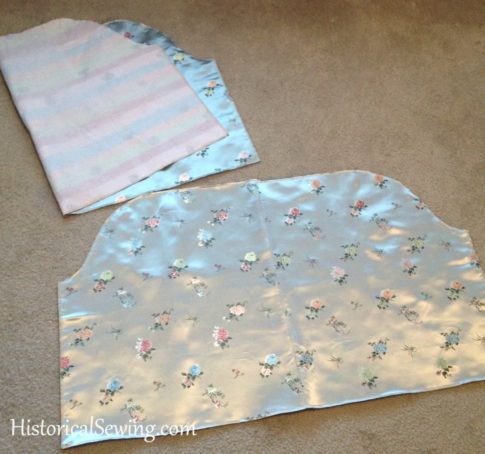
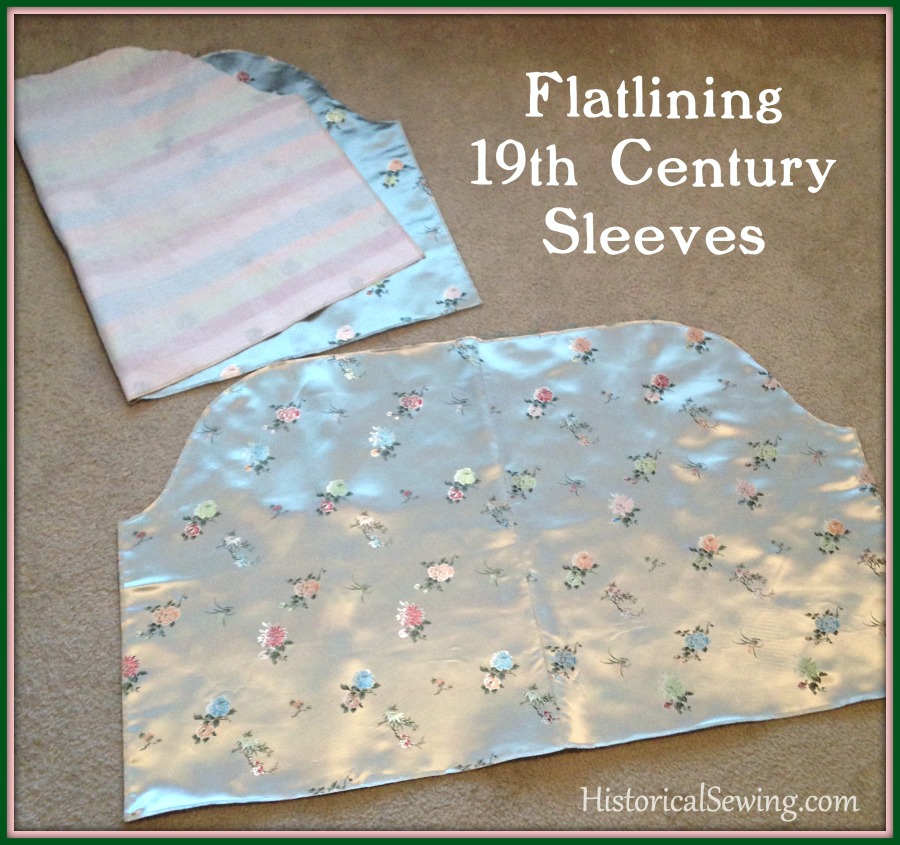
The process of flatlining involves cutting both the fashion fabric and underlining fabric from the same pattern piece(s). Then you lay them together, wrong sides together, and baste the raw edges.
Run your machine basting down the underarm seam from top/underarm to bottom wrist/hem edge to stay with the grain.
If the sleeve head is full then baste just inside the seam line on the allowance part. Otherwise, you can pin the layers together and use the gathering stitches to hold them together for construction.
Baste the hem edges of large open sleeves like pagoda or bell shapes. You only need to baste the wrist edge of more fitted sleeves if your fabrics slip on one another or you are not comfortable with merely pinning the layers until the hem is finished.
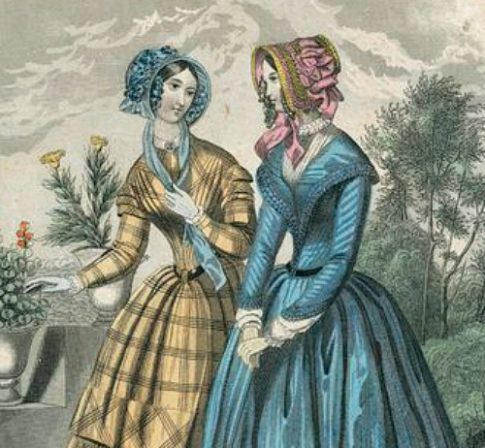
If a tight sleeve, such as from the 1840s, is cut on the bias then the underlining fabric needs to be cut on the bias too so the fabrics can move together and fit snugly around the arm.
However, if you are merely using a bias cut of a fashion fabric for design purposes and not movement, cut the underlining on the straight of grain to support the bias fashion fabric.
If you have an upper puff cut on the bias, you can mount it to a fitted stay cut on the grain. The upper puff only needs to be flatlined if the puff cannot retain the shape on its own. Then flatline the puff first before mounting to the stay or undersleeve portion. The stay doesn’t need to be flatlined.
A full-length undersleeve should be flatlined, even if a puff is mounted to the upper portion.
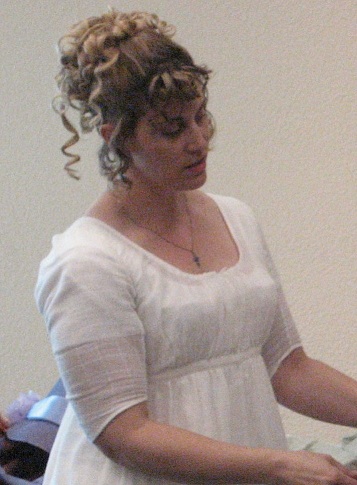
1800s & 1810s Regency Era – simple cotton day dresses with either short or long sleeves don’t generally need to be underlined, nor do evening sleeves. In silk day dresses with long sleeves the underlining is optional. A top half flatlined sleeve is another option.
Outer garments like a spencer or pelisse require an underlining in cotton or linen and especially if they are made in silk.
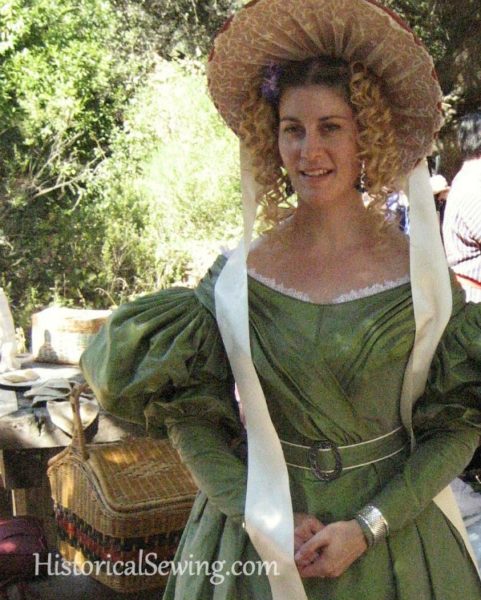
1820s & 1839s Romantic Era – with the fashion changing to larger puffed sleeves it is smart to flatline them to hold their shape. As mentioned, silk taffeta can stand on its own, but mounting to a nice organdy or organza will really help hold the beautiful silhouette.
The lovely double sleeves of the 1820s with the short puff and covered by a long, sheer leg o’ mutton sleeve only requires flatlining of the small puff.
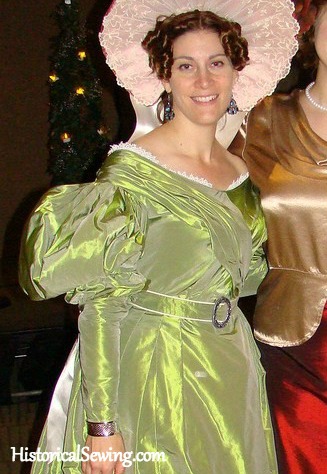
Early on in my historical sewing and as I was learning more about fabrics I flatlined my huge 1830 beret sleeve in stiff organdy…. You know, because I wanted the HUGE puff to stand out.
Well, with the silk taffeta and organdy it was impossible to gather the sleeve head small enough to fit into the armhole. I ended up having to pleat it to fit. Turned out beautifully! But it wasn’t my first plan as I wanted gathers. Underlining choices can hugely affect how a sleeve drapes and fits and turns out.
1840s to Early 1850s Early Victorian Era – these tight sleeves are frequently cut on the bias (to fit tightly around the arm) and need a solid, but light, underlining fabric to support the stretch over the arm.
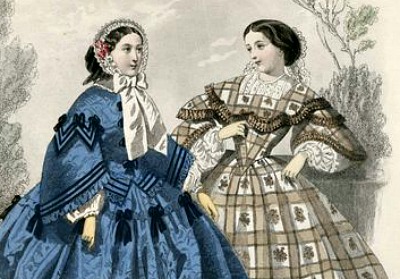
Mid-1850s & 1860s Mid-Victorian Era – Sleeves cut wide in a bell or pagoda shape can be flatlined or left plain with a wide hem facing of 2” to 3” to support the lower hem edge and any trims. More fitted two-piece coat sleeves need a simple underlining.
Bishop sleeves gathered into a cuff do not need to be flatlined as their shape is soft and flowing.
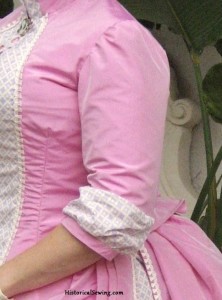
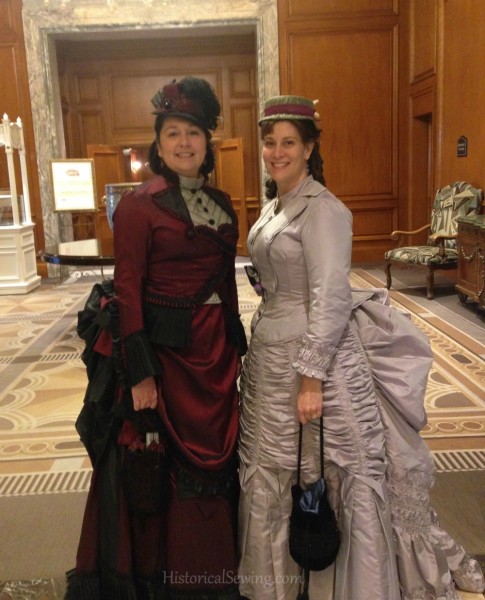
1870s & 1880s Bustle Era – yes, flatline the sleeves – both long fitted sleeves and short puff ones. A few examples of late 1880s dinner gown sleeves are merely long, tight fitting ones cut from sheer net or fabric. Underline with organza or leave one layer.
1890s Late Victorian – yes, also flatline these sleeves. Those puffs NEED underlining support. But keep it light. Use netting, organza or organdy for lovely silhouette shaping.
Shirtwaists in cotton or linen do not need to be flatlined.
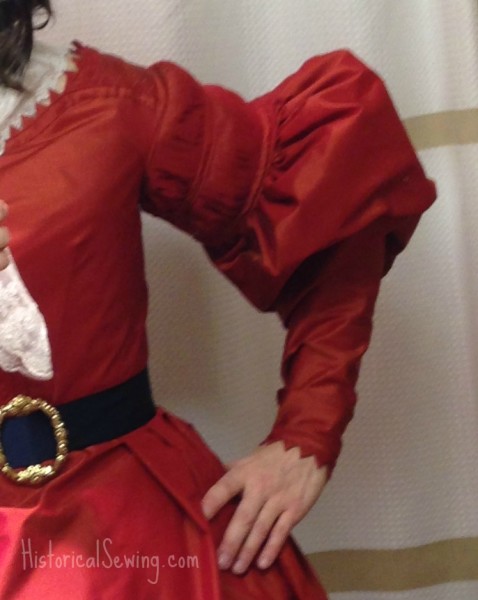
And then I learned that you can’t simply flatline a 1890s huge puff sleeve and have it keep its silhouette. Especially if you are using a slippery silk satin brocade. Oy!
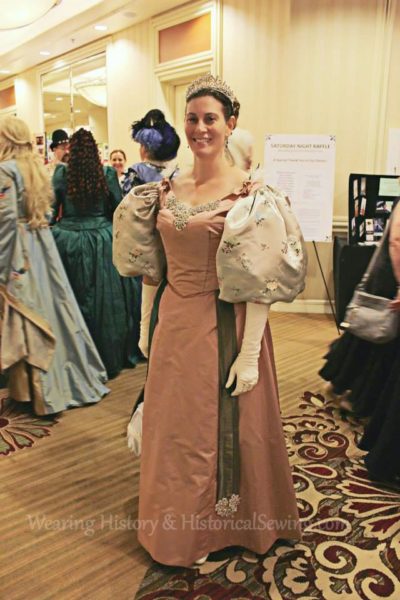
So…. My 1895 Strawberry Garden dress has these enormous puffs made from Truly Victorian TV495. I flatlined the brocade to stiff organdy then gathered the top and bottom to fit a cotton stay that was snug around my upper arm. The organdy scrunched up inside the brocade and the brocade slipped around all over it on the outside, sagging quite disappointedly.
I’ve yet to fix it as there’s so much fabric and the brocade frays like crazy. I need to tack the organdy to the silk – probably small hand tacks hidden within the flowers – to keep the two layers together.
Keep this in mind when flatlining a huge puffed sleeve – the two layers need to be held together in the middle somehow.
Best of luck with all your sleeve construction!
Do you consider flatlining your 19th century sleeves when sewing? Have a fun story about a project where you discovered the power of flatlining (or not, as the case may be)? Share with us!

On the male side of things in the late (1880-1890) Victorian period, what about frockcoat sleeves. laughing Moon (109) has pattern pieces and specs for actually interfacing sleeves. Never heard of such a thing!
I could see a muslin or light dupioni interlining, but their call for full IF (let alone fusible!) seems as if it would cause creases instead of drape.
Even a short sleeved muslin interlining at the cap makes sense.
??
Tailored jacket sleeves are fullly interfaced and lined. The interfacing historically is horsehair, but there are modern wool (faux and real) interfacings that are purposely for tailoring. One must be careful with fusible interfacing, and I don’t particularly recommend it for historical fashions. Sew-in is the way to go! But a frockcoat shouldn’t have sleeves that “drape.” They need to be shaped and the inner layers help with that.
This was so useful and I’m shocked that, despite having read your articles on flatlining bodices and skirts, I’d managed to bypass this one until it was posted by someone on the Historical Pattern Review page on Facebook. I wish I’d read it before I made my 1890s ballgown, as I foolishly decided to skip flatlining on the grounds that I didn’t want TOO stiff and exaggerated a silhouette… ha ha!
I’ve now gone back and amended my mistake.
I notice one thing that makes me curious: in the picture of the Regency dress, there clearly is something underneath the sheer sleeve of dress itself. Is that the sleeve of the chemise? I’d prefer the look without that sleeve showing, but I suppose that’s how people’s dresses looked then.
That is indeed my chemise sleeve visible under the sheer white windowpane fabric of the Regency dress. The dress itself is fully un-lined – no underlining fabric at all even on the bodice.
(And don’t worry, this sleeve article is much newer than the bodice and skirt flatlining posts. You didn’t bypass it – I hadn’t published it yet! 😉 )
What does “If you have an upper puff cut on the bias, you can mount it to a fitted stay cut on the grain” mean? Particularly, ‘the fitted stay cut’ . I’m not familiar with that, I think.
The fitted stay is like a short sleeve that basically goes around your upper arm and is the cap length you want. Then you gather up the puff to fit the stay sleeve at the top and bottom, baste, and set into the armhole. You can add netting or other stuffing between the puff and stay to help hold the puff out in its shape. It’s so you don’t have your arm simple sitting inside the huge puff; it’s controlled by the stay. Hope this helps.