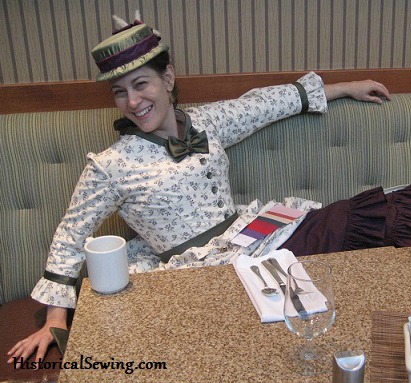
Ahh… sleeves. The bane of nearly every historical costumer. Aren’t we glad we only have two arms!
Ever work yourself into a frenzy just trying to get your sleeves right so you can at least *move* in your costume? Yep. It’s the challenge for most of us. Over and over with each bodice….
Well, after years of sewing sleeves (we’re talking nearly 30 here) and a few years of teaching about sleeve fitting, I’ve picked up a secret or two on making them not only look good but also sit right into your bodice where you can actually move. Come discover a tip or two on fitting that will allow you to eat and dance comfortably. 🙂
Years ago a costuming mentor (the brilliant Mela Hoyt-Heydon) was speaking to a class at Costume College about costumes for the stage and film. Someone asked about the actors moving in such restricted garments. To which she replied (paraphrased): I don’t care what time period you are doing. I can fit anyone so they have full range of arm movement.
Those words stunned me.
As in… to this day they still affect me. And they challenge me to make my fitting better.
Because seriously, people living everyday lives had to move in their clothes. I’m not talking about court wear or special pieces where the elite were dressed to simply stand for the portrait.
No, it’s the folks like you and me who got up each day and dressed in the clothes (aka the costume) they would need based on that day’s activities. They ate, walked, visited, shopped, used the bathroom, wrote letters, and went to bed.
My side question here is: why do so many modern people think our Victorian ancestors couldn’t move in their clothes?? But that’s for another lively discussion….
But also – this is the question that lingered in my own mind when Mela made her simple statement in that class so many years ago.
From that point on I have been working out just HOW to make a bodice and sleeve fit so as to have freedom of movement and not rip a seam or cause the bodice to pull up indelicately showing undergarments.
Now, in all honesty, I’m still working on this. Sometimes my bodice fitting comes out as if magic happened, like on my 1875 Scotch & Soda bodice. Other times, I’m still fighting with lifting my arms enough to perform tasks.
Even when I think I have the most beautifully fitted, perfect bodice & sleeve pattern, the garment ends up too tight or too loose or just… I can’t bloody move in it!! That’s because, I think, bodies change and we mentally change with just a breeze. Two months from now that bodice pattern may be too small or that I simply *think* it fits small.
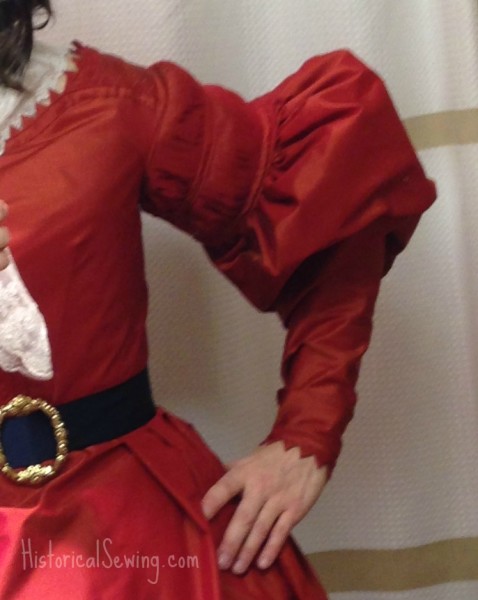
So despite the physical and mental changes that will occur, how can we, today, improve our fitting techniques so the garment fits us right 80% of the time? Let’s take a look at the points that make a difference with how we move in a bodice.
(You may have noticed I have mentioned bodice fitting more than how a sleeve fits because sleeve fit and movement in the sleeve starts with the bodice. Oh, yes – BFFs right here!)
There’s an intimate relationship between the bodice and the sleeve. Like, very close. They touch and connect together and move together. Ooh la la….
Our main fitting secret to learn is how to isolate the arm from the bodice and place the seams in such a way as to do that.
“But Jen! You just said there’s an intimate relationship between bodice and sleeve. How does isolating the arm allow for movement??”
Well… think about how you move your arm. It can move while the torso stays in place. Sure, the skin and muscles move, but you can stand still and shake your arm. If you fit the bodice close enough around the arm and allow enough fabric to cover the body when you move, you shouldn’t be restricted by moving.
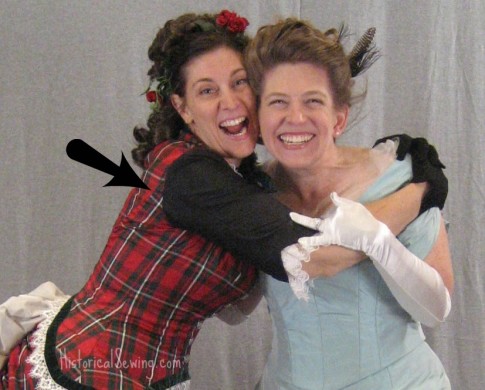
Points to ponder on fitting your bodice to isolate the arm:
- Lengthen the side of your bodice high up under the armpit. Don’t over-do it and pinch yourself. But allow about 1/2″ space between bodice armhole seam and the high point under your arm when it’s hanging by your side.
This is the first step to isolate the arm. By allowing enough length to the bodice side, when you lift your arm your bodice will stay in place (or only move up a minimal amount – again, this takes practice and every project will be different.)
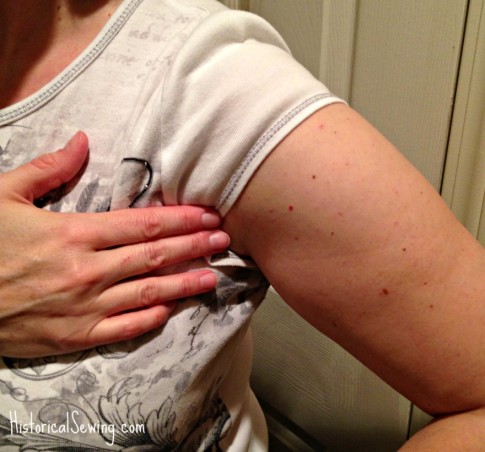
- Second point in fitting for movement is to know where the crook of your arm is. It’s that point where your arm attaches to your torso, a few inches up from the armpit point where the skin & muscle starts to move away from the body. You want your bodice armhole to be snug (isolation) under the arm from front crook point to back crook point.
- A final point to consider for movement fitting is: do you have enough fabric in your sleeve cap at the sides and under the arm to match up with the bodice and allow an arm to move without moving the bodice?
The main place that this makes a difference is at the crook point of the arm. Many times there’s not enough sleeve fabric (length in cap) to cover the underarm when the arm is lifted. When your arm is up, there must be enough fabric to cover your body and the arm so the bodice and sleeve don’t go to war with each other. One will “borrow” fabric from the other to cover the body as it moves.
Think about the placement of your armhole seam to isolate the arm so the sleeve fabric covers the part of the arm it needs to cover, and the bodice covers what it needs to remain in place. This is about where your armhole seam needs to be.
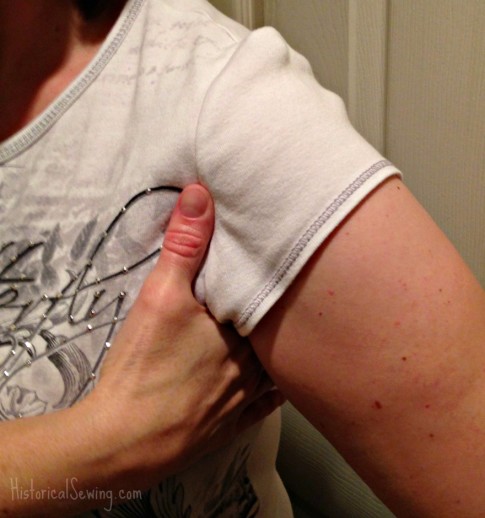
Get some exercise:
Try moving around and lifting your arm while keeping your modern bodice/top in place under your arm and at the front of the chest.
Cup your armpit with your opposite hand – that’s the critical place to put the armhole seam.
Feel on the front where the muscle starts to go away from the body into the arm, a few inches up from the armpit – that’s your crook. Everyone’s crook is different.
Fit to YOUR figure and your crook point and you’ll be able to move in the Victorian bodices that you make. 🙂
Have you any experience with fitting where you isolate the arm for movement? Share a good (or bad) experience you’ve had with too short bodice or too large an armhole.
For more on sleeves you might like:
How to deal with too much width in your sleeve cap

Daughter needed a woven (brocade) jacket to ice skate in. We’re talking jumps here. The higher the arms – the better the jump. Sure wish I had this article then. I did find info on the flamingo dress arm alterations, adding gussets, which helped expand my abilities. Final outcome – good enough for one show but will probably go back in to incorporate a band of 4-way stretch ‘color accent’ around the bodice arm opening.
Thank you for writing this article! I inadvertently ended up with the kind of armscye and sleeve shaping you talk about here on a modern basic bodice (though it’s eventually going to be the base for historic patterns too!) and kind of thought I was going crazy because it sure makes for odd-looking pattern pieces, but it works so well. It’s reassuring to hear that someone else has worked out the same thing and that it works for you! 🙂 (And for anyone else who might come across this, I guess this is confirmation that yes, you would also be able to do this on modern clothes…)
I have made my own modern clothes since I was a young teen (over 30 years). After doing so many Victorian bodices, I now do a lot of armhole alterations on those modern patterns for a better fit. It works nicely!
Thank you! This article helped me so much 🙂 I was struggling with my Victorian Bodice and I just had a Eureka! Moment after reading this 🙂
Yay! So excited for you. 🙂
A couple of years ago, in my own quest for sleeves that let you move, I thought about Flamenco dresses. If you’re not familiar with that dance style, it is a Spanish/gypsy dance that traditionally has the women in very fitted dresses – but they very often have both hands far over their head. So I thought that they must have solved the problem. And I did indeed find a very helpful web article.
The gist of it is this: You don’t want to raise the armhole way up, since that’s where you sweat. So to make up for it, you have to change the sleeve shape. You end up with more material underneath the armpit than we’re used to, but the full movement range totally makes up for it in my opinion.
Check out her article – there are very helpful diagrams showing how to change a normal pattern into one that lets you move…
For my junior prom, my mother made me a lovely dress of pink duppioni– fitted bodice, short straight sleeves, and a very full calf-length skirt. She spent many hours on the bodice mock-up, with many fitting sessions, but when prom-day came, she didn’t have to worry about me putting my arms around a dance-partner’s neck—because I couldn’t lift my arms hardly at all! We realized too late that thru all those fittings, we were thinking in terms of knit dance leotards (which she also had been making), not woven dresses, and had fit all the ease out of the pattern!
My copper satin civil war ball gown is just lovely to look at. But it feels like a straight jacket. Doing the”arch” in the Virginia Reel is just about impossible, especially with a tallish dance partner.
Want to remake the bodice. Have any suggestions for a front closure ball gown bodice? Need to wear this for a play. The lacing in and out of the top will be too time consuming . I have the Past Patterns ballgown pattern .
You’ll see loads of front closure evening gowns by the late 1860s/early 1870s. Research those years and adapt the (usual) button front closure for your gown.
Brilliant! This is *exactly* the tip I needed for fitting sleeves, and, as usual, you make it all so simple!
Do you not add gussets? I often use two piece gussets, with each half cut as one piece with the sleeve.
No, I don’t use underarm gussets in any of my bodices for 19th century. I’ve only put them in chemises for 18th C. & Regency.
Thank you so much!! It’s as if you read my mind. This is exactly what I’ve been struggling with. Thank you!! . 🙂
Thank you for the great advice on armhole seams! I was just struggling with that on a colonial ball gown (due to fluctuations in weight gain & loss), how to get a flattering fit yet still move my arms without popping my bodice. Can you post some more “inside views” of sewing construction details – how to get the inside right so it looks great on the outside? Thanks, Liz