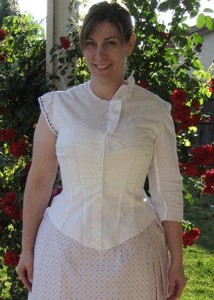
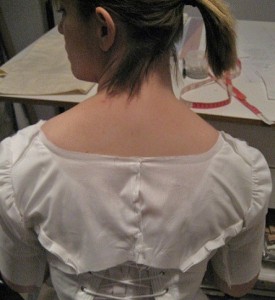
My arms were growing tired as they twisted up and over my shoulder. I was trying to pin in a new shoulder seam with the bodice front & back sections draped over my shoulder. It’s not easy, though, when that shoulder seam angles from the neckline down to the back of the arm. Sheesh!
Of course, 60 + years of fashion in the 1800s have a shoulder seam angling that way.
Didn’t they know that I would want to make clothing like theirs over 150 years later and I wouldn’t have a personal maid, or assistant or private tailor? I don’t even have a sister to help out. It would have been nice of them to put that seam on the TOP of the shoulder.
So what’s a girl to do if she has to figure out how to get it done by herself? Here are some tools and tips for fine fitting sessions when making historical clothing.
TOOLS YOU NEED FOR FITTING A MOCKUP
Straight Pins – they can be plain or have ball heads. Sometimes the shorter 1″ size is perfect for securing a tiny pinch of fabric
Pencil – I use a strong, hardwood pencil and make most of my marks with it.
Colored Pens – Ball point works best. After you’ve finalized your markings for where to take in a seam, add a dart or place your buttons, use a colored pen in blue, green, purple, pink or red to define those marks. I like to color coordinate so my blue lines are those I make while fitting, then after I take the mockup off, I make the lines red so I know where exactly I need to transfer to my paper pattern.
Seam Guage or Small Ruler – if you pinch up a section that’s a bit too hard to get a pin into, hold the pinch and measure half of it and mark the center fold. Release the pinch and make a note on the mockup or on notepaper of your measurement. A seam guage also helps if you need to adjust a center line equally or if you need to make a mark on both left and right sides.
Time – not really a tool but something you need nonetheless. Fitting ALWAYS take longer than expected.
TIPS FOR MAKING YOUR MOCKUP & FITTING YOURSELF
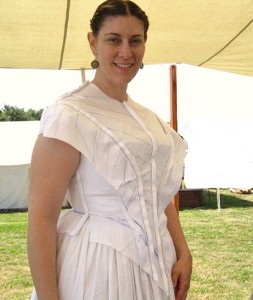
*Draw in the grainline on your fabric. So important! Even if you only draw in the center front and center back lines. The way a garment hangs on the body starts with an accurate grainline placement.
When putting a bodice mockup on, pin the center front (or back) closed then anchor it to your corset or foundation garments. As you go through the fitting, come back to that center line to make sure it’s still in place.
*Honestly, for 99% of my mockups for 19th C. costumes I use a sturdy cotton muslin or twill (depending on my fashion fabric). If I have a thick silk I’ll still use the heavier cottons to fit. Call me lazy or whatever. (I’m also the Cotton Girl and gravitate toward using it at any time.)
If you have issues with grainlines, try using a cotton stripe fabric for your mockup. You’ll really notice if your skirt is off-kilter.
*Don’t pin too tightly! But don’t pin too loose either. Make the fabric lay naturally around the body. If you need to adjust with historical ease and/or thick fabrics & underlinings, tweak your pattern later.
*Mark dart legs from your pattern but leave them unsewn or just pin them together. During the fitting work with them until they are in the right place for your body curves. Remember to place the bust dart point about 1″ from the bust apex.
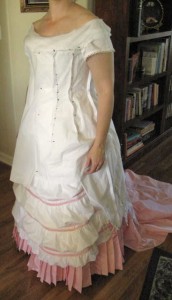
*Use a mirror. When you’re all trussed up in your chemise, corset and petticoats, it’s HARD to see what you’re doing with that bodice side seam!
Learn to be comfortable in front of the mirror and use it to your advantage. I will look in the mirror to pin and then mark adjustments. It can take a bit to learn how to operate a pencil this way. Believe me, my lines go all over the place in hard to reach areas AND while doing it from the mirror’s perspective.
For another view, take pictures of what you’re doing. Sometimes a still picture will bring out that pinch you need to make or move the seam a little farther to the back.
*A marvelous tip I discovered for fitting yourself came from Jenny LaFleur at Costume College 2011. She puts in a separating zipper in the back (or front) opening of her bodices, making it easy to fasten up a mockup for fitting. So easy even your husband can help out and not ruin it or get the opening pinned crooked! This is so brilliant and easy it’s a “why didn’t I think of that and save my grief all these years.”
*Have note paper handy. You can see that shoulder seam needs to be pinched up at the shoulder point but you can’t quite reach to pin or mark it. Write it down NOW on your paper.
In fact, as I’m going over my mockup, I’ll even write down all the alterations I need to make so they won’t be missed. When I’m looking in the mirror they are fresh in my mind. I won’t remember two days later when I pull out the paper pattern.
I make notes like “the hemline needs to follow the blue line then taper to the pencil line about ¾” from center front,” “straighten outside dart legs,” and “see mark for top button placement.” Detailed notes help immensely.
*And finally, fit your bodice and mark the armhole seamline first before fitting your sleeve. Trying to fit a poorly designed sleeve into an unfitted bodice is just asking for the migraine medicine.
As you move in your sleeveless bodice mockup you’ll notice bunching occurring around the armhole at the front of the shoulder to the armpit/side seam. Take note of this and mark where the bunching stops. This is your seamline.
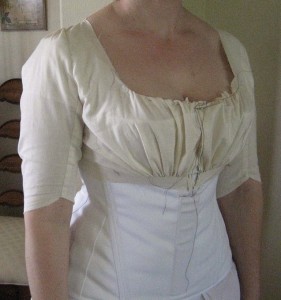
As you become more experienced with fitting yourself, you’ll begin to take notice of those areas you are always working on (fighting?). Celebrate that unique part of you. Learn to love it and embrace it – ’cause you can’t really change it.
Once I accepted my forward rolled and sloping shoulders my sewing became fun again. I simply kept working until the bodice fit me then applied the same methods to future bodices. (That back length adjustment still isn’t fixed yet!)
Keep working. Keep challenging yourself to achieve the best fit you can with your current skills. Hey! Once you learn what works and doesn’t work for you, you’ve increased your wisdom and set yourself on a new level.
Fitting takes time to learn.. and won’t ever be perfect. Accept that and you’ll be a master at the costuming craft.
Do you have a special fitting trick you’ve learned while sewing historical costumes? Please share your experience in the comment section below.

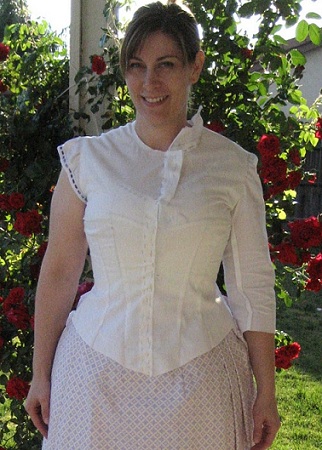
If this is your hobby and not just that you are making a single dress for a single event, get a dressform! A duct tape dummy is indespensable! It still may not be perfect but for the big changes it sure makes my life easier. Then I only need to tweek it a little when I get close to the finish.
Also I always add about an extra inch to all side seams in the mock up and in the final fabric because fabrics types can give or not in so many unexpected ways. I can trim at the end if needed or it allows for future alterations. I never get smaller darn it.
Finally I always clip the round curves on the mock up the usual half or 5/8 inch of a seam allowance, like at the high neck or the arm hole so that I can see if it gives the right amount of room for movement and that the seam hits where it should.
Large seam allowances are an awesome idea! And yes, good point about clipping seam allowances around the neck and armholes to release them to the seam line.
Once again I’m reminded that I should do my front and back closure on my muslin BEFORE I do my side seams. I always end up not having enough for my closures if I do it the opposite way. I’ll be making myself a big sign to hang in my sewing room that says “MARK CLOSURES FIRST!!”.
Jennifer, you are a gem! I love your fitting tips. When I am trying to fit a bodice–always a challenge because of my body type–I keep a roll of duct tape handy. If I can’t pin a spot easily, taping it firmly in place works well until I can take off the mock-up and do the pinning or basting. Or if I need to add fabric somewhere, I can cut and spread the mock-up fabric, then tape it into correct position. Sometimes I only need a small piece of duct tape, sometimes a larger piece, depending on the adjustment I’m making.
It is and amazing thing, but your e-newsletter is always about something I’m currently sewing! The fitting tips came just in time!
Thank you!
My bodice looked a little bleh — nothing really wrong and then I thought “Wait, I think they stood up straighter than I am now” I pulled back my shoulders just a little and WOW! what a difference! pretty posture may help.
Also, I had a bodice fitted very nicely in the muslin, made it up in the fashion fabric and it was just some how not amazing even after standing up straight. Then I realized my corset was riding a bit lower. Once I moved it up a smidge (along with the bust) then — WOW!