Yeah… you’ve finally reached that point where you want to tackle a huge project. Something that challenges you. An undertaking that takes your skills to a new level.
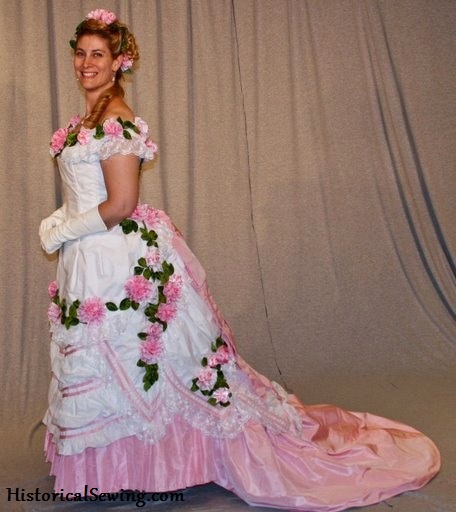
It may be a trained 1882 dinner dress; a Civil War ball gown; or an embroidered Regency dress.
But where to begin? You have a brief idea of what you want, but what are the steps to get there? You also believe you can finish this new project (which with this mindset goes a long ways to actually getting it done).
So with just an idea, a dream, how does one go forth to making it happen?
You follow the 5 Elements of course! Silhouette & Design, Patterns, Fit, Fabrics, and Construction are what make your historical costuming dreams come to life.
Please take note that all these elements except Construction can be selected in tandem with each other and at various times too. You may pick up eight yards of gorgeous fabric but don’t yet have a design for it. Or you fall in love with a newly released pattern but know you’ll want to build more trim ideas on it later.
Let these elements flow in your design realm. Keep them organic throughout the entire creative process. Build them up when needed and adjust as you go along.

Build the Silhouette
The first thing to do before starting on the dress is to build the proper historical silhouette. The right profile is key to supporting what you want to put on top of it. The silhouette is the entire foundation to the look you are going for.
Underpinnings are where it’s at! Build from the skin out.
You start with basic chemise and drawers, followed by a corset. This is for the entire 19th Century mind you. (Well… except for the drawers which came in more towards the late 1820s.)
Then decide on a support garment, if any. This includes a bustle pad, petticoats, hoops or wired bustles. If you want to make a bustle dress, then you must have something to lift all that poufy-ness in the back. (Try these specific suggestions.)
Once the silhouette is created, the work begins on the dress itself.
Plan the Design
Forming your design goes hand in hand with building the silhouette. It’s the complete, overall appearance to your finished garment.
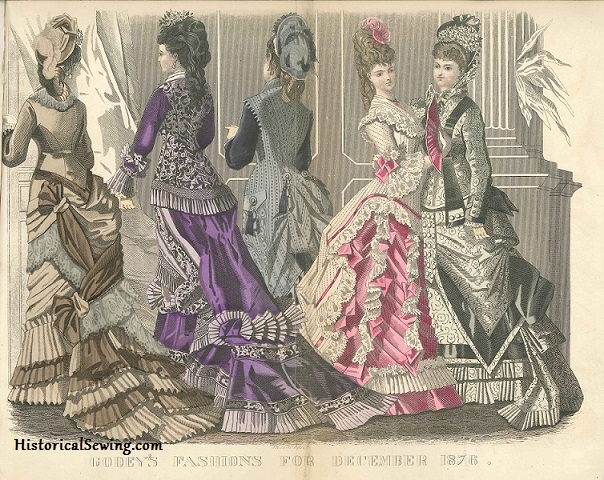
It’s helpful to sketch out what you want. Details and construction lines, colors, trims, sleeve shape, skirt length, etc. Even if you don’t have your fabric at this point, you need to have the end goal in mind. What do you WANT it to look like when it’s finished? Do you want heavy trimmings or left rather plain?
Even rough sketches will help you visually determine if one ruffle or three look better on the skirt hem. Use the black and white line drawings from patterns as a coloring book for your ideas.
Collect the Patterns and Gather Tools & Notions
Speaking of patterns, once you have your design approximately figured out you can then search for patterns to build it. Even with having a fashion degree background and years of sewing experience I love starting with basic pattern shapes then tweaking, adding and subtracting to develop the design I want.
Even if you haven’t sewn for very long, keep your design simple by selecting a pattern for a whole dress or patterns that seem fairly simple in styling. Make yours different by adding various trims. (I rave often about Truly Victorian patterns because they truly make fantastic bases to start all sorts of designs.)
Be open, too, to combining two or three patterns to build your chosen design. Nothing is stopping you from using sleeves from one pattern to sew into the bodice of another.

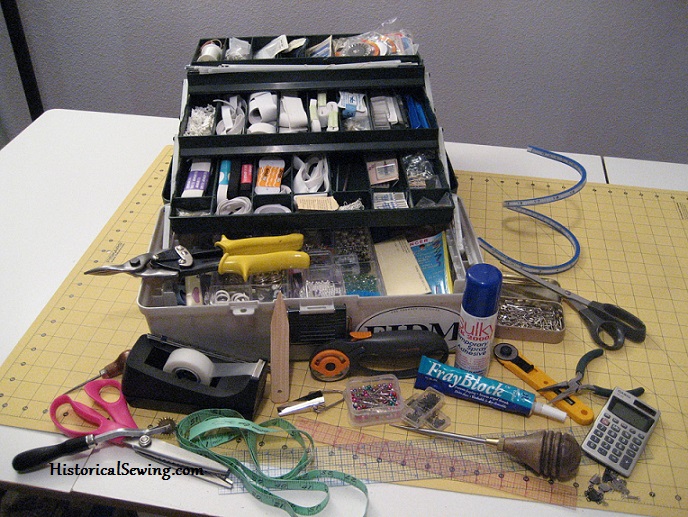
While searching for the right patterns, take stock of your sewing supplies. Do you have good paper AND fabric scissors (they are not the same!)? Have you stocked up on machine and hand needles? Remember to replace these at the start of each project.
Verify the pattern envelope for notions needed and think beyond that list as well. Will you need hooks & eyes? Or bias tape for finishing? What about boning? Do you have continuous boning on hand or will you need to order specific sizes later. Also remember to get matching thread.
Fit the Patterns
As you now start to tackle your grand design, the first thing to do is make a mockup of the patterns. Fit skirts at the waistline with darts and for hem length. Next make up the bodice (only, no sleeves) and fit that over your finished skirts. Then add the sleeves to a second mockup for more fine-tuning.
Fit is one of the most recognizable areas that distinguishes fine dressmaking from “happy hands at home” projects. Tailored (i.e. fitted) bodices and well-hung skirts exude talent and skill with thread & needle. Spend time improving yours.
Although perfecting fit of fabric to figure requires time and talent, many resources exist to guide you along the way. Here we have our popular Fitting Tips handbooks for Civil War and the Regency Era. You can also utilize books like Sarah Veblen’s The Complete Photo Guide to Perfect Fitting and Sandra Betzina’s Fast Fit.
But the best thing you can do about fit is simply to get to it!
The more you can practice fitting the better you get at it, especially when fitting yourself. For your next big project, spend the time playing with the folds of fabric until it behaves like you want it. Keep working on it until you’re happy. Big projects take time remember!
As I constantly remind myself – it won’t be perfect. But that every task makes it easier for next time, even the Big Projects done now for smaller projects later.
Select Fabrics
Ahh… another stumbling block for costumers.
Selecting fabrics too quickly or without thinking can kill your enthusiasm for your Big Project. Fabrics can also make or break an otherwise gorgeously made dress. This is a Big Project after all, so be willing to save for the best you can afford.
The first rule of historical sewing: avoid man-made fabrics – polyester, nylon, acetate, and most rayons. Using artificial textiles will
1) cause swear words you never use to come out of your mouth, and
2) look plastic, modern and cheap.
So what do you use on your Big Project? Natural fibers like silk, cotton, linen and wool. Beautiful textiles. Those our ancestors would have used.
But not all natural fabrics are the same. You’ll still find quality differences and rough & smooth weaves within these fibers. Although there are bargains to find, keep in mind you get what you pay for. Be in the know when fabric shopping and choose wisely.
For colors and prints, start researching originals. I like to use Pinterest to study a particular era and get a general feel for the textile prints, colors and drape/hand. Reviewing photos of antique garments right before I go shopping keeps ideas in mind for when combing aisles of fabrics. My new knowledge is put to use right away in an effort to select something that calls to me but also is fairly period accurate.

Onto trims…. These are a bit different only in that it’s so much easier to find rayon fringe rather than silk, poly ribbon rather than embroidered silk (and easier on the wallet!). For your garment, stick with purchased trims that blend with your design and don’t give off too modern of a look.
Delve into your design sketch to find out where you want trim and what kind.
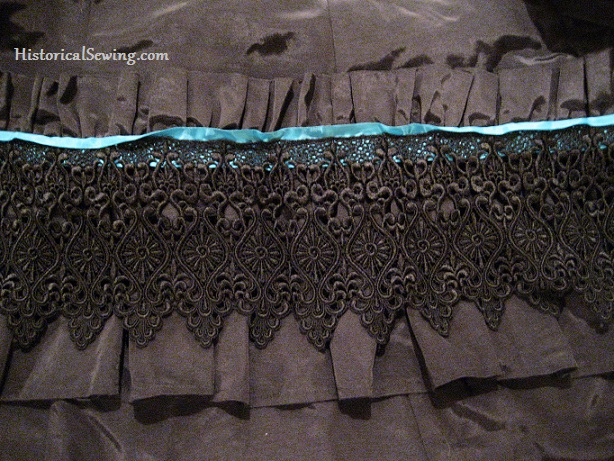
Many times detailed projects, especially mid-to-late Victorian, demand you create your own trim from the dress or other coordinating fabric. Of course, this is to be expected from Big Projects… the challenge of pleating your own silk taffeta or embroidering strips of ribbon.
Self-trims cause so many dressmakers to freak out and shove the project aside. Alas, you’ve already gotten this far so don’t let a little time to create custom trim scare you out of the project.
Sew it Up!
Finally, after all your supplies are gathered, fabrics purchased, pattern fitted and design draped, it’s time to start sewing up your grand plan. Big Projects take so much effort just to get to the point of cutting into the fashion fabric.
Many dressmakers will falter at this point because it’s time to do the actual sewing work. Perhaps your project is a good stretch for your abilities. Wonderful! Let it be a challenge to improve your skills, plan methods, and perfect your finishing techniques.
If you know you’ll need to make pleats, practice first on scraps. If working with silk thread scares you, sew a small pillow or reticule to get over that fear.
Use this time to add to your sewing knowledge. (Isn’t that what Big Projects are for??)
Research tutorials on those areas of construction you are confused about and practice. Then apply those new skills to your project. Application of a new technique will reinforce the steps in your mind and in how your hands move to produce it which improves your abilities.
Remember to start building from the ground up, just as we start from the skin out. Sew your skirts first. Fit them over your silhouette. Then continue with any aprons or overskirts followed by the bodice. Add undersleeves, collars, and belts. Finish with accessories (if you need to make them).
Schedule
A quick word about the timeline of massive historical projects – they take hours, weeks and months to plan and execute. (But this is obvious, no?) They are not something you can start a mere two weeks before the event and expect to complete with quality around other life happenings.
The key is continual work. Step by step. A little bit of progress starting months out will have a huge effect on garment completion down the road. Because of the lengthy time to finish a Big Project people drop like flies. Boredom, life events, and distractions – all kill our enthusiasm on immense plans. But keep at it!
Take a chance and be the one who completes a Big Project from time to time. I like to have one every couple of years to challenge my skills, keep established ones fresh, and to simply prove I CAN accomplish great things. Will you join me?
What big projects have you completed recently? Are you working on one now?

I’m pushing past being stuck on a very small big project right now – the most perfect Frozen dress possible for my little niece. On one hand I feel silly worrying so much about a costume for a little kid, but on the other hand I’m the perfectionist veteran of too many ballet and burlesque costumes not to go nuts over every detail, *and* I have the knowledge of my sister’s fashion degree vs. my self-taught sewing skills hanging over my head. And the materials are hell to work with – glitter spandex (so she can wear it a while, and get it on and off without help) and sparkly poly organza, with heaps of sequins and glitter that need to be placed as I put the thing together. I’m close to going mad over it, but instead I’m going to the craft store for more heavy-duty fabric glue. One thing is certain – this crazy-making little dress will sparkle!
And she will LOVE it! Keep going – you can do it K! 🙂
The best investment I’ve made to date has been my manniquin. The price for a good one put me off for a while and I did make one to start with (instructions all over the web) and it proved useful, but I couldn’t get pins into it when I needed to and eventually it collapsed. So I bit the bullet and bought a real fit-to-you dress form and I’m so glad I did. It wears one of my old corsets and is fitted exactly to the measurements of my figure. (WORD OF WARNING: You WILL need a lot of self-acceptance when you see what your figure REALLY looks like).
Now I put the appropriate undergarments on it and pin, adjust, fit and tweak my designs right on my double and my dresses look so much better.
I’m doing an 1870s day dress right now and will be starting a formal 1969 dress next. There’s 10 yards of dusty pink silk moure taffeta waiting its turn. THAT is the project that will require every single one of your instructions, Jennifer, and I’m very excited about that project. In my dream I come to Costume College in 2015 and show you what I did with it.
Good luck Diane and I’ll see you at Costume College 2015! 🙂
Ok, I’m hooked and I am now about to tackle a bustle dress. I am in the process of finishing the TV101 Bustle Petticoat. A question I have is how do you know how much to tighten the bustle tapes? Do I tighten the ties to make the bustle fit the skirt or so the skirt fits the bustle? And how do you know if it is tight enough or not?
You build the silhouette from the skin out. So adjust your bustle shape to your liking then fit your skirts over that.
I’m working on a bustle dress…except that I’m knitting it, not sewing! I’ve been working on it for almost a year, and I’m very close to finishing the skirt. It’s turning out better than I imagined! I can hardly wait to finish…I think I’m on the edge of burnout, but I will keep going!
What a gorgeous dress! And so many great tips! Planning ahead will definitely make the Big Project easier, and more fun.