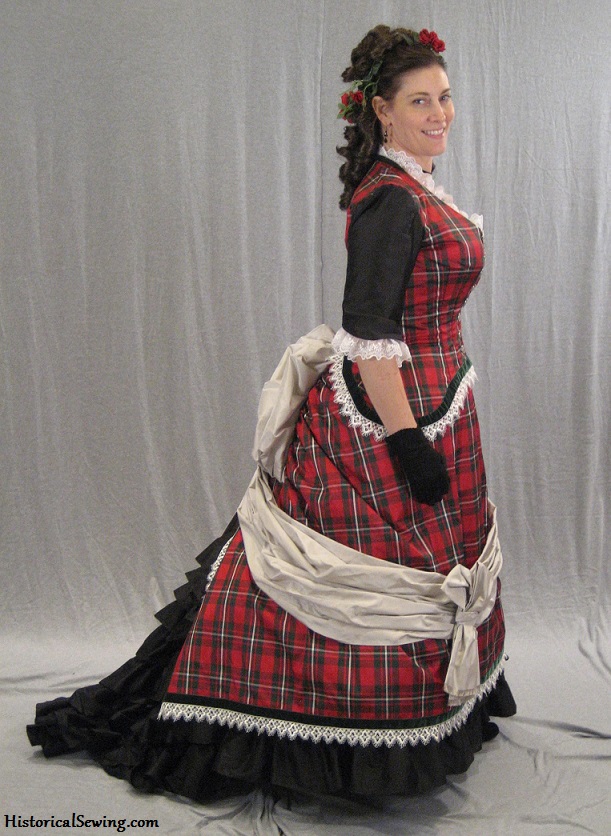
For years I’ve wanted to make a gown using my family’s tartan. But I didn’t necessarily want it in wool. So that left a silk fabric. Yeah… expensive silk. From Scotland. hehe 😀 Also, I hadn’t sewn a plaid in years (and no, I don’t mean going back to when I was 14 and made my first real ruffley dress in a lovely Black Watch plaid).
I knew this project would be a challenge. And every few years or so we NEED that challenge project to bump up our skills and refresh old ones.
Here’s how I completed mine and forced my pricey plaid to yield to the Early Bustle Era fashions.
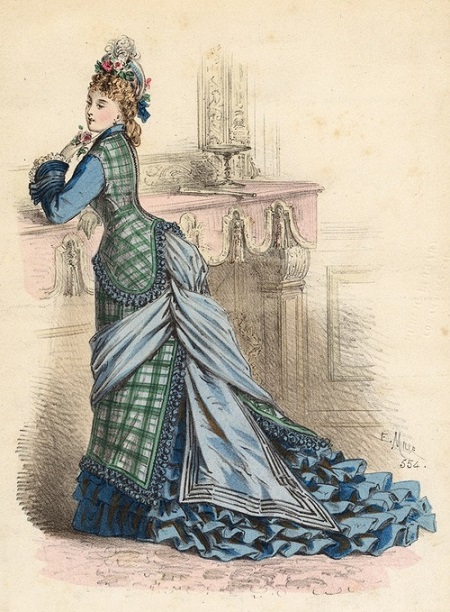
Not sure which came first – finding the silk tartan fabric or happening upon the fashion plate that I copied. I want to say the plate as I fell in love immediately and knew THAT was the design for my tartan.
The 3 oz. dupioni silk fabric was ordered from Scotweb.co.uk (which, for some reason, has hiccups in getting on their website). The tartan was woven by James Hare then shipped from Scotland (I was a happy girl that day).
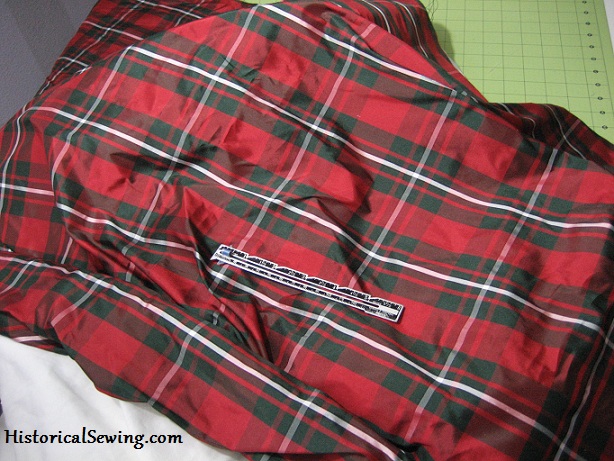
The tartan is MacGregor (modern colours) and is the tartan from my grandmother’s grandmother’s line.
Wanting to stay true to the fashion plate, I agonized over what complementary colors to use with so obvious a Christmas color scheme of plaid. (Try as I did, it *still* looks too much like Christmas!)
A shopping trip to Downtown LA produced black twill for the underskirt foundation (much to my dismay later – discovering a 3% spandex stretch woven in – ugh!) and black silk dupioni for the underskirt ruffles and sleeves. Instead of pulling out the white woven stripe from the plaid I went with a light silver color – Scotch & Soda 🙂 The ball fringe in the plate was replaced with white rayon trim headed by 1″ green velvet ribbon.
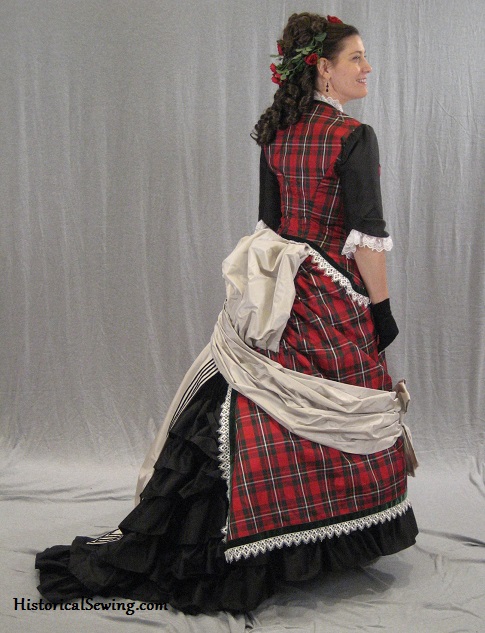
People are always asking what patterns I used for various projects. Some are easy – cut & dried from the pattern as is; others – from my own testing & trials of repeated sewing. This dress used both.
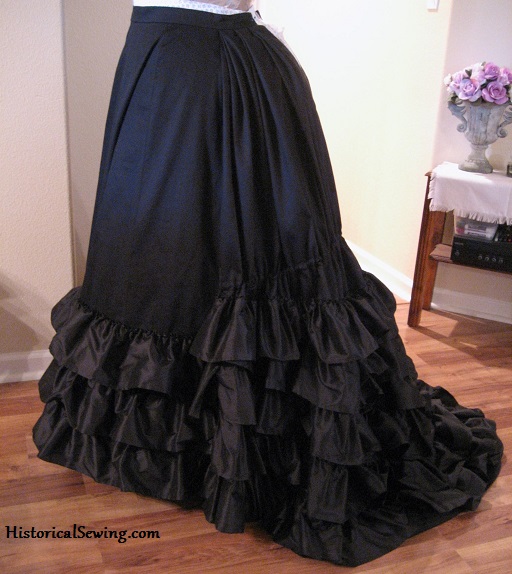
The underskirt is Truly Victorian TV208 Trained Skirt, view A cut from the twill. No changes except a casing behind the knees to pull in the width of the train for a better 1875 silhouette.
I cut enough panel strips of the silk dupioni to start with 36 yards of flat fabric when all pieced together. I then ran one row of machine gathering breaking the stitches just past each piecing seam.
I initially was going to pin and machine mount the ruffles to the skirt base. Yeah…
As I started gathering up the sections I realized such a higher quality look would be produced if I hand tacked them all on. Yes. All.33.yards. (as was the final count) The skirt including the ruffles took about 55 hours total to make.
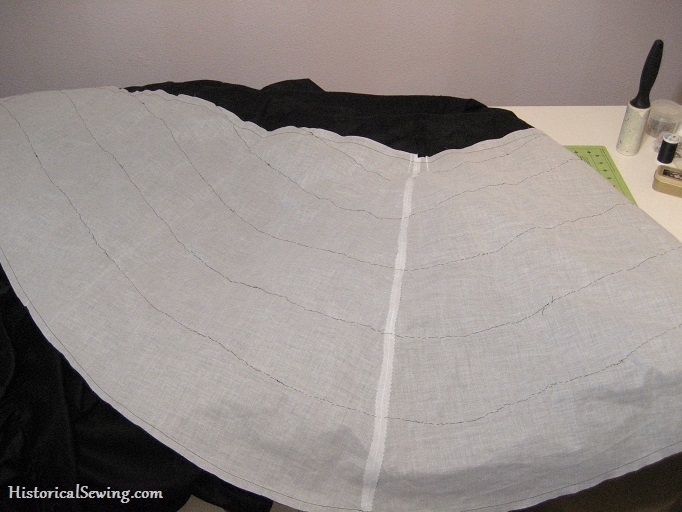
As I was setting on the ruffles I decided to fill it in full around the hem and train so I could use the skirt as a base for other mid-1870s gowns. (I see an all-black dress in my future!)
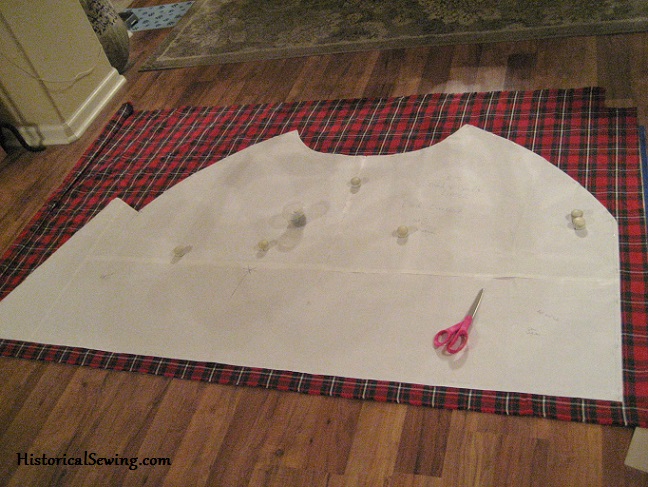
The plaid overskirt was made, about 80% exact, from the Truly Victorian TV304 1875 Square Overskirt. This overskirt shape was extremely popular in 1875-76. Even though I knew the general shape was what I wanted, the plate showed skewed back edges I wanted to duplicate.
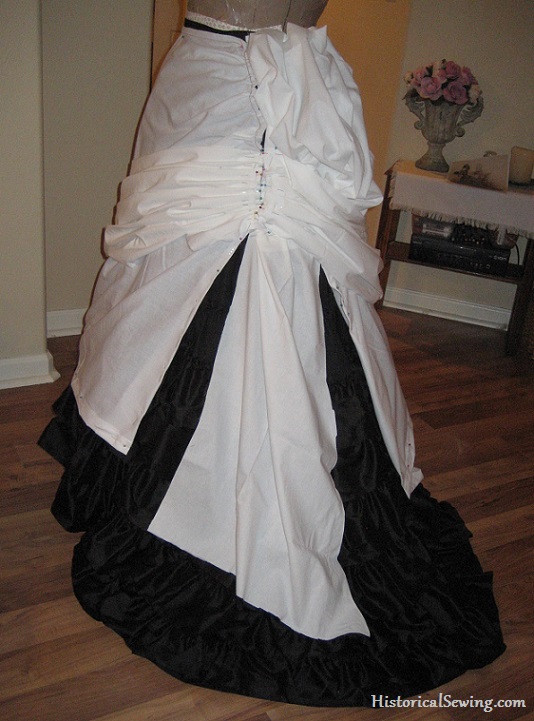
I trimmed the hem a tiny bit and had to play with the center back pouf – it was HUGE!! I controlled it by shortening the pouf pattern by 4-plus inches and made the pouf base a bit wider and with a wider lower edge. I also lengthened the base by 2″.
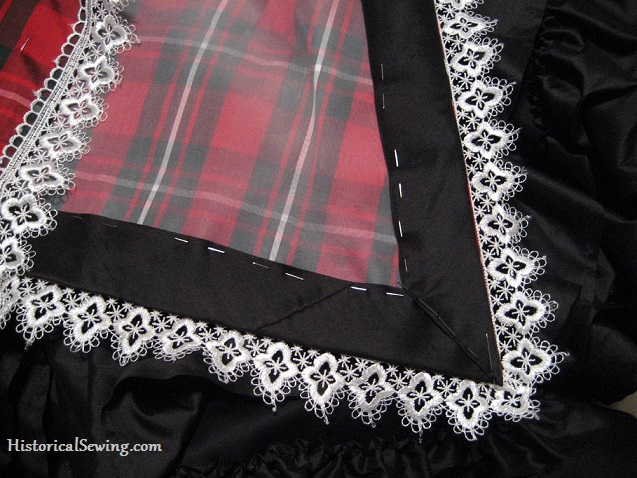
The plaid was flatlined with silk organza for body then finished with 1.5″ wide silk dupioni bias.
I cheated and machined stitched the bias then pulled it out of the way so I could machine stitch the lace on at the edge. The bias was then turned inside and hand tacked down. The 1″ green velvet ribbon was hand tacked along both edges to cover the top of the lace and finish the trimming.
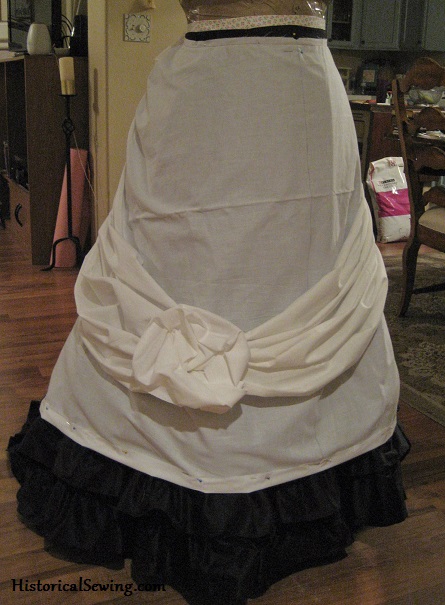
The sash was developed with long strips of muslin pinned at the left side back seam (just below the placket opening – another change I made from the TV pattern). The strips were then brought around to the front, pleated and pinned at the right side near the knee.
Because the fashion plate gives NO CLUE about how the front should look I had to make this up. I could see the sash sweeping down each side at an angle but then what? After researching original dresses on my Pinterest boards I decided on a bow. Not sure at that point what kind of bow, but a bow… loopy thing… you know.
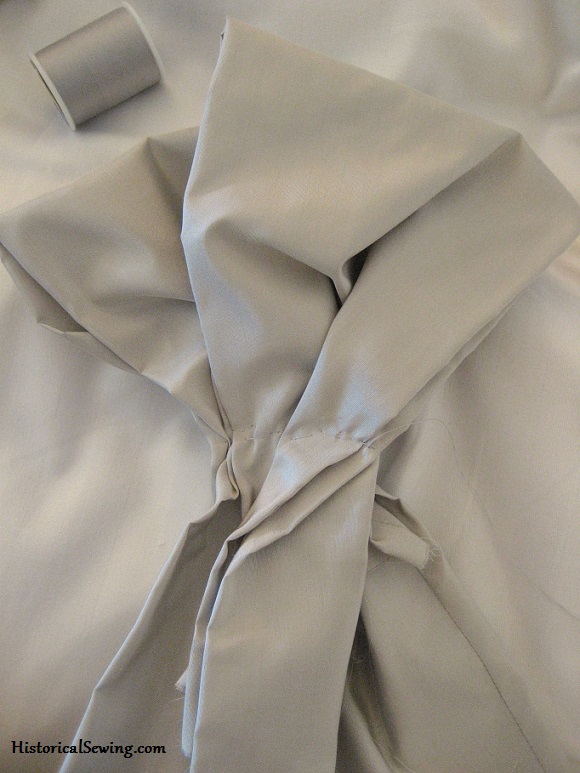
Later I decided to cut wide strips on the cross of the fabric and sew the long seam making a tube. I also made a narrower tube for the bow loop. The tubes were gently folded at the top with the top raw edge about where the tie loop would be. They were pleated a bit for interest then I simply started tacking the folds and pleats together.
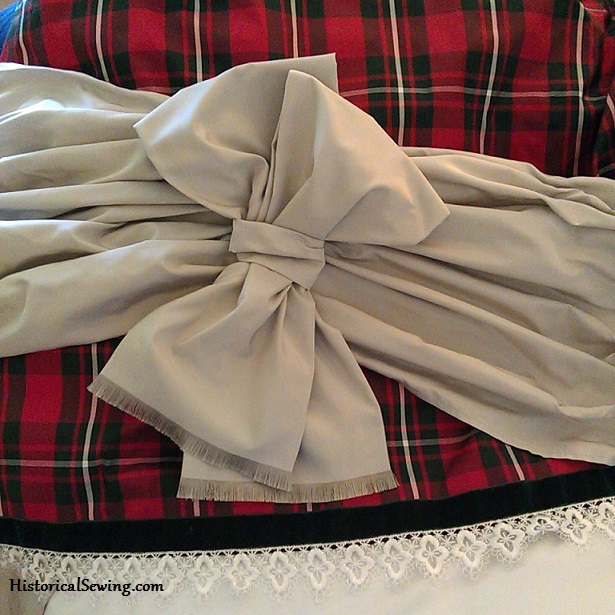
Using my hand bow technique, I finished the bow with the tie loop covering the tacking stitches. Finally, I pulled out the horizontal threads to create the fringe.
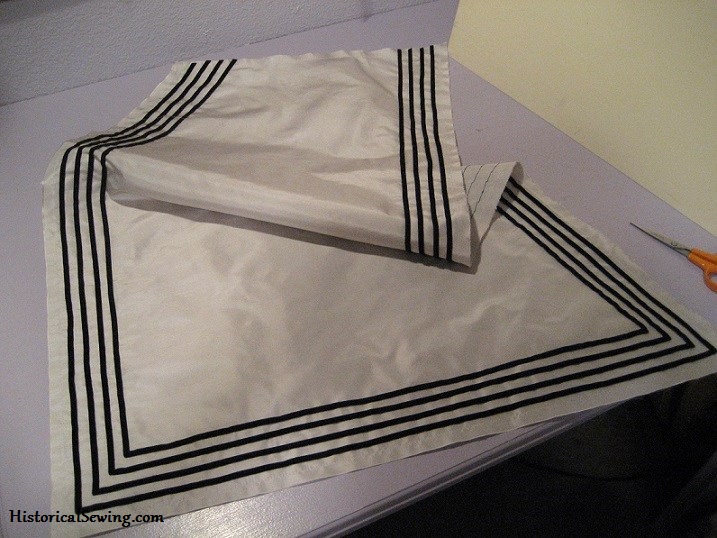
The final bit of the overskirt was the sash tail. Analyzing the fashion plate further I realized that the four rows of tiny trim would take the dress from “wow” to “amazing.” It really WAS the key to completing the look.
The only 1/4″ wide trim I could find quickly was a double sided velvet ribbon. Ugh… double.sided.velvet… Again, same as with the skirt ruffles, I knew this was a hand tacking project. A whole afternoon yielded 9 hours spent making tiny tacks to hold the four even rows of tiny ribbon onto the tail.
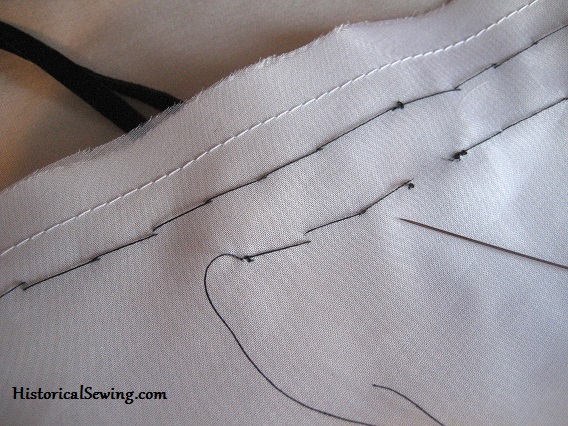
The tail was first flatlined with silk organza then the ribbon sewn on. To finish, I sewed a lining layer of the same silver silk to finish the raw edges and enclose the hand stitches.

Now that the skirts were done it was time for the bodice. Plaid matching… you do it just like matching stripes.
This is where I really can’t tell you what pattern I used. Well… ok. I used my bodice from the 1887 Summer Berry Trifle Dress which is like the fourth or fifth generation of some Truly Victorian pattern. The TV460 perhaps??
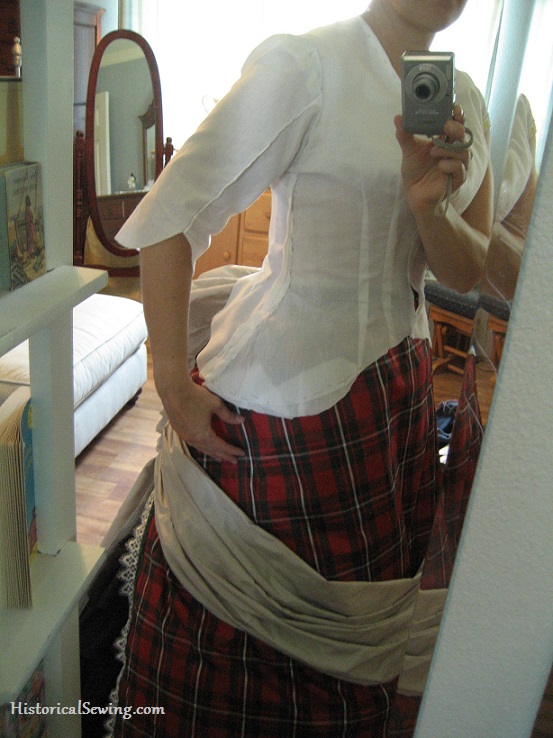
I had to slice and add fabric to get it to lie smoothly over my hips in that deep rounded side. I also spent time taking in the side seams to make it fit better. (See – don’t reinvent the wheel.) Oh, and for those of you with sharp eyes, yes my sleeve IS set in backwards. Ha! The curve is supposed to go on the back side for the elbow. Doh!
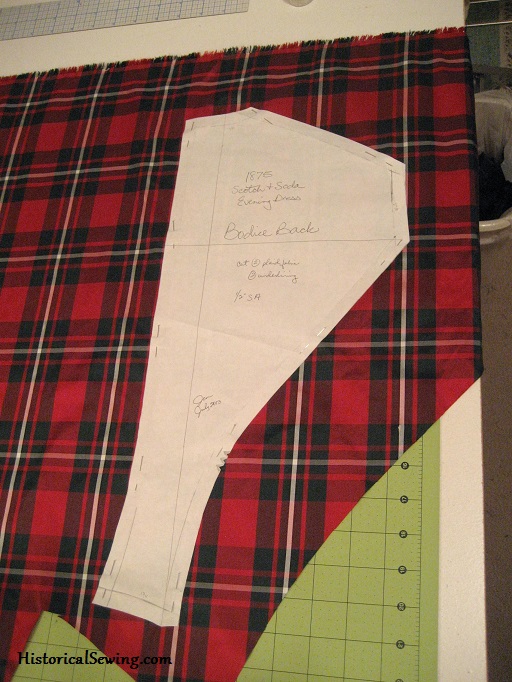
Next was oxygen deprivation time as I held my breath for three hours while I patiently matched the plaid at each seam. I almost cut it wrong for the overskirt was cut on the cross (see photo above) and so I needed to turn my bodice so it would also be cut on the cross to allow the green rectangles of the plaid to run in the same direction. (Yeah, they aren’t squares! Lucky catch!)
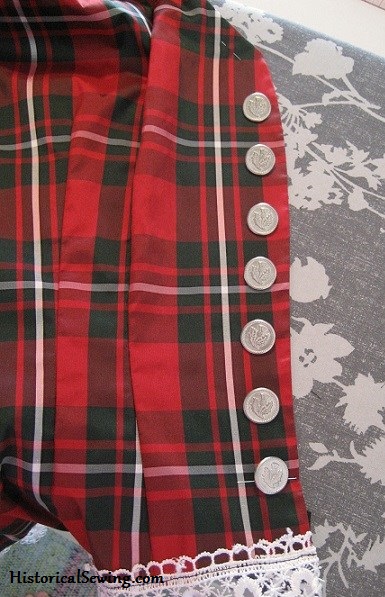
To keep with the Scottish theme I purchased beautiful 3/4″ pewter buttons from Three Feathers Pewter. The thistle design along with my thistle bodice brooch was perfect!
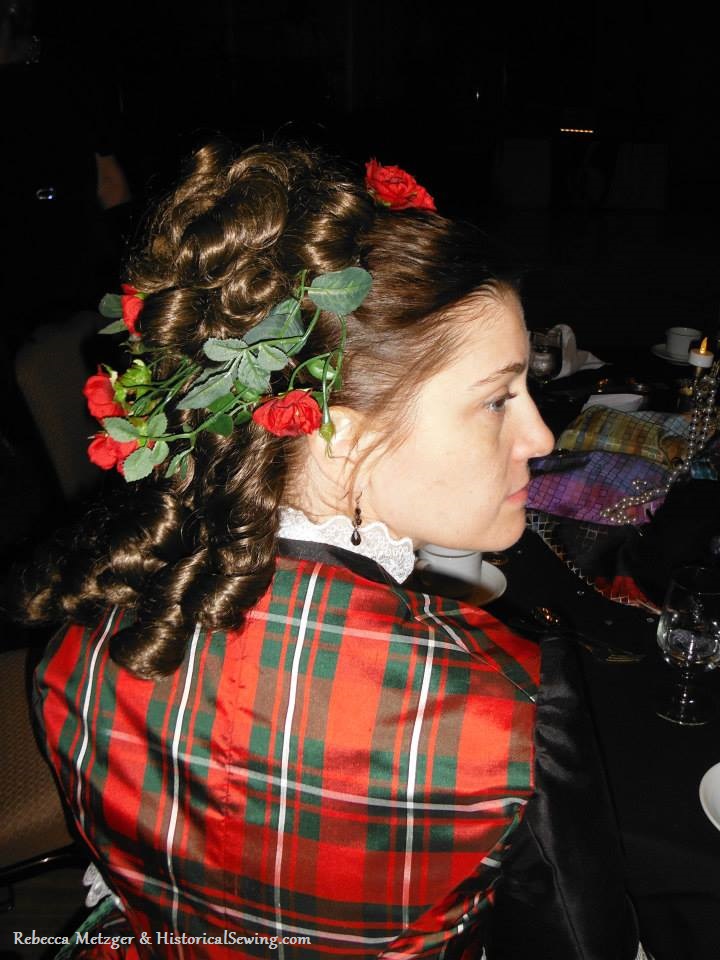
My hairstyle was composed of one piece of long sausage curls pinned on top of a high ponytail made from my own hair as a base. Then a second piece made from two smaller curly hairpieces was secured on top. (Both pieces were made by Tracy at The Historical Hairdresser.) The faux roses from Michaels were lightly arranged around the head mimicking styles we see so often in period plates.
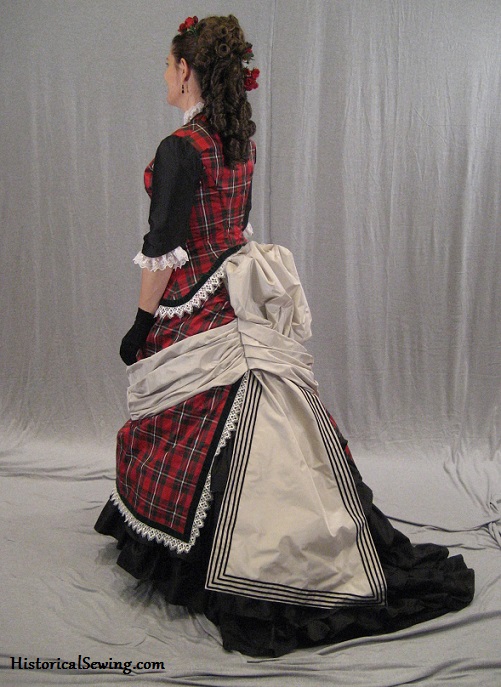
The dress is about 97% done as I have bias strips cut to create cuff trim on the sleeves. The dress turned out fabulously, in my opinion, so we’ll see if I ever get around to adding that bias trim. 🙂
Have you tested your skills this year with a challenge project? Is it completed?

Hi Jennifer, I hope you are well? I’m messaging you all the way from sunny South Africa and was wondering if, at all possible, I could get patterns from you for your victorian dresses. I’m a photographer living in a small historical town called Barberton, Mpumalanga (est 1884) and get requests to do victorian style photography shoots all the time due to the rich history of the town but sadly cannot get any resource material for victorian clothes around here. I hope you can help me with this so I can get the dresses made locally and be able to provide my customers with their requests. Look forward to hearing from you. Take care and stay safe. Steve
Hi Stephen,
Most of my historical ensembles start from ready-made patterns. Then I will tweak, add-to or trim as needed for my design. I highly recommend Truly Victorian (my go-to for Victorian dresses) and Laughing Moon. Both companies offer e-patterns (PDF), so even though you are many miles away you can still purchase and use. Have fun with the rich history of your area!
Sorry to revive a dead comment section, but I must know… What was your yardage on that lovely plaid silk? I’m looking into doing a similar dress and I need to know how badly my wallet shall have to cry in order to make it happen…. I know the underskirt will be an entirely separate adventure, but I know roughly how much that will run me, at least. Thanks in advance!
I ordered 6 meters of the tartan in the standard 55/58″ width. After cutting the overskirt and bodice I had well over two full yards left (maybe close to three)… which I then cut ANOTHER bodice from as my size changed after pregnancy and the original was too hard to alter successfully. I still have a good yard left. So, for some strange reason that 6 meters has stretched out really well! 😉
Hello again!! I’m back to leave more comments on old posts!
I would like to know your most important/best tips for pattern matching plaid/tartan/checks – I’ve figured out all my patterns and underlinings and such for the project I’m doing with the fabric I described in my last comment (the pink, green, and gold taffeta) but besides the tip “don’t cut anything after midnight”, I am struggling to find advice for matching this sort of pattern in historical garments/costumes.
Hi Finley,
I recommend looking at my post on matching stripes. Plaids work in a similar manner. However, you want to look to see if your plaid is “even” or “uneven”. Meaning, if you fold the fabric on the bias, does the stripe part of the plaid line up on each side. If not, it is an uneven plaid, which most plaid fabrics are woven this way. But check. For my tartan plaid for this ensemble, I had to turn the bodice pieces and cut them “on the cross” grain because the main white “box” of the plaid was not completely square. I needed the bodice to match in the same alignment as the wide overskirt.
Also, we have loads of extant garments where they didn’t put much attention to matching plaid lines. It seems they weren’t as concerned with matching plaids like we are. For our projects, look at matching main lines of the plaid at the side seams and/or around the waist area, just above the waistline; or at the full hip line, and let the rest of the plaid work itself out naturally around the armholes, shoulders, and other skirt seams and waistline. Good luck!
How did you keep your ruffles so even vertically when mounting? did u measure as you went or have it marked in some way? Also what is the best method for sewing hand sewing ruffles so they don’t lose their fullness?
Yes, I marked the row lines evenly from the hem edge. For tacking on, this article may help.
Love this dress! I have ordered many buttons from Three Feathers and they do such beautiful work. Another source of silk tartan is Dalgliesh in Scotland. They do a soft silk twill that is really lovely, and they can do any tartan variation you can think of – they specialize (or did anyway) in hard to find tartans. The minimum order used to be 5 yards, so check them out if you find you need more!
Stunning!
Was organza a fabric commonly used for the inside of a bodice?
Not to support it. Bodices need firm underlining support from solid cotton or twill. The organza used here is only supporting the overskirt parts.
I can’t get enough of looking at this. It’s very beautiful. It doesn’t remind me of Christmas because you chose to use the color black for your trained skirt, rather than hunter. Good move on your part. 🙂
Jennifer, you are the most outstanding historical fashion designer. That dress is very lovely. You look stunning and awesome!!
You looked so awesome in this dress. 🙂
Thanks Stephanie!
Ooooh, so sumptuously gorgeous! I’m going through a real bustle phase at the moment in my historical sewing, so I’m just loving this! Thanks so much for sharing both the finished product and some of the process.