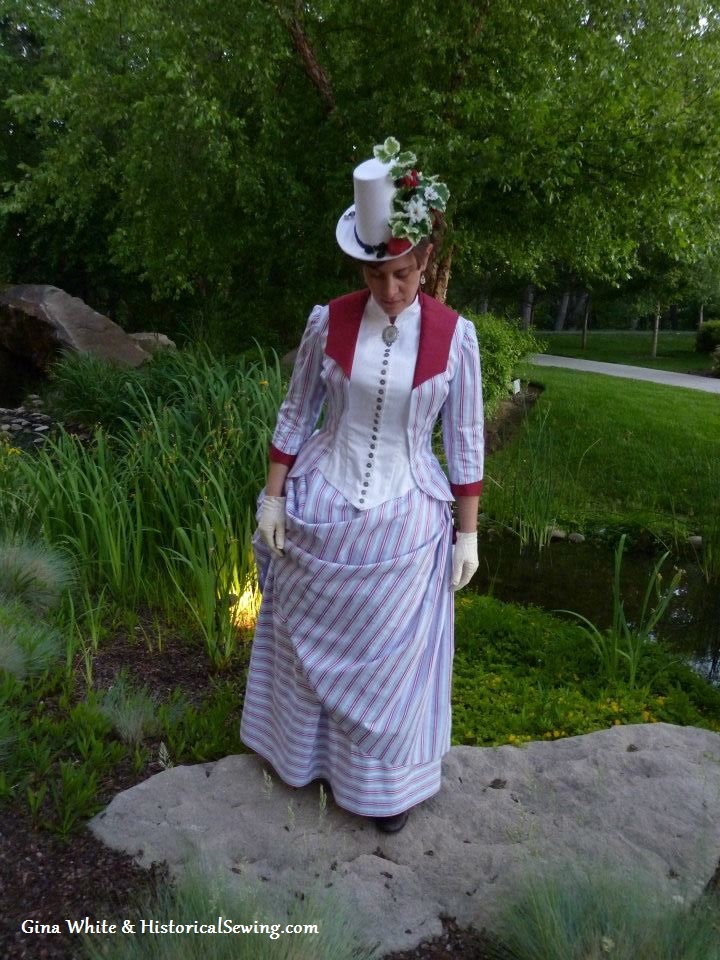
Back in January 2013 I declared it was to be the Year of the Striped and Plaid Bustle Dresses. (Have you participated yet?) During the Fall 2012 session of the Bustle Day Dress Online Class someone had posted a link to striped fabrics over at Farmhouse Fabrics. [insert dream time and drool here…]
Through a Thanksgiving sale I gobbled up… sorry… ordered, 12 yards of 60″ shirting in a blue, white & raspberry stripe fabric that I’d been eyeing for several weeks. Now that the fabric was purchased, a design was decided on and off we traipsed into Strawberry Fields Forever.
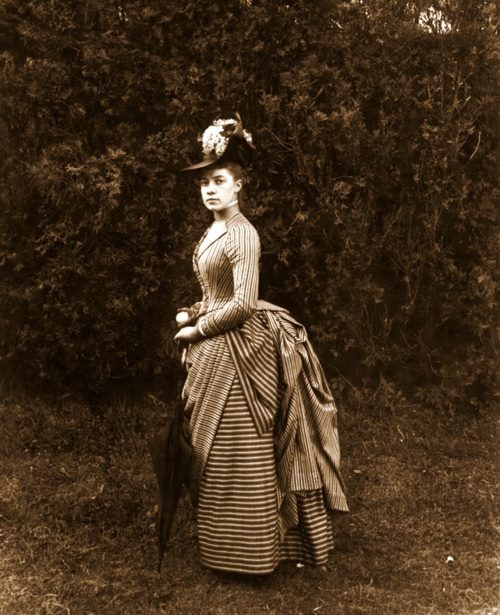
With a stripe I knew I wanted a late bustle style with stripes going every direction. Not wanting to get too complicated I settled on making up the Truly Victorian skirt patterns as is then playing with a vest front bodice design. Miss Alice Austen was a big help in getting me off to a good start.
The foundation skirt is an ivory cotton twill made from the TV261 – 1885 Four Gore Underskirt. I debated endlessly over how to mount the horizontal stripe panel – should I cut a yoke? Should I cut the skirt whole and mount the stripe on top? Should I cut the yoke from twill only and sew the stripe to the bottom edge?
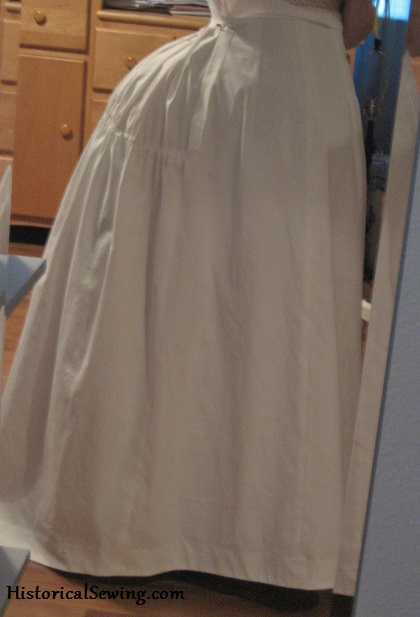
Through a brief series of emails with Heather McNaughton at TV she agreed with (and encouraged) me to make up the foundation skirt as is and lightly gather the horizontal stripe panel to fit around a parallel line at the hip level. (This ended up being a line 32″ above the floor marked by my willing-to-help hubby but with directions from me.)
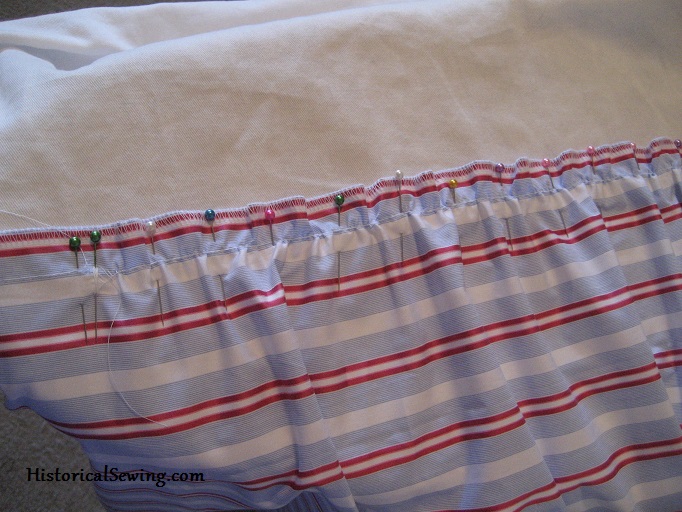
The horizontal stripe was cut in length to match the hem, the top edge serged, then finished with a basic hem facing. It is unlined and lays flat on the twill underskirt.
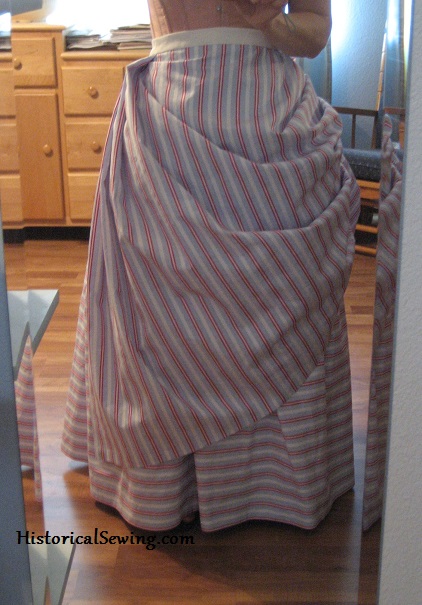
For the overskirt I used TV382 – 1886 Asymmetrical Drapery Add-On and cut as-is. However, I flatlined both the front and back overskirt panels in silk organza to give them some poufy bustle support.
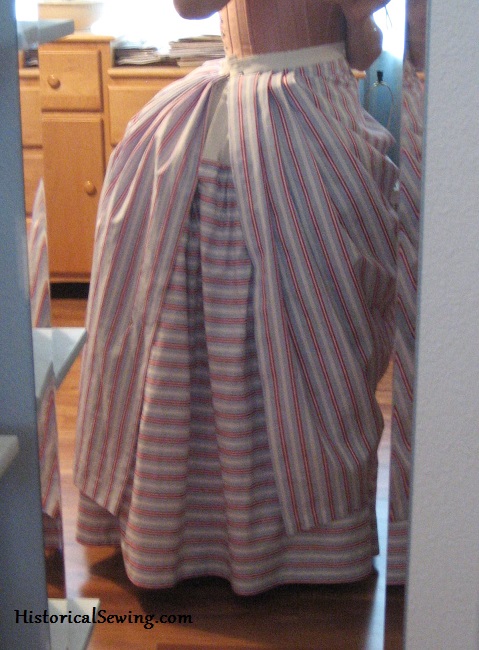
Being how the left side of the overskirt is finished and how it lays over the foundation skirt, I completely expected to see an non-striped section of the placket. See it there near the waistline?
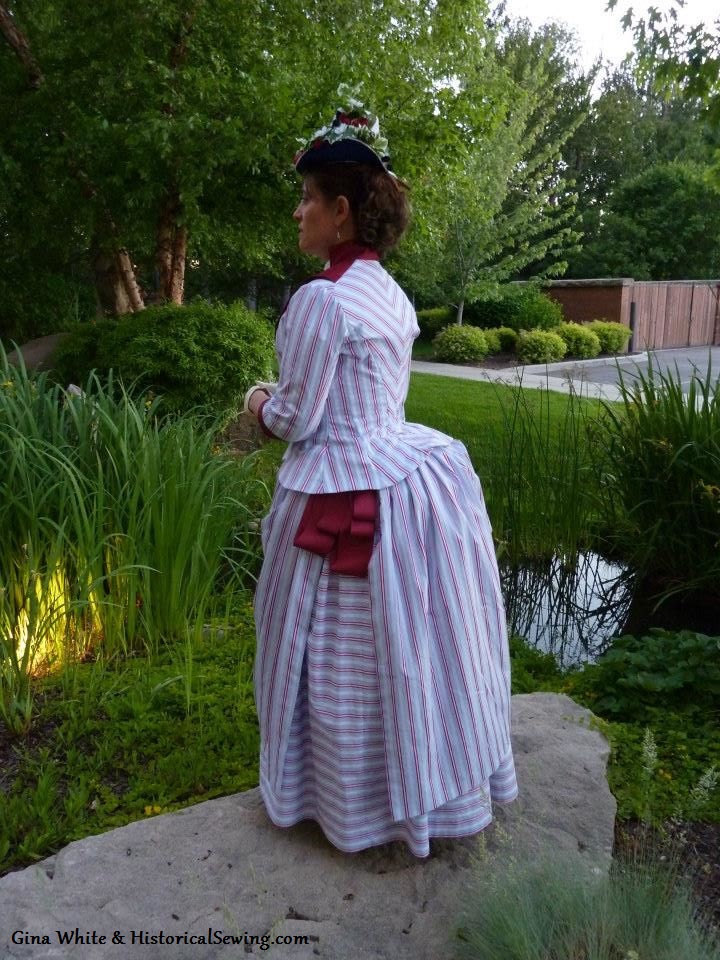
I ended up cutting raspberry poly satin (Hey! It matched perfectly with the stripe and was on sale at Jo-Ann’s!) into varying bias strips, folding them and simply safety pinning them onto the waistband. I think they add a nice touch in addition to covering the “gap” in the stripe fabric.
Their official name is Loopy Bow Things… 🙂
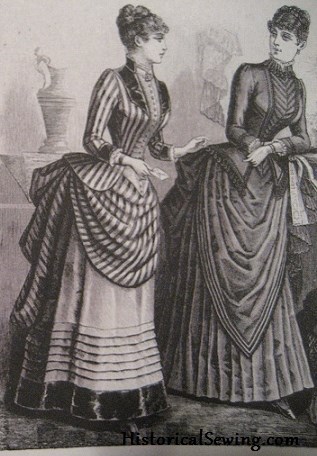
I struggled with the bodice design for weeks. Then finally came across this lovely plate (above) from the book Fashion Design: 1850-1895. Perfect.
The cut of the vest front seam is actually a bit different from the Truly Victorian 1884 French Vest Bodice. Because I had already made that pattern, I took it to make a new mockup where then I drew in new lines.
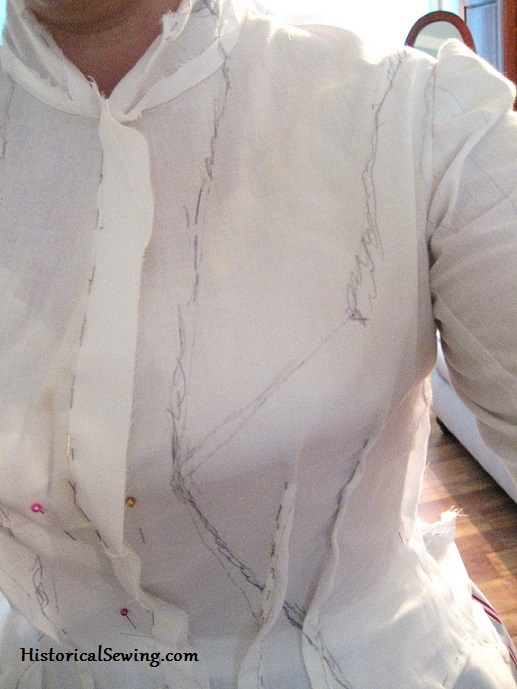
The vest starts much closer to the center front at the neck and goes straight down to the bust line rather than tapering out over the apex. After making both this bodice and the TV one I really think keeping the vest portion close to center front at the bust gives a much more flattering appearance to an ample bosom.
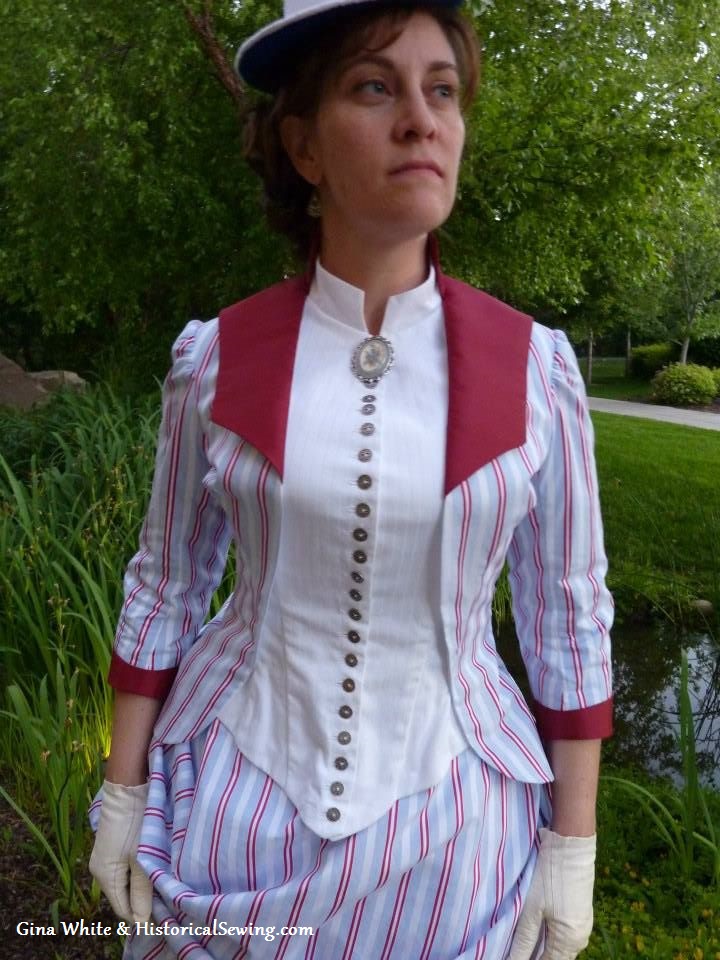
The lapel and mandarin collars as well as the angled cuffs were cut from the raspberry satin, but I used the reverse side for a more matte (read: less obvious man-made fabric) look.
Most of my Victorian bodices use self-covered buttons. The premier event was a few days away and I didn’t really have time to cover the 21 buttons I wanted for this project. So off to my little Jo-Ann’s store praying they had *something* I could use. (It’s not so much as NOT finding something as finding ENOUGH of what you find….)
The scrolled metal 1/2″ buttons presented 5 cards on the hook – I guess I’ll have 20 buttons then! Right-on!
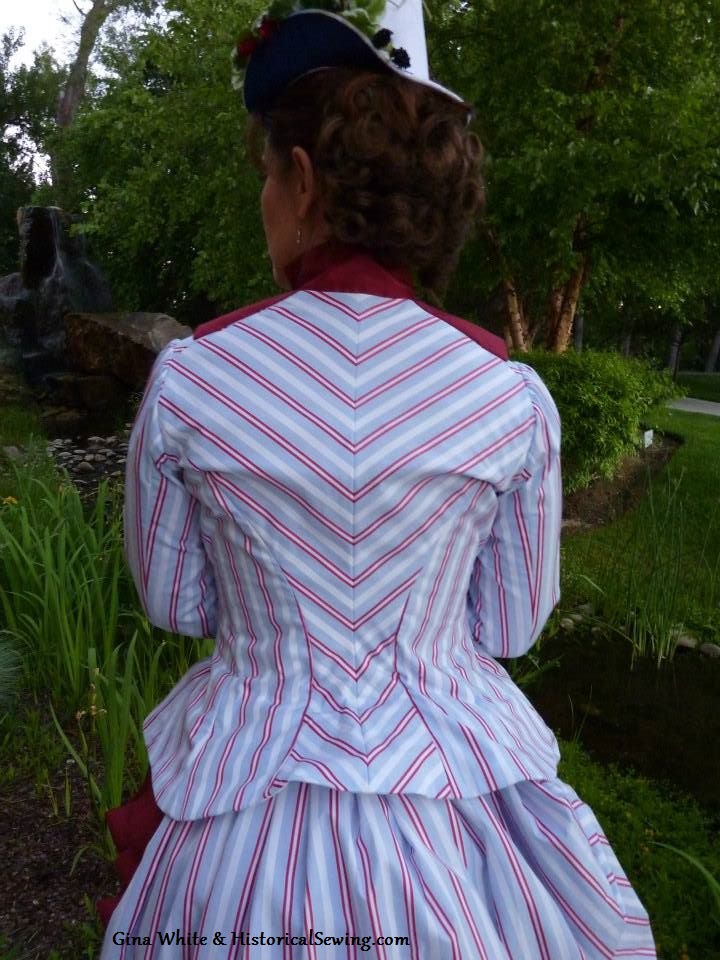
Another “short-cut” I took because of the time crunch was to create a chevron with the stripes on the center back panels. The time saver came from not having to line up the stripe from the center back to side back panels. Although it can totally be accomplished I didn’t want to put in the effort (yeah, I know…).
After basting the center back seam I only had to rip the middle section apart to re-align. I think it came out terrific!
[Please ignore those horrible horizontal shoulder blade pooches you see on either side – those are where my metal boning ended. I ripped them out and put in longer bones that go further up that seam stopping close to the armhole seam.]
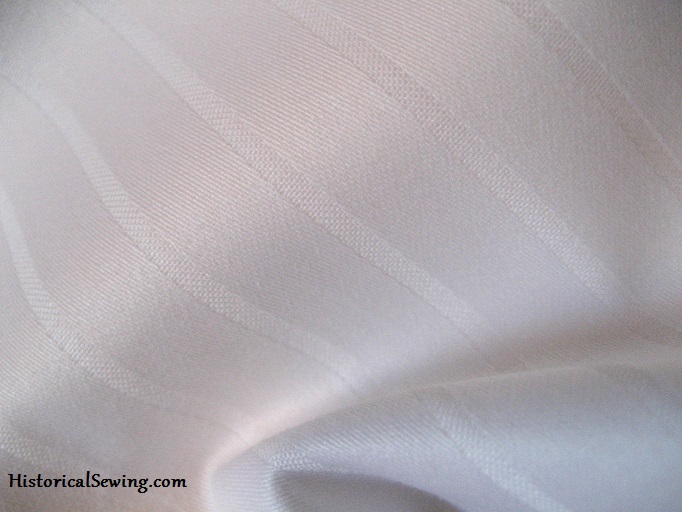
The vest part is made from a striped cotton sateen – a VERY lucky find at Jo-Ann’s – flatlined to a white lightweight twill. It is cut as a full bodice front and attached at the side seams.
The striped bodice front was cut from the main bodice pattern, flatlined with silk organza then mounted to the stripe. The front edge is finished with bias for support. The two pieces (currently) are hand tacked together along the inner dart, but I intend to continue the tacking up to the dart point so the stripe stays in place better while wearing.
The hat was also covered in the white sateen which you can read about that project here.
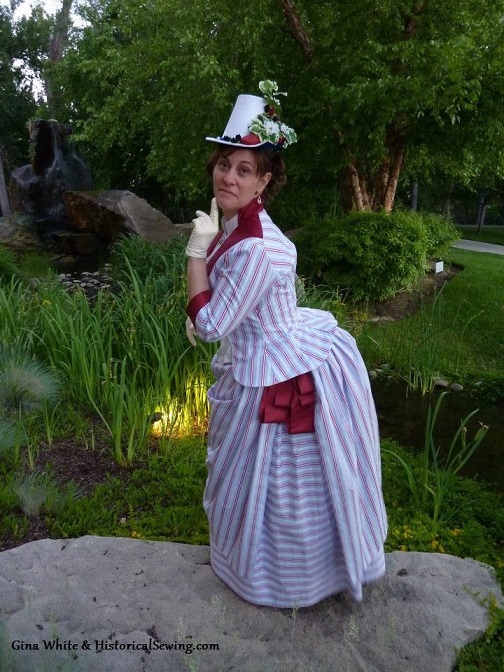
To create the silhouette in the photos, I am wearing: chemise, drawers, 1880s corset, lobster tail bustle and petticoat. Then I put on the skirts (both foundation and overskirt were attached to one waistband) and finally the bodice.
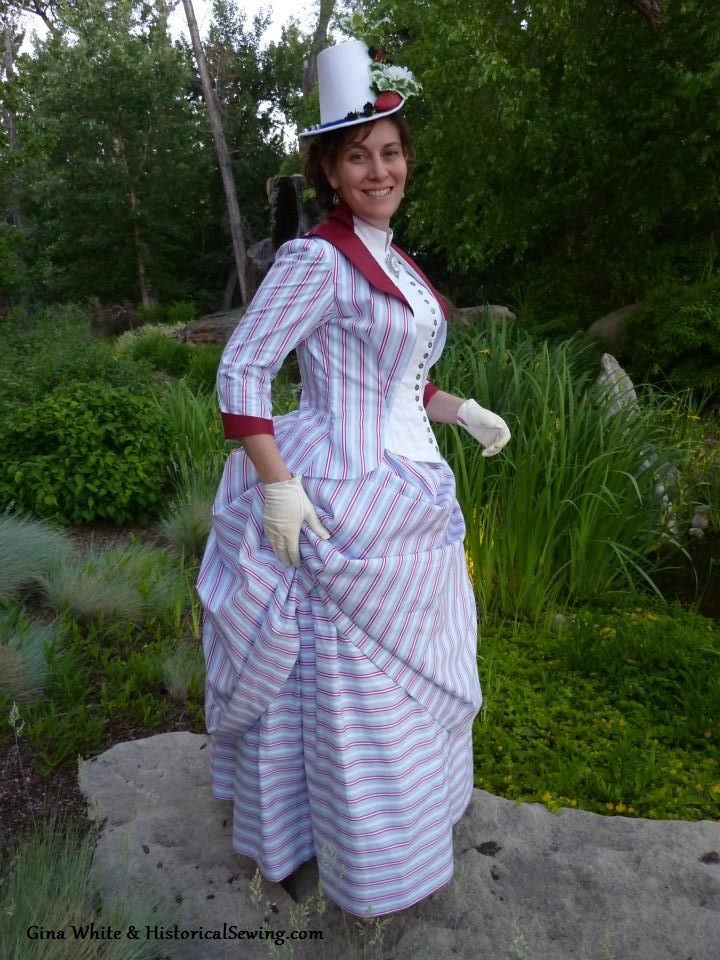
Overall I think my first all-over striped bustle dress came out splendidly! I really do love it.
Have you made an all-striped dress too? How did it turn out?

Love this ensemble! I have bought blue and white striped fabric and plain blue fabric (skirt) – both in cotton? shirting. I have been looking at the Truly Victorian French Vest Bodice but really want the lapels like yours. Did you make a paper pattern for these yourself? I had already thought about the possibility of chevrons so it is great to see them looking so nice. Also love the Loopy Bow Things!
As you can see in the post I drew in the shape of the lapels on my mockup. I then traced them out onto paper and trued for a finished paper pattern to use for the bodice. 🙂
I thought (hoped ) that was what you did. It looks lovely! I bought the striped fabric first then started thinking about how I wanted to use it, and you provided the look I envisaged. Thank you!
I commend you on your honesty about your “laziness” in “resorting” to the chevron pattern in the back, but I have to say that that’s the sort of thing I *aim* for, & you could totally have gotten away with declaring that you deliberately set out to do it! I think it improves the look immensely!! But I do want to thank you for amply demonstrating that shirting is actually a very good dress fabric; I honestly would not have thought of it, myself!
Thanks Susan. And yes, shirting fabric is *awesome* for light summer dresses. 🙂
I love this dress. and thank you for the details you provide. I’m new to sewing, so I’m working my way up making a full Bustle dress. I’ve been doing small costume sewing projects and drooling over fashion plates and reproduction dresses in the mean time.I found the “Loopy Bow Things… :-)” all over this 1885 fashion plate.
Those ARE loopy bow things in that fashion plate! 🙂
Oh, and everyone of my friends who is also friends here is welcome to search my photo of this if possible and give opinions. We all don’t his home runs every time and any feedback is welcome. It;s a black and brown ensemble with a brown subltle striped overskirt and a striped inset in the vest. I learn a lot with each new outfit. . . .sigh.
I was wondering which bustle period this was when I saw you in this at CoCo, but was too busy listening to you to pursue it further. I appreciate your comment on how a closer vest looks better on a large bosom. I made the TV basque bodice, and using their sizing, the vest slants not-so-nice over my chest. I’m really not loving it and am contemplating giving this bodice to the CoCo sale. Would you consider doing a workshop on how to cut a vest into a bodice for bosom-y ladies? What would you charge, how many would it take to get you down from Bakersfield and how long would such a workshop last? I have a lot of space in my house (once we get all the built-ins installed) and have space for about 6 or 7 work stations. This couldn’t happen right away, but maybe in April or May? Or could you make this a CoCo class? I’d gladly pay for your expertise and experience as long as we start with a TV pattern. To see how dorky my brown bustle day dress with this basque is, you can go into my photos on my page and it’s there somewhere. I don’t have it in my own personal photos or I would have put it into a personal e-mail to you. but it flares out and just emphasizes “BIG BOSOM!” Not a nice tailored (read:camoflaged) look. I like what you did with the Berry Dress.
Good news on one end: I’ve spoken with Heather at TV and she has a vest/bodice pattern in the works that changes the wide visual bust line to more like mine.
Second – I would gladly come give a workshop in the LA area on changing a Truly Victorian pattern into a vest/bodice pattern. Email me and we can discuss particulars. I will also put this into my thinking for a CoCo class offering. 🙂
P.S. This dress I’ve dated 1887 which is the Late Bustle period.
I am officially a fan of the Loopy Bow Things. How ridiculously practical!
So many layers! I love that!
It is one of the most beautiful things I have ever seen! <3
Thanks for the information on making it, as a sewing novice I like all the instruction I can get, it really helps me work out how things go together!
Why, thank you! And you’re welcome. 🙂
Absolutely beautiful! The berry satin really makes the stripes pop.
love it…looks very similar to a shirting fabric I’ve been drooling over at joann’s.