Being creative creatures we are always striving to better ourselves and our work.
Of course, there are always those quick projects where we just want to get it done and ready for the event. Those we simply “cut & paste” using the supplies and abilities we’ve developed over time.
But then as I was sewing on my 1875 evening gown ruffles this week I realized what a brilliant way to step up your skills when it comes to Victorian dressmaking. Duh! Like why hadn’t I really ever thought of this before? All you need is time…. …well, and patience. And the ability to not go crazy while building your skills, because the project won’t ever be perfect no matter how much time you spend on it….
Aside from the usual techniques we use to make fabulous historical costumes like flatlining, adding boning, and using hem facings – you’re doing them, right?? – a noticeable tactic to bump up your game is to hand sew all the trim.
Yes. I’m totally serious here.
And I do mean ALL the trim in all forms and manners.
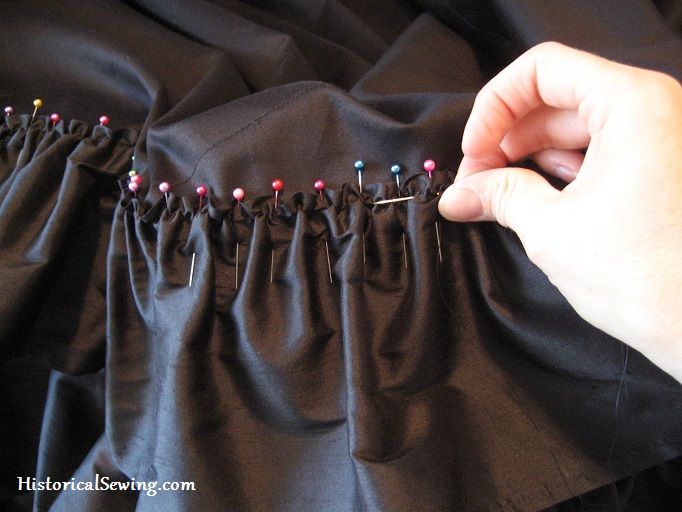
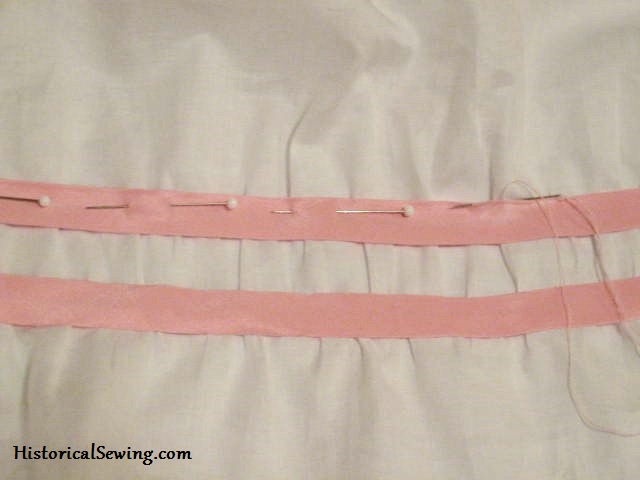
If you want ruffles, gather by hand and tack to the skirt. If you want a bias edged finish, don’t run it through your machine. And you can’t very well make the oh-so-popular bow trim on a machine.
Nope – they were made by hand back then, so to follow suit we need to do the same.
Now really, I *know* our modern lives don’t present us with loads of hours where we can laze about making fine trimmings for our Victorian wardrobes. (This is not the Castle Anthrax… for you Monty Python fans.) But I did say you need time.
So that means if you want to win the Blue Ribbon you’ll need to start preparing for the game months in advance.

Making 19th Century clothing in our fast-paced, 21st Century world is crazy. We’re not used to things taking so long to get accomplished.
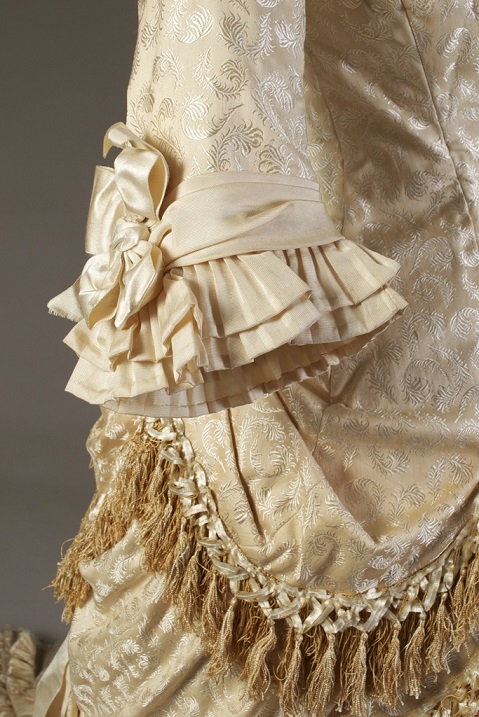
Well, neither did the Victorians. Once they were comfortable using the sewing machine off they went. However – they still mounted all trim by hand. Sure, the hems were machine stitched (well, some of them) and they used the machine whenever possible to gather up sections. But the finishing touches of ruffles and bows and fringe were still created by hand then tacked to the dress by hand as well.

So if you want to rise up and make first string, take your dressmaking to the next level by allowing time to create trim by hand. Whether you start with hems or just quit doing so much sewing on the machine, practicing your hand sewing skills will suddenly take your costume from “happy hands at home” to historical clothing.
To increase your Victorian hand sewing skills I highly recommend the following books. We also have an online class in the works to create Victorian trim samples. 🙂
Embellishments: Constructing Victorian Detail by Astrida Schaeffer
The Art of Manipulating Fabric by Colette Wolff
The Sewing Stitch and Textile Bible by Lorna Knight
Couture Sewing Techniques by Claire Shaeffer
Have you made any garments where you hand sewed the trim? Did you make the trim by hand too or merely tack it on by hand? What techniques of hand sewing do you struggle with or are wanting to learn? Share in the comments below.

Bonus reasons making trim by hand is nice: it’s usually small enough to hold in your lap and do during class or meetings or on the bus.
My mom has always hand-sewed hems on every garament I have ever seen her do. She says it relaxes her. I am starting to learn how to embroider, to level up my hand-sewing skills. Just by coincidence I had two of the books you talked about on my Amazon wishlist.
Good luck on the embroidery! And yes, hand sewn hems are really the best. 🙂
A truly nice thing about sewing the trims on by hand is that later, when disaster or happenstance strikes, or just the Victorian mindset overtakes you, it is so much easier to unmake the dress or re-trim it. Full skirts shaped anew with an accent trim in a different mode. Gowns didn’t just get pitched out the window for a gravy stain when trim could be made to hide it.
I love to sew by hand and often do so even when I could use the machine. I think I could have survived well in the old days before machines. The only reason I use machines is the time factor. I just don’t have the “freedom” those old pioneer women used to have (hah! they didn’t have anything to do except EVERYTHING!).
You are absolutely right, patience and practice is the way it was done, it may drive you crazy with gathers and cartridge pleats but the results are worth it.
Hello;
I am trying to make a Steampunk gown for a Ball on Valentines Day. I tried to do a shortcut by getting an already made Corset but I’ve found that my Breasts aren’t as perky as they used to be. Would you have any tips on how to make and attach a Lace Collar for my gown. (to hide my old lady boobs) Something like the last picture in this post
Any input or opinions would be greatly appreciated.
Regards,
Kerri Eichenberger
Try looking at Ageless Patterns. She had some collar patterns similar to what you want. Look at the capes and fichus pages.
I’m all for hand stitching when sewing anything that doesn’t bear any stress, but if any pressure will be put on a piece I will use the machine. Hand stitching just isn’t as strong.
I use my sewing machine – in general – only for long seams. Once you have practiced hand sewing a bit, you can stitch basically anything so that the stitches will not show on the right side of the garment. My pet peeve with machine sewn trims is the fact that you can often quite clearly see where and how they are attached. It’s just so hard to control the process of stitching with a machine!
I did tack on all the trim on my new Civil War dress by hand (didn’t make the trim though). I have pictures up on my blog.
I’m currently crocheting trim for my second corset (still working on those mockups for corset class) which will be a peach silk corset with white trim. I promise pictures when it’s finished. 🙂
I sew all my modern stuff by hand as well as historical. Well I say all there were a few items I had to finish quickly so I wrestled with the sewing machine. I give myself at least a month to make things although if I have a non busy week I can get a skirt done in a week.
I’ve always hand sewn, never got along with sewing machines but then I can’t afford to buy a top of the range one which may be half the problem.
Ya know.. I’ve done so little trim in the last 2 years since I started doing costuming. I tried last night my first attempt- just a simple decorative stitch from my machine.. and may I just say A CURSE ON SEWING MACHINE DECORATIVE STITCHES!! LOL.
I was dealing with a neckline i had cut too wide so instead of double rolling the fabric, i single rolled it, stitched it down in a near-invisible thread color.. and went over it with a decorative machine stitch to help prevent fraying. … yeeeah. there was swearing involved and it looks like poo. The fabric being a plaid cotton flanel, I decided against regular trim and am now wishing I hadnt. Any tips short of throwing my overpriced machine out the window?
Well, I would say first you need to finish your raw edge first before pressing it under and sewing (even only folding under once). Then you don’t have to worry about that. Second, I would highly recommend a stabilizer to support those fancy stitches. It can be the generic soluble/wash-away or leave in stabilizer. Or a band of seam tape, or even finish that neckline edge with a single fold bias strip which would stabilize both the neckline and any decorative topstitching.
Don’t throw your machine out! It’s a tool to be used. Work more on your fabric selections and finishing techniques. Good luck!
I don’t own a sewing machine nor know how to use one properly so I hand sew my stuff AND I am still very new to sewing garments. I am working on a 5th century Byzantine outfit. Thank goodness is it kinda shapeless because gores are my bane. I am getting better but I still feel like a monkey doing a math problem. Doesn’t help my friends are tailors and start spouting clothing/sewing terms that make me go “huh?”
Keep at it Karen. You can only get better!
I have made multiple garments with all hand sewn trim. I made bridal gowns in an 18th C. style, and they are hand stitched alternating scallop trim tacked on by hand. I have to say that the turned out much better than the ruffler created pleats that were stitched on by machine! There’s so much more “fluff” to the hand attached trims. I also sewed floral garnitures on those same ensembles, and the florals have to be tacked by hand otherwise you’ll ruin them!
Now that I’m doing Victorian costume, I’m definitely taking those lessons on that project to heart and leaving time for hand applied trims. Part bounus is that taking out hand stitching to – re decorate is easy- peasy, rather than risking ruining the garment.
Yep, most of my stuff is hand sewn now, so that includes all my trims. I do mainly 18th century stuff, its a pain, but it just gives the right finish to stuff.
You know…I don’t think I’ve ever sewn trim on by machine? Well, maybe ruffles, when encasing them in a seam. Admittedly, I work mostly with Elizabethan fashions, so there are some big differences, but it’s surprisingly easy to make your own braid from cotton cord and sew it on–and then you never have too much or too little, you only have just the right amount! As I’m shifting into Victorian fashions, I am already planning to continue the same trend; for a skirt I’m making, I’ve designed my own loopy braid and will be adding pearl drops to it as I stitch, for that extra luxury touch.
I also do a lot of hand embroidery, blackwork, and cross-stitch for my costumes, and it means that I plan out the overall look of a costume and start the trims FIRST, because of how long it takes to embroider them. My biggest piece was an embroidered applique about nine inches across for a pirate vest. It looks beautiful still, though I need to go back in and tighten up a few of the pearls.
One trick I did find, though, if you’re having trouble with keeping trims where they need to be while you stitch them on–especially appliques! I found out that “they” probably used something like gum Arabic (I think it’s Arabic) to temporarily mount large trims and appliques while they were sewed into place, during the Elizabethan period. Steamabond is a very-acceptable modern substitute and it helps IMMENSELY with large pieces. You still need to stitch it on well, though, because like gum Arabic, Steambond (in my experience) really doesn’t hold all that well as a PERMANENT thing. But it definitely gives you time and peace of mind while you stitch that perfect buttonhole edge stitch–without using pins that can let the applique slip anyway.
My biggest thing against handsewing is starting and stopping. I don’t mind stitching — actually, I find it relaxing — but anchoring my thread is daunting enough that I avoid handsewing at all costs. D: