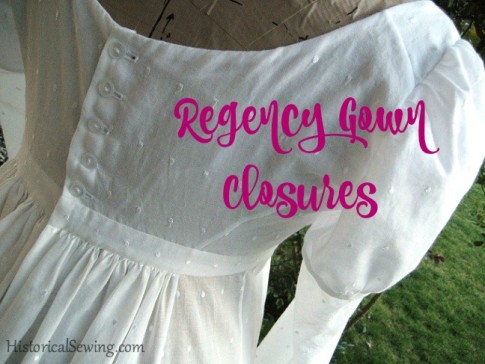
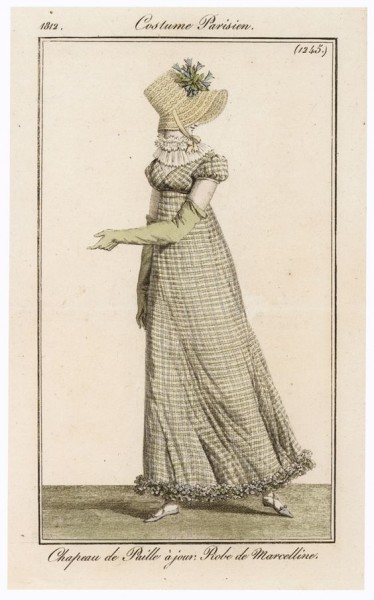
The Regency Fashion Era (1795-1820) is a wonderful time of simple silhouettes, drape-able fabrics, and a freedom from tight dressing (as compared to the Rococo period before and Victorian Era after).
With these delicate styles comes light closures – ones not to disturb the easy shaping. They are fairly simple. Basic really. Uncomplicated.
And generally only 3 of them for the Regency Era, along with small variations in each.
Closures need to be balanced with the garment. Strong plackets on Victorian skirts support the heavy fabrics & underlinings used. Invisible hook & thread loops on delicate lace and embroidered Edwardian shirtwaists keep their look “light.” Put these thread loops on a bustle skirt and they simply won’t do a decent job.
Yes, how a garment is closed plays a huge role in keeping the structure and silhouette needed.
For delicate Regency dresses (we’ll stick to the gowns here and not include outerwear) any of these three options will suit very well and are the ones found in existing antique garments.
1 –Ties of Tape or Ribbon
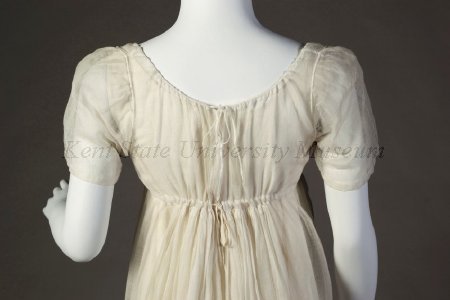
Probably THE most common of Regency dress closures is the bodice back simply closing with ties at the neckline and waistband.
Coming off the boned and pinned stomachers and bodices of the 1780s came the chemise dress which closed with ties or straight pins in the center front. This carried over into the 1790s when fashion was changing to the columnar styles of the new era.
Some of the earliest Regency round gowns of the late 1790s were closed in front with pins, metal hook & eyes, and as the bodice stayed full with gathers, ties but in the front. This bodice type kept the very narrow back bodice cut styling. As the closure moved to the back the simple methods of fastening went with it.
In my research, fastening a Regency bodice in the back with ties can be found on originals from the 1790s up to the late 18-Teens, and even beyond into the 1820s, although this type of closure was waning by then.
Ties were commonly flat, narrow cotton or linen tapes but could be ribbon too.
Sometimes you’ll see ties at the neckline that run through the entire neckline in a casing. This is for a gathered bodice look as well as an easy way to fit the dress to a figure. (So if your sister or cousin borrowed the dress they could do so without alterations.)
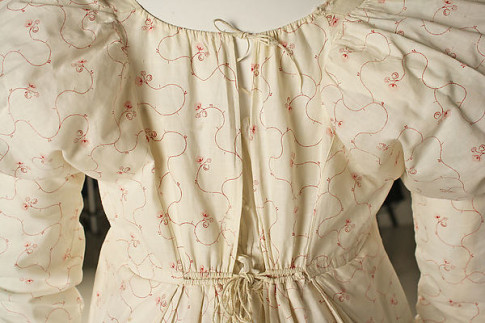
Other times the bodice is fitted to the wearer’s shoulders and back and the ties are sewn straight to the finished center back edges and tied to close. Sometimes the ties run through a casing that starts at the shoulder seam leaving the front bodice neckline smooth and un-gathered.
In similar fashion, the waistline/waistband closed with ties too. Most often they ran around the entire dress in a casing for fitting purposes; other times, like the neckline options, they were simply tacked to the center back edges to tie closed. A third method was to run them through a casing that began at the side back seam which made the center back panel adjustable but left the rest of the dress waistline fitted.
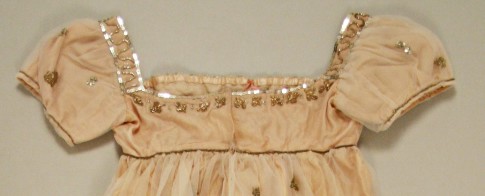
Now, as with all things in fashion, there are variations to the two-back-tie closure. In some originals (like this c.1820 dress sold on ebay) we’ll see a metal hook & eye at the waistband (which overlaps the center back closed somewhat) but then a tie at the neckline.
In others, we can see simple hook & eye sets at the same neckline and waistband place to close the dress, yet this closure is still in keeping with the light silhouette. And a bonus with this one, it completely hides the bodiced petticoat and/or corset which the plain two-tie closure can sometimes reveal.
I have only found dresses that close with ties that are placed at the neckline and waistband. I’ve not seen any examples that have a third tie in the middle of the bodice.
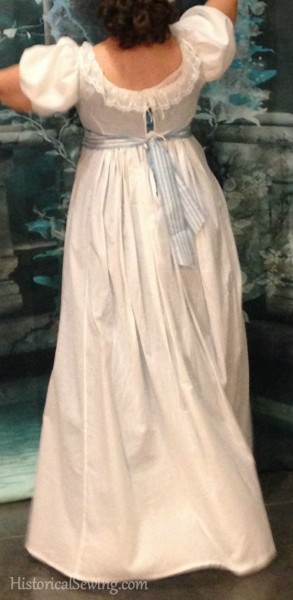
To our modern costumer sensibilities this may seem not enough of a closure to be secure. But truly, it’s okay. It’s historically accurate (even if your undergarments show a bit) – you can use it as a closure throughout the entire Regency Era – for both day and evening wear. Plus, it makes dressing super fast.
Yet one more variation of this “tie closure” is hand eyelets made along the center back edges and the bodice laced closed. On this dress the lining is laced closed with the bodice back tied together over it. The ultimate combination for fitting a variety of figures and/or weight differences.
2 – Drop Apron/Bib Front
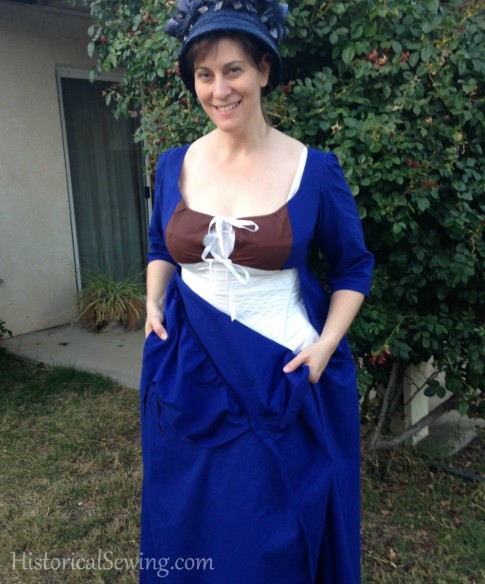
The second closure method found in the early 1800s is the dress cut to open in front known as an apron or bib-front gown. This style of dress was a carryover from the late 18th century gowns that closed with a fitted lining at center front then a stomacher (earlier decades) or jacket bodice pinned over it.
The dress is created with a short front lining attached to the sides of the dress in place of a full bodice front. The skirt is sliced at the sides with the back skirt panels attached to the back and sides of the bodice. The skirt front panel is sewn to the back skirt below the long slit and a bib-type, rectangular piece attached on top of the skirt front that will create the front bodice.
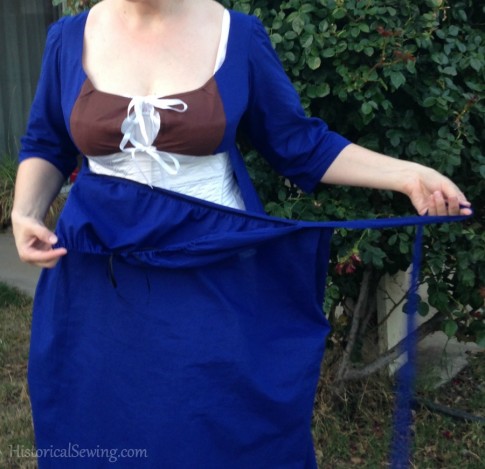
To wear, the arms go through the sleeves and the back of the dress pulled into place. The front lining pieces are closed (see below). Long ties are sewn to the front skirt/apron part at the waistline. These are tied around the body either over or under the back of the skirt. Finally, the front bib is secured over the lining.
Again, as with all, there are variations here in this dress closure.
For the lining: A – The front lining pieces can be overlapped and pinned shut. B – They can have ties on the edges and tied closed – the edges touching or even having a space between them. C – They can have eyelets and the front edges laced closed.
For the apron/bib: A – The top edges can be pinned to the bodice shoulder straps. B – The apron top can have button holes that fasten to buttons sewn to the shoulder straps. C – The top edges can be attached to the bodice proper with metal hooks & eyes or thread loops.
In my research, the bib-front gown was popular throughout the Regency years, examples found from the very late 1790s up through the late 18-Teens, although by the later times they have definitely fallen out of popularity – at least according to extant garments.
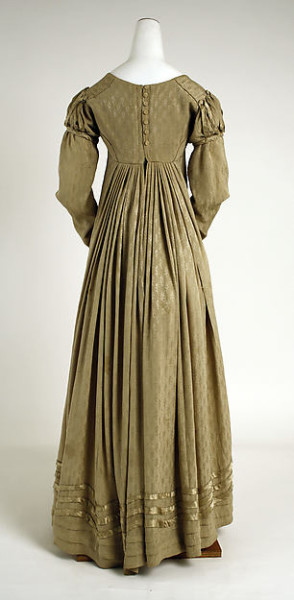
3 – Back Buttons
The third closure method we see in the Regency period is the bodice back being secured with buttons. Honestly, I thought this was a more common technique until I did a bit more research. Apparently back buttons were not really considered until the 18-Teens as the bodice and dress itself become more structured.
I’ll take a guess that the popularity of the 1995 A&E Pride & Prejudice production that shows many back buttoning bodices was/has been a huge influence on historical costumers and pattern drafters alike. The production is set more like 1813 which does reflect button closures of the period, but the vast majority of the actresses wearing them does not accurately show the more popular ties closures.
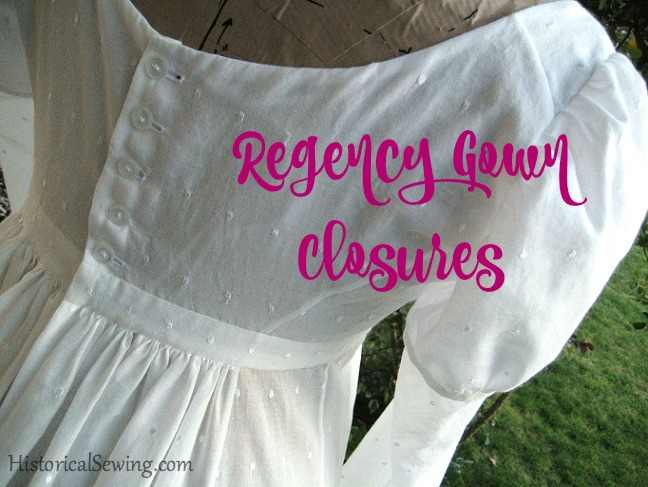
The closure of center back edges overlapping and three to five (generally) buttons to secure is indeed a nice way to finish off a dress. Buttons were shell or wood (natural substances) or, primarily, created from rings, aka Dorset buttons.
Research has shown the button closure to come into use in the 18-Teens but really more into mainstream in the 1820s. However, even as this is an appropriate closure, do your research to gather examples if you want to be more historically accurate.
So, the next time you’re whipping up a Regency dress for a ball or picnic, go with a basic bodice with drawstring or two-hook & eye closure at the neck and waist. Easy and done. You’ll be period accurate and perhaps find an extra hour to decorate that bonnet to go with your new dress.
What’s your favorite closure for Regency dresses? Have you tried the variations here? Which one do you want to attempt next?

I’m researching a dress in a museum in sweden. By my determination I think it has a center front hook and eye closure. would this be possible? it’s dated 1815
Yes, it is possible.
Very insightful! I am studying the regency era of fashion and have yet found where these fabrics would have been sourced? Could u help me out ?
You can find my recommended fabric sites on the Resource page . Enjoy shopping!
Hi,
A very helpful article!
The 1813 white evening gown, with the ruffle neckline, is very similar to a voile dress with a ruffle neckline I am trying to recreate from a 1810s portrait, altering the Sense and Sensibility pattern. How did you finish the skirt opening back? The pattern I have uses an overlapping placket, but how to did you so nicely finish the edges for a dress that simply meets in the middle and is tied with ribbon?
The skirt edges were finished with a narrow continuous bias placket that was first machine stitched to the slashed skirt opening then folded to the inside and hand slipstitched into place. Then a good press!
Thank you for this. I’m researching some details for a regency gown (historically accurate, of course) for myself and another hobby. One thing I don’t see here, but I’ve seen in some gowns (specifically contemporary gowns from Denmark and France) is spiral lacing. One thing I see a lot of people doing that is a big mistake is lattice lacing. Up until the mid-1800’s, most lacing was still spiral lacing. There’s a great example in the Met where the bodies are obviously laced wrong because they top and bottom don’t line up because someone tried to lattice lace instead of spiral lace it.
Sorry to soapbox! I love this post and the details you made so easily available to enthusiasts. Thank you!
Appreciate your comment, Lydia!
I haven’t come across Regency gowns with lacing closure, only corsets of the time, which were indeed mostly spiral laced, but corset examples exist, too, where cross lacing is seen. All the dresses I’ve seen in my research have the closures I’ve mentioned here. But neat to hear of gowns with lacing were in those countries!
I’m working on a chemisette, pattern from La Mode Bagatelle, and it calls for buttons up the front. Should these be self-fabric buttons? If so, can I just get the metal button kits from a fabric store and cover with my batiste? Thanks for all your encouragement and advice!
Shell or wood buttons would be better as the chemisette is more of an undergarment. However, you could do fabric covered, but keep the size small.
Ohh so glad for these blogs! Especially on regency dresses, undergarments etc, as I’m starting my first project after following this blog for close on to two years!
I’m definitely going for the drawstring closure on my new dress, it sounds fairly easily, otherwise I might give the buttons a chance
Thank you for all these good advice!
When you say ‘pins’ are you referring to straight pins, like in dressmaking or something like a safety pin?
Yes, straight pins. In the 18th century and into the 19th century some garments were merely pinned closed. Specific pins were made for this use – generally they were longer and stronger than pins you sewed with. For modern use (to be historically correct) basic, straight sewing pins will work. Safety pins as we know them didn’t come into use until the late Victorian decades of the 19th century, and even then, not frequently.
I just have one question: I have also seen dresses with grommets with ribbon through them to pull together the back of a dress. (4 on each side which lace up) Was this ever done historically? I hope so because I have a dress I have made that isn’t the size I thought it was and I am thinking of doing this for my most recent dress, either that or doing hooks and eyes and waiting until I fit into it again. I don’t really want to wait, so what would you suggest?
I mention this briefly in this post in the first section. I’ve found this dress that has the lining closing in center back with hand eyelets (metal grommets were not available yet) but then the bodice back is tied over it. Talk about fully adjustable!! However, I’ve not come across a dress that closes just with eyelets and lacing. The lining closing with lacing and the back covering is a carry over from the adjustable sack back gowns from the mid-18th century.
On your dress, could you hand tack a new bodice back (with ties to close) over what you have currently and convert the current bodice back to lacing? That would be an option if you have more fabric to cut a new back.
“lining closing in center back with hand eyelets (metal grommets were not available yet) but then the bodice back is tied over it. Talk about fully adjustable!! ”
That also puts the stress of wear onto the heavier lining fabric, so the bodice material is protected.
Indeed!
Great summary! My first regency gownhad a bib front. My second gown had buttons in the back (it was 1814, so I’m still good 😉 ) I Guess my third dress will need to have ribbons.
Very Interesting! Thank you!
Thanks for this great post, Jennifer! I remember seeing a post on another blog with photographs of various Regency era dress backs, but I haven’t been able to find it since.
I’ve made Regency-era gowns for the models on the covers of my historical romance novels. The first used buttons, but the second was a front bib closure with pins. The latest one which I’m just finishing will use hook & eyes (which I ordered from the Tudor Tailor in England; I figured if they are authentic to the Tudor period, they must have been in use in the Regency, too). Do you have other sources for historically accurate hook & eye closures?
— Bliss Bennet
Other sources, how? Proof of using the hooks & eyes or actually purchasing them today for use?
I’m actually relieved that the button back was not the most popular. I hate needing to have help getting dressed.
Nice overview! I think we tend to gravitate towards the button-up closures because it’s closest to what we do nowadays, but definitely not the most common back then!
My first regency dress has eyes and hooks at the back. The whole length though, so not entirely sure how accurate that is. The second one is a complex mix of loads of ties and a couple of pins. Even though I’ve never seen one exactly like it, I think it’s at least plausible. I’ve tried to describe some variations on the front-closing dresses here.