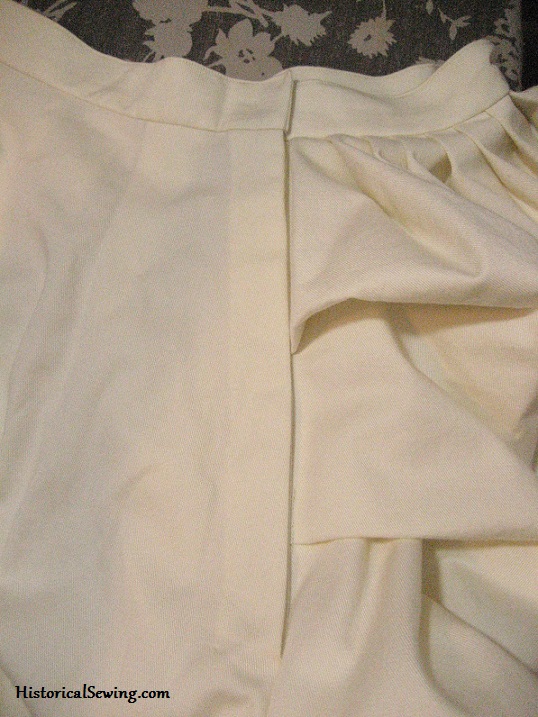
Ever make a skirt where you sew up all the side seams – easy, right? – then you have to figure out what to do with the opening? (Hopefully you left an opening in one of the side seams. 🙂 ) It’s not always as simple as folding the raw edges to the inside and stitching down.
A well-made skirt opening shows off good dressmaking skills – yes, even if you can’t really see it. With a separately attached placket on Victorian skirts the closure is strong and supported – perfect for heavy skirts of the late 1800s.
Let’s look at the how to cut a skirt placket then how to attach it to your skirt for a smooth, “hidden” closure.
I find it easier to set in the placket first before sewing any other of the panel seams. In fact, it’s one of the first things I do on my Late Victorian skirts, right after flatlining and before the main side seams.
A skirt placket is generally applied to the center back or a side back seam (usually on the left side). Rarely are they in the front. Plackets are straight strips of fabric sewn to the opening edges. (I know, boring but oh-so-practical.)
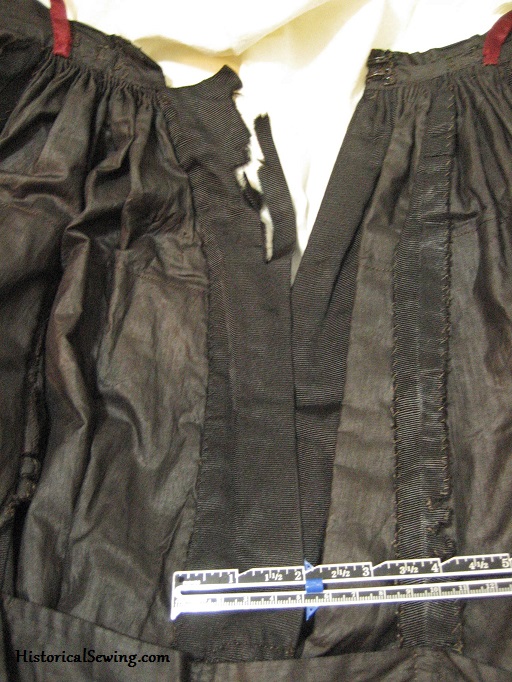
Cutting a Placket: Width
Finished skirts plackets are commonly 1.25” to 1.5” wide. For thin or sheer fabrics use a 1″ inch wide or smaller placket. Based on originals, you may want a narrower placket piece for the back or right-hand side of the skirt.
For length allow a longer placket opening than anticipated – trust me on this one. Corsets, chemises, petticoats, hoops, bustles, hairpieces, etc., all add to the body circumference. The shortest length recommended for a skirt opening is 8”. Period dressmaking manuals recommend 10” to 14”. You can use 9” to 12” for most period skirts and be fine too.
Decide your finished placket width. Let’s use 1.25″.
The formula is: skirt seam allowance + (finished placket width x 2) + skirt seam allowance
So for our 1.25″ placket we need to cut a strip of fabric 3.5″ wide.
Sewing Tip: Add your finished placket width to your waistband before cutting. Even though we set on placket facings to both skirt panels, you only need to add one additional width. So if you cut a 32″ waistband (with seams) then add 1.25″ more before cutting.
Cutting a Placket: Length
Decide your skirt opening length; we’ll use 12″ because of our awesome bustle layers.
The formula is: waist seam allowance + finished opening length + end seam allowance of 0.5″ or more
So for our opening we need to cut the placket strip 13″ long.
Setting in a Placket
The skirt side seam can be sewn before or after applying the placket (I prefer to do the placket first as you see in this article). Remember to leave the seam allowance on the bottom of the placket pieces free so they can be stitched together later after the seam is sewn.
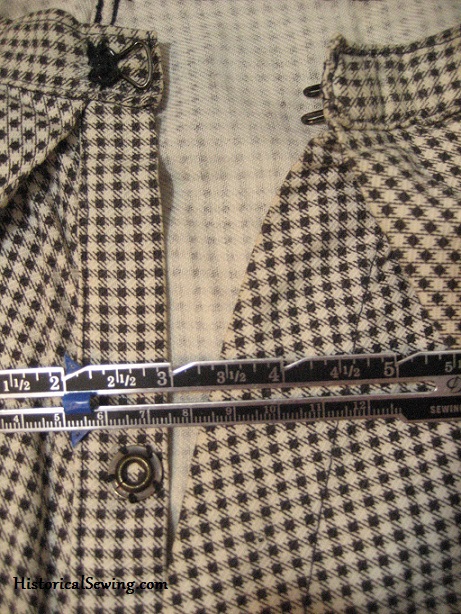
When sewing the placket, you want the placket piece on the back or right hand panel to stick out towards the front. The placket on the side back or left skirt panel is turned completely to the inside.
Cut two placket pieces according to the measurements above (13″ long by 3.5″ wide). Depending on your fabric, you may want to flatline the placket that will be sticking out from the seam for support for closure pieces. Finish the lower edge with pinking, serging or zigzag stitch.
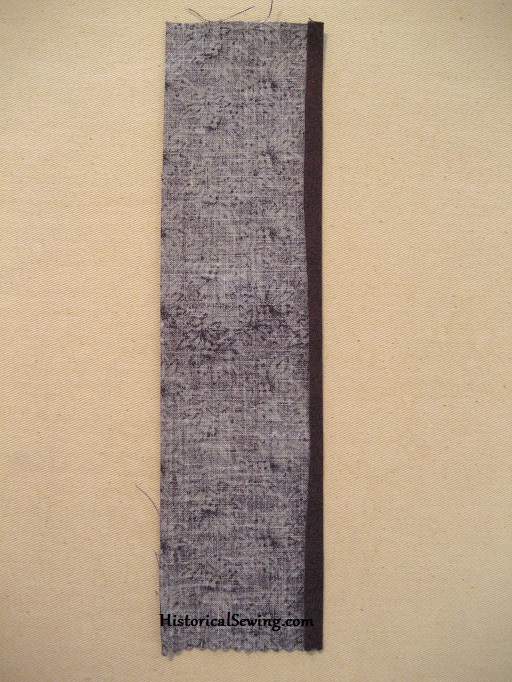
Right or Back Panel of Skirt
Press under the seam allowance on one long edge of placket piece. Trim (see above photo).
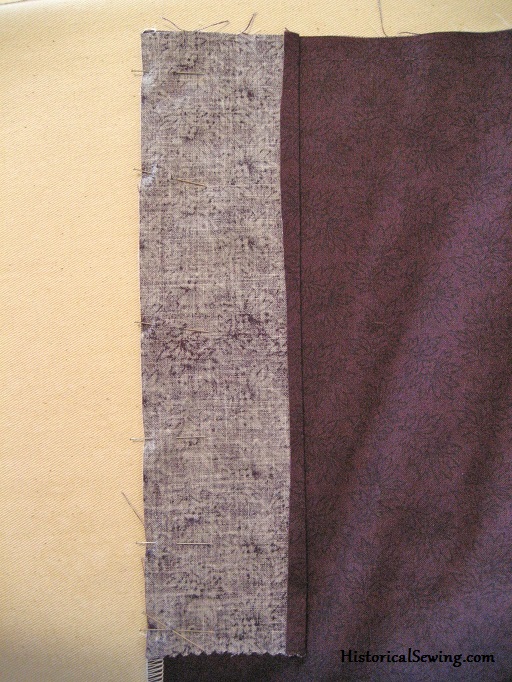
Right sides together and matching raw edges (of placket and skirt), stitch placket to skirt along opening. Grade seam then press the seam allowances toward placket.
Press placket in half (lengthwise) and tack pressed edge of placket over seam line along the inside. Leave the placket sticking out away from the skirt.
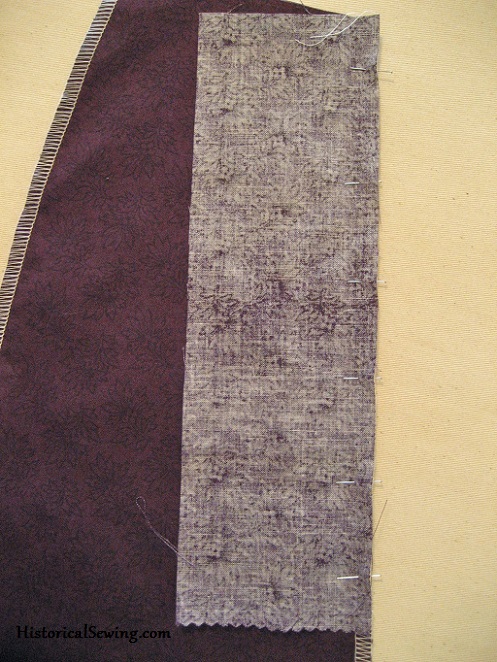
Left or Side Back Panel of Skirt
Stitch placket to skirt at opening, right sides together (above). Press seam flat; grade and press seam allowances towards skirt.
Press placket in half matching raw edge to seam, then press again the entire placket to the inside and baste across the top at the waistline. You can trim the excess underneath to eliminate bulk before stitching down. Hand tack outer fold of placket to skirt underlining to secure.
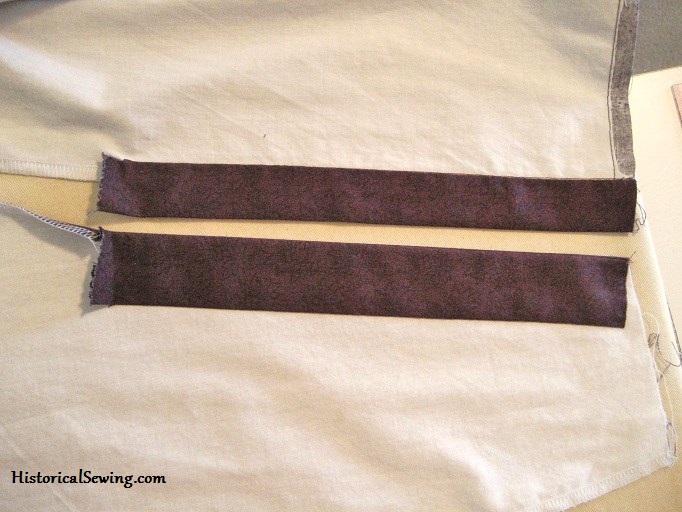
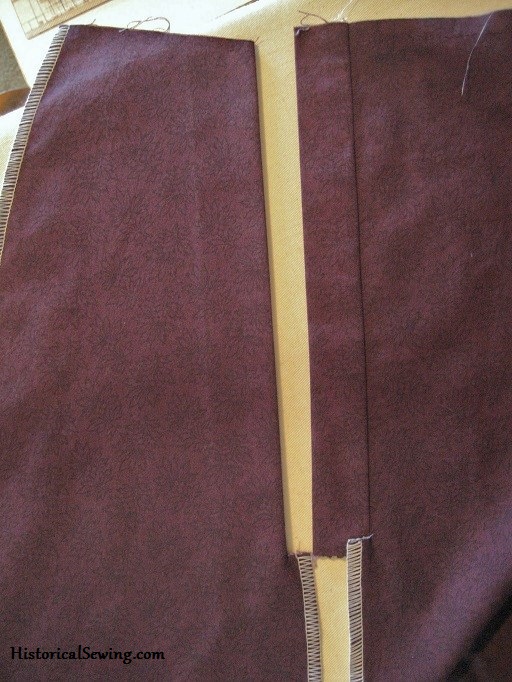
Sew the skirt seam from hem up to where the placket pieces are sewn on. Keep the placket out of the way of the seam.
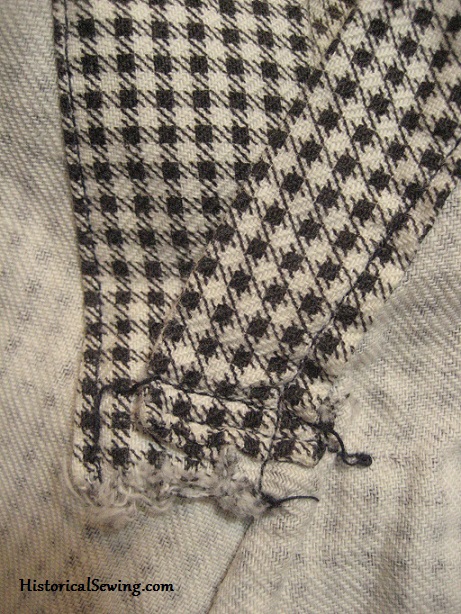
To complete the placket, turn the skirt to the inside. Overlap the finished opening aligning the skirt seam lines, and stitch across the ends of the placket pieces to hold in place.
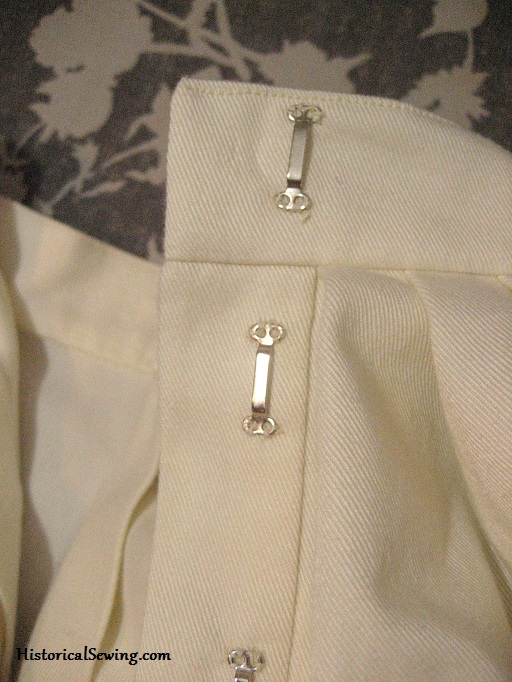
The waistband will start at the edge of where the placket is turned completely to the inside, go around the top of the skirt, attach to the top of the opposite placket, and end at the placket edge.
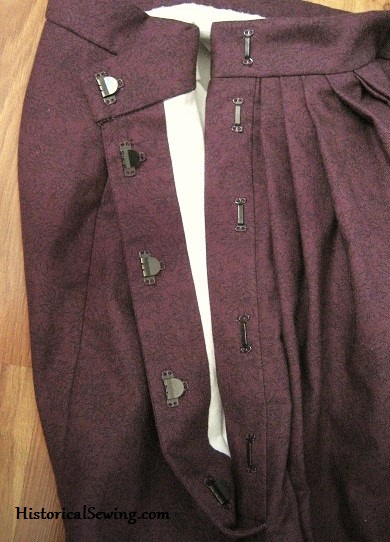
To finish, sew hooks along the skirt placket that’s completely turned inside. Place eyes or bars on the under placket making sure when placket is closed, the garment edges will meet. This is important to hide the placket in the seam.
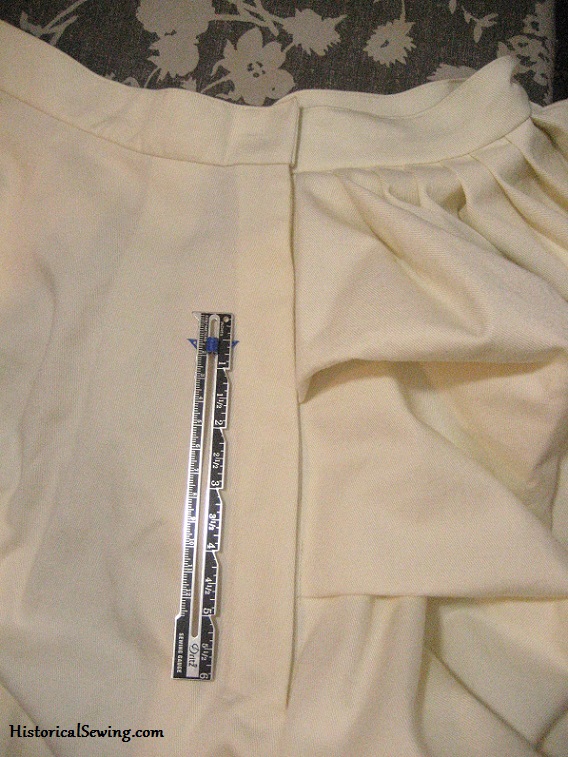
When closed, the front placket aligns with the seam of the back placket, creating a complete seam line. Voila! A hidden but sturdy skirt placket!
Do you use plackets to finish your skirt openings? Have you discovered any tricks of your own when sewing in a full placket like the ones here? Share below in the comments.

Hello! Sorry this is a question on an old post but I was curious,
I used this tutorial recently on an Edwardian skirt pattern (bless you!) but was having trouble with the fasteners in the placket. The waistband closure is fine but the hook and bars I placed in the placket don’t seem to want to
1. Stay closed, they keep unhooking themselves
2. Stay flat, the skirt fabric is a bit heavy I think? It pulls at the placket and pulls the center back out of shape if that makes sense?
Do you know if it might be the hooks are too small – will changing the hook/bar size assist this? Or would a different closure in the placket work better?
I tried googling but couldn’t find any answers so thought I’d try where I learnt the placket in the first place!
No biggie if this isn’t the place to ask 🙂
Cheers for the tutorial though!! <3
Glad to hear this tutorial helped!
1. Try gently bending the head of the hook down (closing the open space) a little with needle nose pliers. This may help the hook to stay in place a bit better. I do this often. Be gentle and go slow so you don’t close up the hook too much!
2. This might be a fitting issue… as in, not enough fabric to go over your hips below the waist. Yes, the hooks *might* be too small. I use the wide skirt hooks/bars (shown in this tutorial) rather than “regular” hooks/eyes. With regular ones I’d recommend a size 3 for skirt plackets. You might look at setting the sets closer together, too, to prevent uneven pulling.
Good luck!
Thank you for your response!
Yeah the hooks I’m using I think are a standard size 2 and even though they’re set 1” from each other… they might be just a touch too small
As for fit I thought that they keep unhooking because the skirt was too big! There’s two big pleats that fold towards the centre back and top stitched in place to the hips but I might try adding some width and see if that improves!
Thank you so much for the tips!! Xx
The fact that the waistband fasten works, make me think that is the absence of tension on the placket.
I would so love if you gave a complete class on plackets! I have been looking everywhere for information and almost all the sites I’ve gone to have covered modern methods (such as those with zippers). This tutorial has been very helpful and clear. I think it’s the only one that suggested making the plackets then sewing the seem. I can’t help but think there is so much more to be covered, such as plackets with pleats, etc. Thanks for a great post! So helpful!
Hi Shannon,
This post was based on the tutorial in the skirt lesson from my Bustle Day Dress Class. I’m so happy to hear it’s been helpful to you!
Hi, do you have any recommendations for modifying a currently zipped skirt to this method? I already need to replace the waistband and I thought I ‘d take the opportunity to make it more historically accurate (I also majorly fail with zips anyway)
Thanks in advance
Rip out the zip and use the remaining seam allowance to sew the placket pieces to. Cut the waistband 1″ longer to over lap the other waistband end. The placket sits right at the seam line with no overlap. Should be rather easy to accomplish this. Good luck!
This was so helpful!
When setting the placket, do I need to sew that in before or after I do my cartridge pleats?
Thanks!
I don’t recommend a full placket like this when doing cartridge pleats. You want the pleats to be close to the opening to prevent a break in the pleating line visually. Generally with cartridge pleats I simply turn under and narrow hem the slit or seam and start the pleating thread close to it. This full placket is more for later Victorian skirts where knife pleating is used to bring in the fabric to fit the waist.
I’ve been sewing on my plackets after the seams were sewn and they never look pretty. They kind of bunch up at the bottom. So I’m going to try this method of doing them first next time. Hopefully I remember. Thank you!
Val
So valuable! My Victorian skirt patterns don’t include this!
Once again, thank you so much for another helpful tip!
It seems like every post I read here improves my own sewing just a wee bit, and the bits add up. Just following this blog is an awesome sewing course in itself!
Great tute. I’m working on a dress that opens down the front and has a 10″ opening in the skirt front and this is perfect for finishing that opening.
Amazing!
Thank you so much for sharing this!
I like to make a placket/pocket. It covers the opening of the skirt and gives me a safe place to stash personal items. It’s also a bit forgiving if I wait too late before an event to try on my clothes and find out I need to adjust the waistband a bit. I LOVE your site! I am so happy to have discovered it. I have been sewing forever and you still always have something interesting to show us. Thank you!
You are welcome Holley!
Have you read my big pocket article yet? Pockets are awesome!
Thank you. This is soo helpful.
THANK YOU… this is SO MUCH help!! – the only successful placket i have ever done was with your instructions.. as someone with some perceptual problems having this laid out for visual reference like this is pure gold for me..
Thanks SO much for this! I’m a pretty fair seamstress, but until now was never exactly sure how to get that placket correct. Fabulous! Looks like putting the placket in the side back seam would solve another problem: all the weight of the center back pleats/gathers tending to droop and pull the placket open. How common is the side back opening, versus the center back in historical garments? Does it vary during the various decades?
It varies with skirt design. You’ll many 1870s & 1880s openings in the side back but also in the center back. 1890s are common to have both as well. But then in the 1840s through 1860s you’ll see openings on the side front, occasionally the center front, and then in the center back; yes, it would depend on the skirt styling.
This is interesting. I usually do my plackets like you would do one for cuffs on sleeves (continuous lap?) using a peice of bias fabric.
The continuous lap placket is another way to finish a skirt opening and it’s mainly reserved for thin materials, cartridge pleated skirts, and delicate designs. The placket here is for supporting heavy and/or layered skirts. It was quite popular from the later 1860s on through the Edwardian years and is a placket that works for many decades.