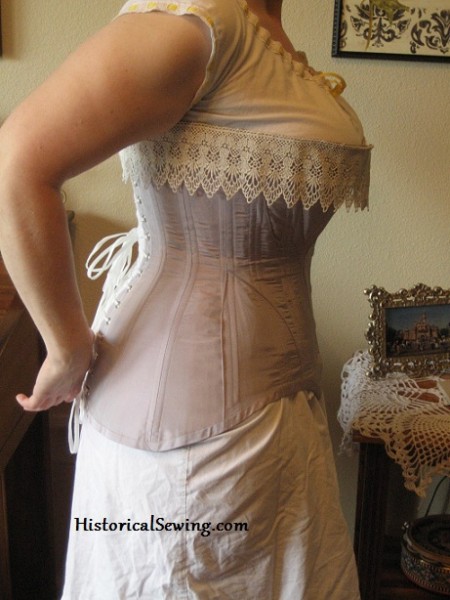
Made from the same blackberry cream silk I used on my 1873 ruched gown, I can now add Edwardian corset to my list of completed projects. Yay!
Last summer Heather over at Truly Victorian came out with the most delicious surprises – she had ventured over the Century mark into the Edwardian Era. Did you swoon like I did?? And not only were skirts and a blouse available, she made a corset pattern too!! I mean, the one from Past Patterns is good but how many of us know the loveliness that is TV patterns?
So here is my rendition of this fantastic new pattern.
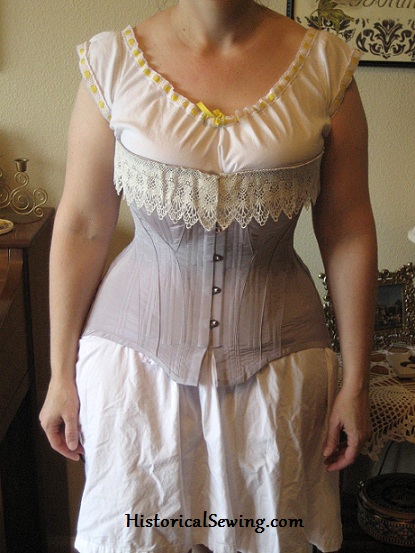
At Costume College 2011 I was approached by CGW to present a workshop class on this corset. Great! I had a few dozen corset projects under my belt but not this new one (obviously). Autumn came and was quickly turning into the holidays and my own version of the corset was not done.
So I did what any sewing teacher would do – create a sew-along to push my own backside into moving forward and finishing. It worked, despite finishing 3 weeks late from tax season hitting my schedule.
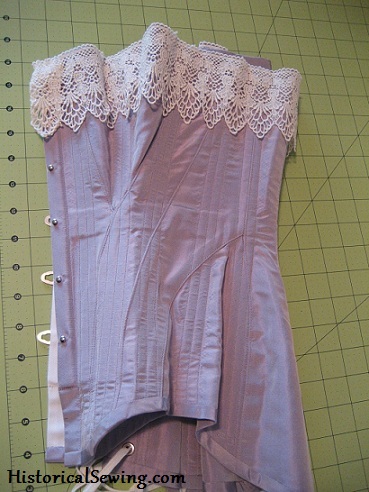
I LOVE the final result!
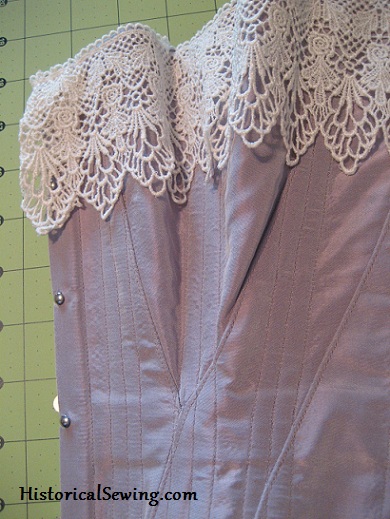
The corset itself is one layer (or two if you decide to add a fashion fabric cover on top like I did) with bones encased in ¾” bone casing – two per casing so it makes for a lot of metal.
The six pieces are fairly easy to piece, but the gores at the bust and hips can make you scream & yell if you’re not careful. They go in like a true gore rather than like Regency corset gussets where you snip the edge then turn the raw edges under and top stitch.
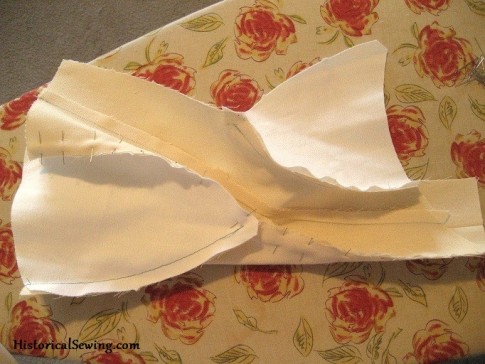
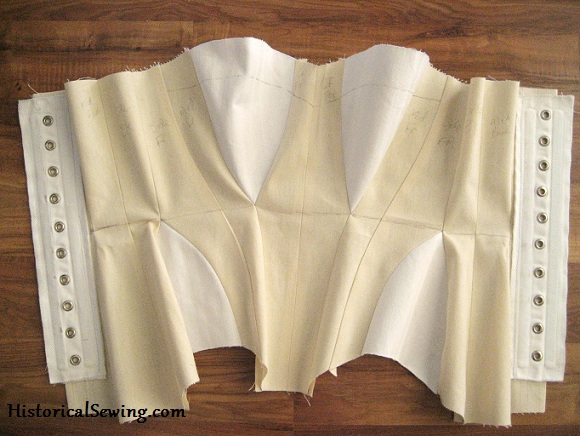
My mockup was made from a heavy canvas and scrap coutil with my handy-dandy grommet strips for fitting. I had to be careful not to cinch too tightly during the fitting as bias is present on those curved seams. Plus there was no support of finished seams, heavy coutil or waist twill tape.
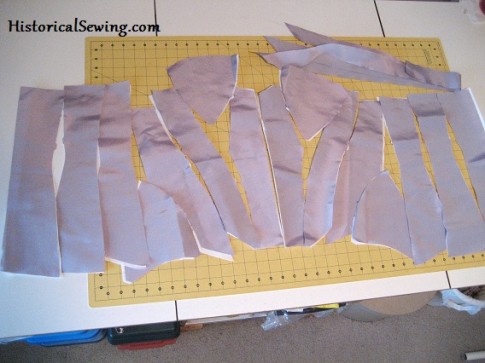
Here are the panels and gores cut out and ready to flatline and piece together.
The center edges are finished with a separate facing which is simply sewn to the edge and turned inside. The instructions say to turn under the facing raw edge and topstitch to the corset. This is how you normally finish a facing.
Apparently it didn’t like me.
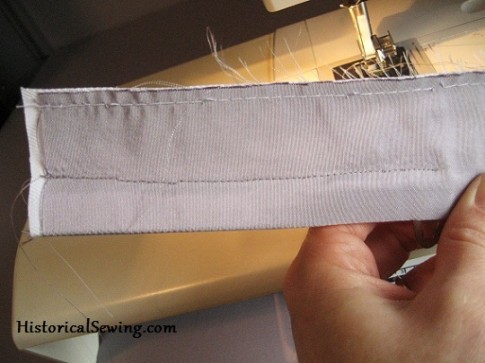
That folded edge seemed too thick for my liking so I ended up just trimming off the turn under and (maybe someday) going back and whipping that raw edge down.
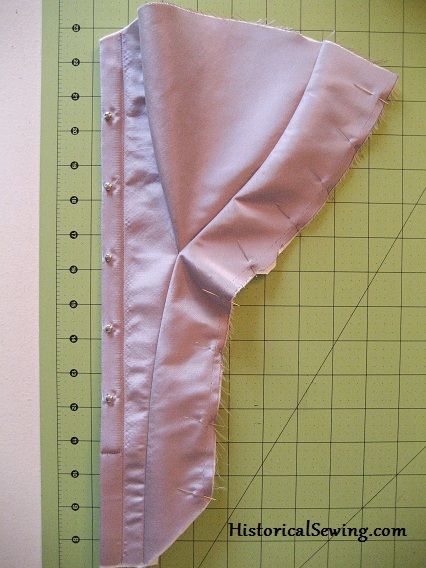
Bone Casings
I’ve done a few dozen corsets. I’ve even written a workbook on how to make them. But I have to say that the bone casings on this particular corset kinda scared me. They are intimidating!
The back ones are fine. It’s those placements over the curved front seams and bust gore that just freaked me out to a point of procrastination. As I mention most often, the only way to get it done is to tackle it head on and just do it. So I forced myself to.
But it wasn’t easy. I sewed the back casings in first. Quick, not too hard. Done.
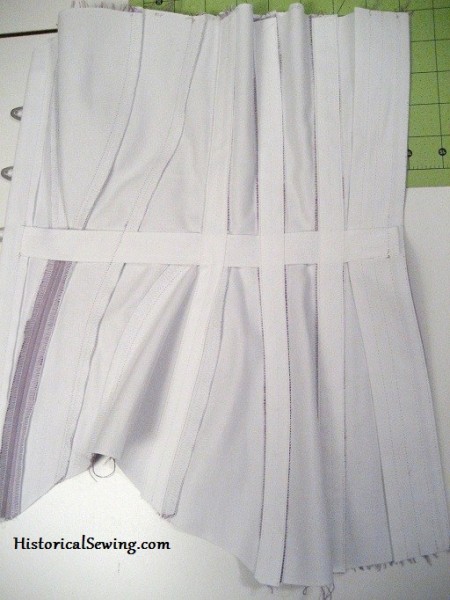
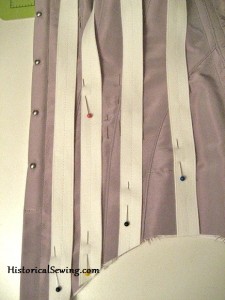
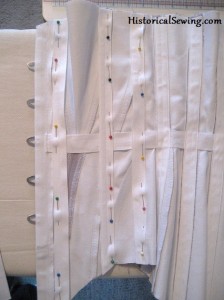
To help me understand and get the right placement of the front casings, I ended up pinning strips of casing to the right side of the corset to better see where to put them. It actually helped a lot. Then I simply transferred that placement to the inside and sewed them down.
Sitting Down
I CAN sit down in it. Right before I finished the binding on the bottom I did a quick fit and trimmed the center front about an inch, tapering up to the thigh cutout. The long back length doesn’t affect my sitting.
Initially I cut out the high bust line. But if you look at the mockup (above) you can see the new cut line I drew in. Now that it’s done, I love the line but think that (next time) I could cut it down even lower.
Padding
Some people I’ve talked with seem to think oddly at the pads that are used for this pattern. Well, you have two bust pads, elongated-shaped-not-stuffed-full-thingies, and a rounded hip pad not unlike a Natural Form bustle pad.
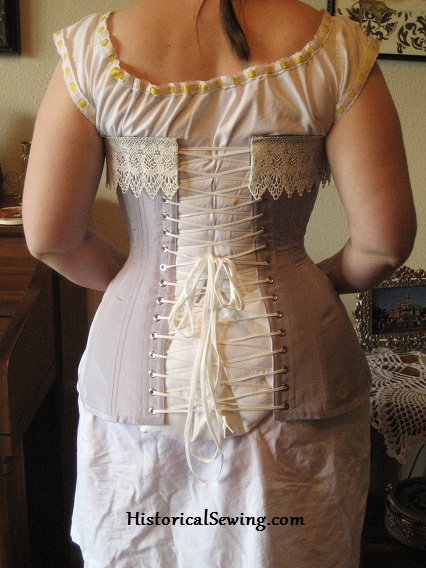
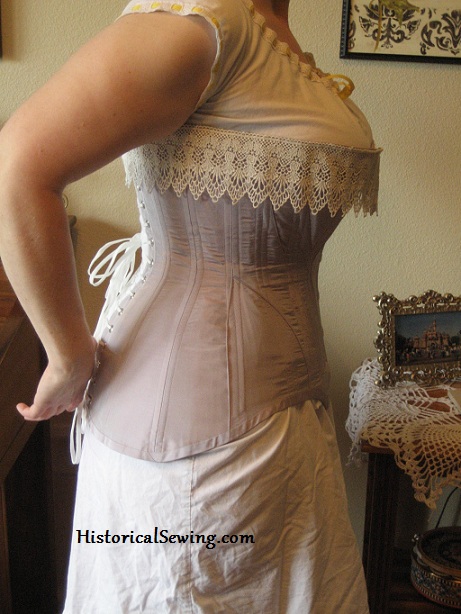
The hip pad sits UNDER the corset. Oh, but I’ve found it’s easier to say this but in trying to actually get it to sit correctly, you have to fiddle with the placement as you cinch up the corset. The hip pad is to round out the slope of the back side from just below the waist down to the curve of the butt. This is what gives that CURVY, feminine S-Curve shape of the Edwardian Era.
I think to obtain a great silhouette for myself, I need another pad between my corset and petticoats as my back side is quite flat. But I would not eliminate the pad under the corset as it helps SO much with the silhouette.
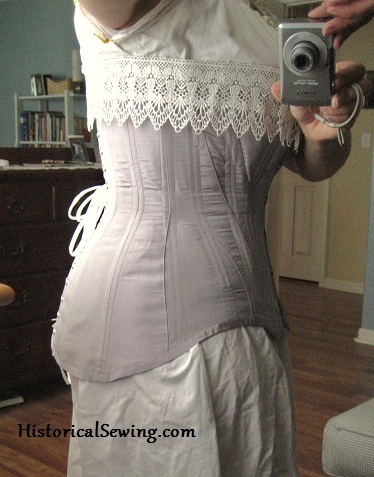
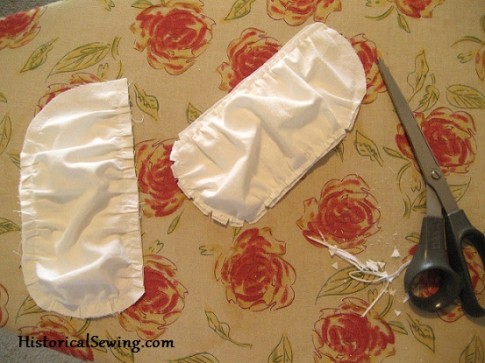
The bust pads don’t increase the bust. No. They sit UNDER the curve of the bust to create a smooth, rounded line from bust apex to waist. Remember this is the early 1900s and the center front is straight with a droopy, pouch-y bust line. Then you add bust ruffles to a corset cover to help with the rest of the silhouette, like the lady below.
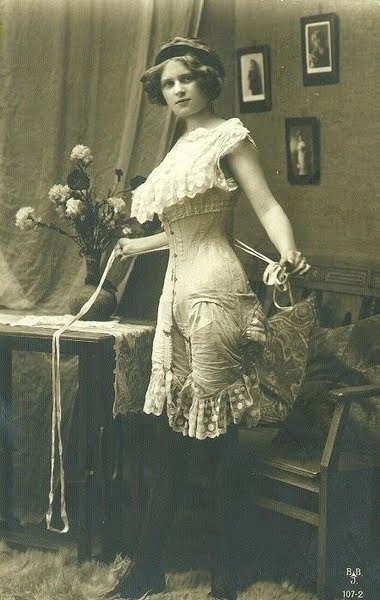
Overall I love this corset! I love the silhouette results. I love that it’s purple! 🙂
The pattern was fairly easy although the instructions can be weak at times or muddled. Take your time reading them over and over. I especially note the caution needed for picking out the size to cut. Read and re-read as it is SO important to start with the proper size.
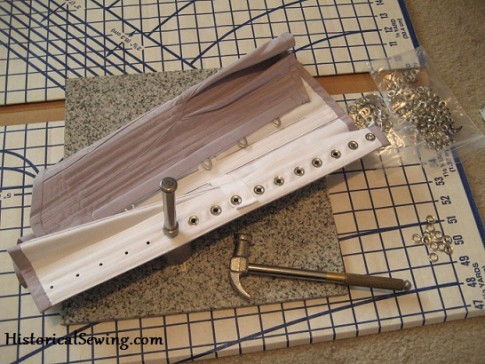
And don’t overfit. Heather (at T.V.) warned those of us in the Sew Along to not fit to perfection with this particular style. It’s supposed to just hug your natural figure with the pads rounding out the shape.
The plan is to add some flossing to the bone ends, but that’s the challenge since I’ve not specifically done embroidery on a corset. And garter straps may also be added. But we’ll see with time. For now it’s lovely and wearable.

I’m working on a Gibson Girl-inspired costume currently and I’m just waiting for all my materials to come in. I got this pattern for the corset and the matching TV Edwardian undergarments so having these “walkthroughs” of the patterns are so very helpful! I’m really excited to actually get sewing, but it’ll be a minute before my coutil and bones and everything else arrives, so in the meantime I’ll be studying your posts 🙂
Enjoy your project, Iris!
I am taking a break from my bustle dress to make one of these, and I am curious how you fitted this. On Heather’s message board she said that you really can’t do much of a mockup on this pattern, you just have to make it and see what happens. The corset will change your shape when you lace in. What happened with you? I’ve made a mockup and – wow!- it really has that Edwardian shape to it that I love, but there is a LOT of space on top. I went with the lowest bust (so it’s almost but not quite an underbust) and the highest hip, as I stand 5’1″) Thanks! (also, your corset class is AMAZING and has been a great jumping off point for this project. super cool!)
I made a mockup too and checked the fit as I usually do with my corset mockups. Some boning was added to the mockup and I made sure to put in the bust pads – below the bust in the curve between bust and torso! – and the hip pad to check the fit. The corset DOES tilt the torso slightly when you lace in. I managed it slightly on the mockup by having those bones in the seams and lacing strips on the back.
The key is to really follow the measurements in the pattern to select your size. I found the bust slightly big but not too much. I’ve seen others made up and an see the “bow front” of the corset. It’s almost like it’s TOO big of a cut around the front bust. In my further research over the years the corsets were against the bust (or just under it) and the corset covers and bust enhancers were what created the more S-Bend shaping – NOT the corset itself. The corset is a starting point.
So, I’d recommend you look at the width of those front panels and bring them in if you have too much space. But remember to add the padding under the bust before you start tweaking the panel widths. They do indeed help with the bow front look. Good luck!
How is this to wear? It doesn’t look like it’s severely straight-fronted. I’m interested in making this pattern, but concerned that a straight-front corset would exacerbate low back trouble by pressing my belly and pelvis backward, even if I don’t lace it tightly.
I find it very comfortable. It doesn’t tilt the pelvis back but rather a bit forward, but not much. The padding is what helps with the S-bend silhouette rather than the body being tilted. It’s quite lovely to wear.
How do you think I should make one of these? I have a long waist, a flat stomach, curvy hips, rounded bum, poky ribs and a small bust. Lots of padding under the bust perhaps? Would this pattern suit or would you suggest a different one?
This pattern is a dream and gives a nice silhouette. The padding goes under the bust to pad out the hollow between the bust curve and the torso but doesn’t increase the bust necessarily like other bust pads do. If your back side is already round for the Edwardian silhouette you can leave off the hip pad.
Thankyou for the tips! I’ll get this pattern when I’m done sewing my 1780s stays 😉
You always have the nicest trim. You don’t, by chance, make your own…. Do you?
Thanks! Not usually unless it’s self-trim (cut from the dress fabric) or layered looks with multiple ribbons. This lace was found in Downtown L.A. – of course…. 🙂
Really amazing work Jennifer!! I am so impressed!
Thanks Kathleen!
http://www.historicallydressed.com/patterns/1910sbrassiere.html
Check out this free pattern.
Laurie
I made a Wedding Corset. I love it so much better then boned. What do you think of it instead of boned ones? It also does not cause the muffin top in my back fat.
Also: I try to get a smaller waist but I end up with rib bruises after a long day. How to avoid this.
To avoid bruising (which is totally possible), the corset needs to be moved down on your body so the lacing is pulling AT YOUR WAIST and not at your ribcage area. And as a modern woman who doesn’t wear a corset every day, it takes time to get a smaller waist.
Thanks Jennifer. Diving in with a little more confidence now. 🙂
Received my TV pattern Saturday and starting it today. Your post will come in very handy.
Question 1: This style works well for the “S” shaped victorian style, but does it work for the straighter hobble skirt look too?
Question 2: What about a brassiere? Do you have a favorite pattern? I know they wore them with the underbust corset, but haven’t located a pattern yet. I got so desperate that I actually bought an extant brassiere from England on ebay yesterday. Can’t wait for it to arrive even though it is too small for my full bust. Thinking I can draft one to fit after seeing it in person.
You can definitely use this pattern for a late Edwardian/Titanic look. You’ll want to leave off the pads and eliminate any corset cover with ruffles. Cut the high bust line and the long hip to smooth everything into place.
As for a brassiere – I haven’t done much research on them and don’t know of many available patterns. They were pretty basic. The underbust/low-line corset in the late Edwardian era usually had a chemisette/corset cover and a tight chemise to give bust support. The separate brassiere (in my research) came later in the Teens. If you find a pattern let me know!
This is stunning. I’ve just made my first period costume (a Regency dress that looks more like a plain slip with uneven sleeves o_O), but I hope one day to be able to make something like this. Corsets are just so intimidating. I’ll be working with boning for the first time on an evening gown I’m starting next week (I’m helping throw a Royal Ball at my library), so hopefully that will help dispel some of my corset fears! 🙂
Yay for your your new gown!
You will find the Corset Workbook a great help in relieving your fears on making a corset. They aren’t hard per se but you do need to know the steps. https://historicalsewing.com/victorian-corset-sewing-workbook
This is truly lovely!
Thank you Lola!