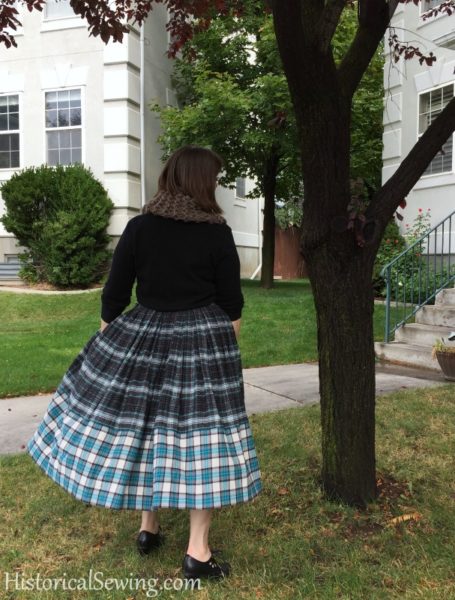
First – I LOVE this skirt!!
Janet the creative mind, designer, and pattern maker over at Decades of Style Pattern Company contacted me last month asking if I’d like to test her newest pattern. She graciously send me an in-progress version so I could make it up and blog about my project which is what you’re now reading. 😉
I’ve known Janet for several years, first meeting her at Costume College way back when she was getting knee deep into her pattern line. I’ve made a few of her designs and have various yardages in my stash to make more of them.
When she showed me her skirt sample for, what she is calling, a “chore skirt” I was bounding with joy to make it up.
See… me and skirt sewing go well together. I love making modern/basic skirts.
This Chore Skirt design is calf length which makes it even more desirable for me to make and wear. [LOVE]
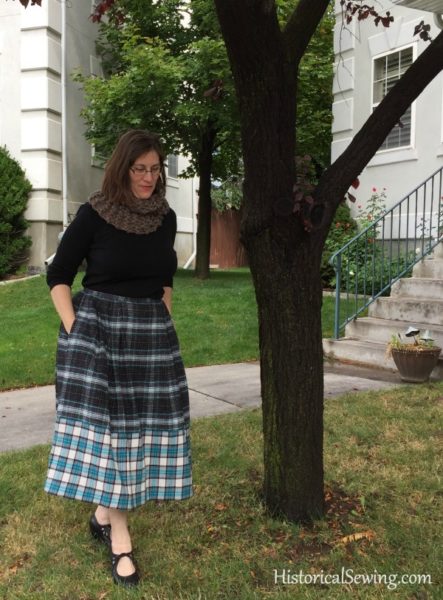
We chatted about fabrics and yardages looking at her sample using two different, but complementary, print fabrics. Since we are heading into fall now my mind went to suiting fabrics, wools, flannels, and the like.
With yardage amounts in hand off to the fabric store I went where I stumbled upon all the gorgeous cotton plaids ready for Outlander autumn sewing.
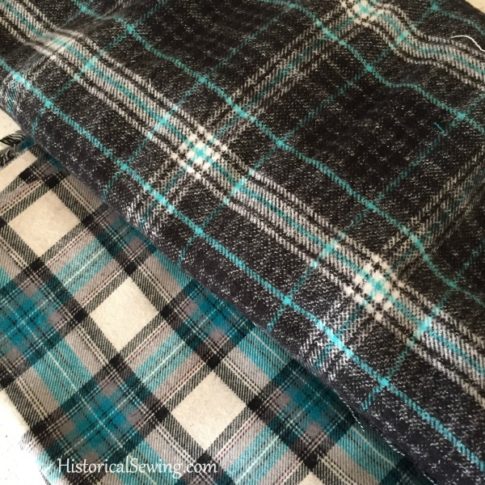
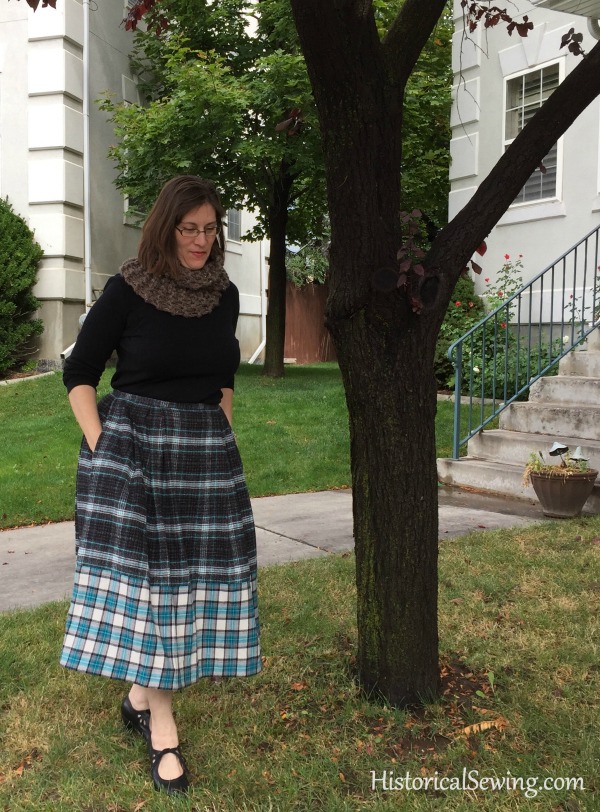
I selected a heavier black plaid for the main fabric and a much lighter weight white and teal plaid for the lower skirt band.
They went well together but I did have some concern about the weights being so different even though both were 100% cotton and of the flannel-plaid variety. But I bravely went forward hoping that the unique construction of putting drapery weights in the hem (along with the very full pleated skirt back) would give the lighter plaid fabric stability and just the right amount of swing.
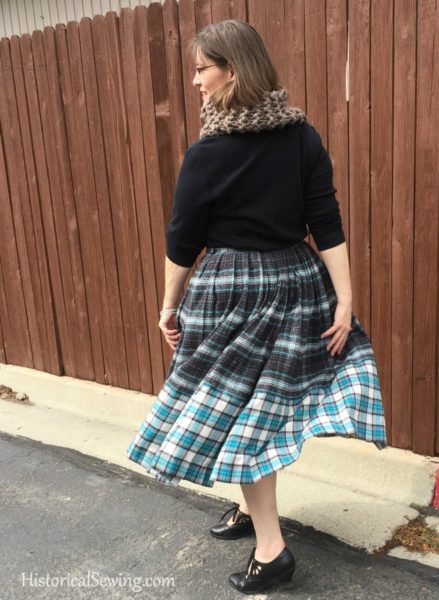
I made up the size 14 as drafted even though my hips are bigger in the size chart. Janet assured me the skirt is full in the hips and to sew it according to my waist measure. Ok, then! Onward.
I marked the notches for my size for easier visibility when cutting out the fabric panels. I love that she gives so many sizes all included in the one pattern.
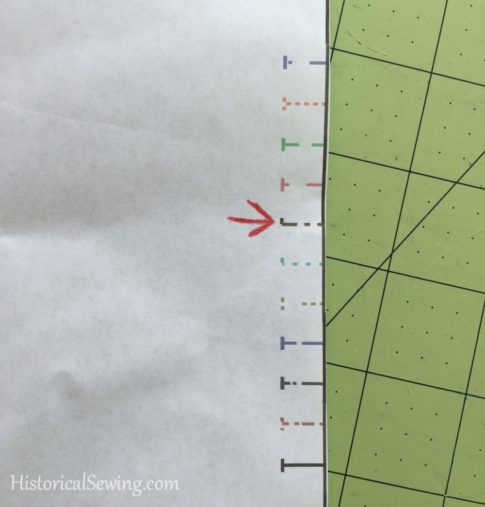
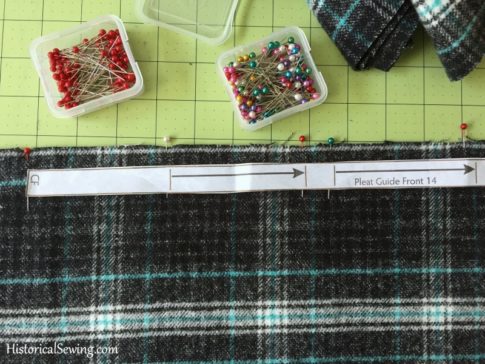
I also really appreciated the pleat guides that were given for each size! Like, I didn’t have to try and calculate pleats or Divide & Conquer or do weird stuff with pins for hours at my sewing table. No, beautifully spaced pleats are ready for you to set into your fabric with the hard work done by the pattern maker – yipee!
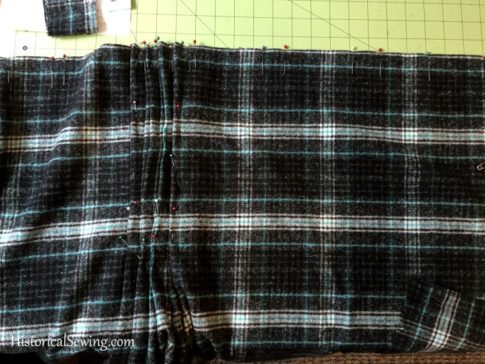
Because my black plaid was super heavy/thick the pleats did give me some issues and I did, in fact, spend a few hours more than desired in pleating up the fabric into (fabulously) stacked pleats.
Fortunately I had the plaid design to help me keep them straight. I would imagine an allover cotton quilting print fabric would be a bit more challenging to keeping the pleats on-grain.
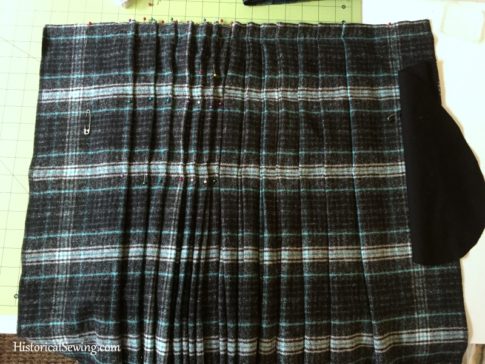
I basted the pleats about 3/4″ down from the top, and on the back I basted two more rows about 6″ and 10″ down from the top to hold them all in place during construction. Removing the basting threads was the very last step I did on the skirt – even after I sewed on the two sets of hook & eyes.
The other thing about my heavy fabric was that it sort of stretched out on me on the cross-grain. So even with marking the pleat lines according to the pattern and stacking them carefully, they “grew” on me so that the top of the skirt was something like 4″ larger than my waist, i.e. the finished pattern size. Ooops!
This is completely my doing with choosing a heavy/thick fabric in which to make stacked pleats. The pattern is correct to size. But note that your fabric may stretch a little on the cross grain as you pleat and baste.
My solution was to take up additional pleats in the extra fabric on the sides of the back panel as also on the sides in the front.
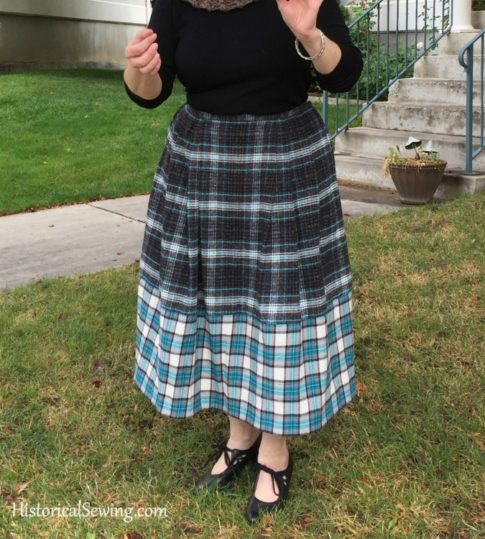
The pattern is drafted brilliantly in that there are pockets – whoot! – inside the side seams which are then tucked into a deep pleat. Nifty!
The challenge will come when setting in the zipper along the side *with the pocket*.
Now, recently I’ve decided I would prefer to hand sew in zippers with a pick/prick stitch than baste a zip into the garment, sew, consider it a crap job, rip it out, and try it again until it looks passable. The same amount of time will be used. So why not do it by hand the first time, have it look great, and be done with it?
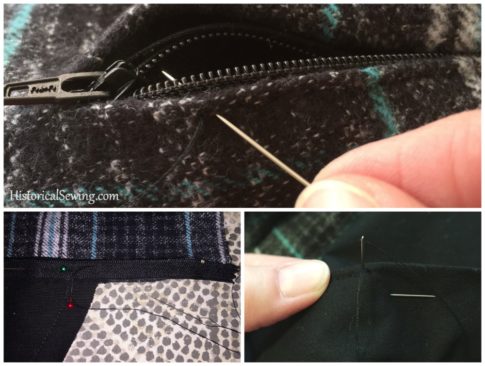
I did a hand backstitch with the front side a pick stitch – meaning, the needle moves down only a tiny amount but the back side stitch is longer. Voila! A beautiful, tight zipper.
The other change I made was to cut the waistband (the pattern calls it the binding) on the cross as I didn’t have enough length left to cut it on grain. I recommend cutting it on grain when possible. Because I was using a plaid I needed to cut the pieces to match the plaid design which left about a 1/4 yard for me to cut the band across the fabric.
I did, however, manage to machine stitch-in-the-ditch to hold the band in place rather than having to tack it by hand. Whoot for shortcuts!
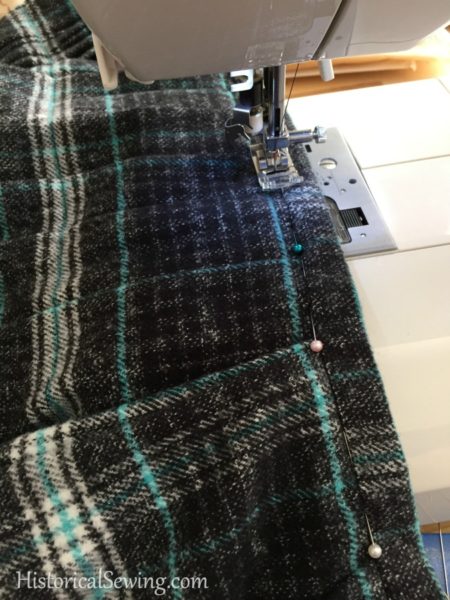
A tip: when setting on the skirt lower band, I matched the center back seams first, then went around matching the notches.
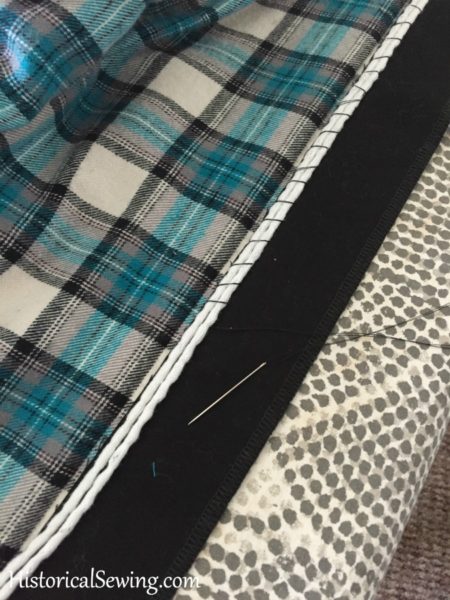
The pattern calls for a double strand of weighted drapery cord be hand tacked into the front skirt band. It also has you apply interfacing to the lower hem edge on the front to support this cord.
I’ve worked with weighted cord before but it’s been many years. Kinda cool to use it again… as well as give me ideas for adding it to future bustle dresses or full 1890s skirts.
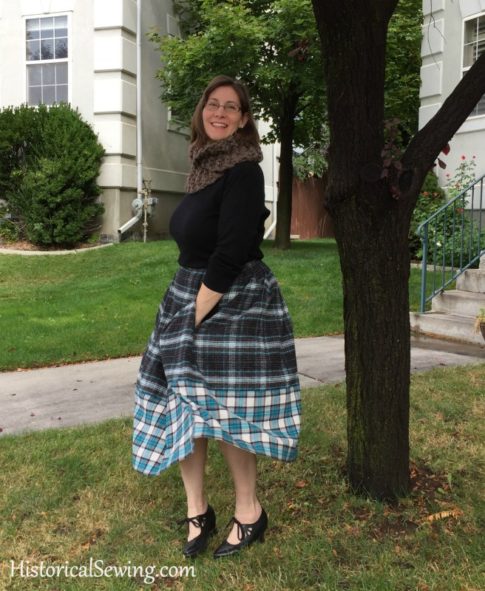
My white/teal plaid for the lower band was so light I decided to cut 2″ strips of plain cotton broadcloth (from my stash!) for the entire hem for weight and support. I did, however, only put in the weighted cord in the front as per the pattern. It gives amazing drape to the entire skirt and balances the light white fabric with the heavier black material.
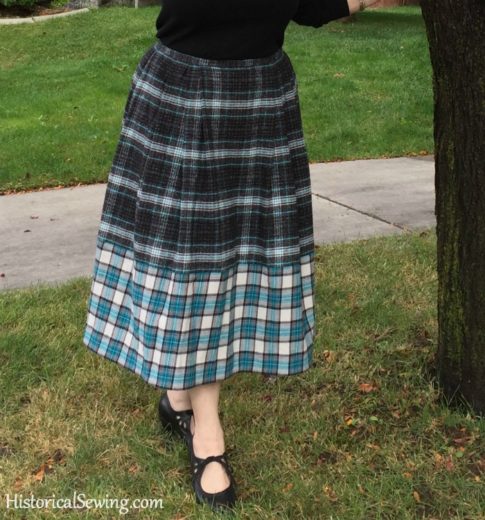
Overall – a beautiful pattern! One I recommend and will be definitely making again – for all seasons too!
You can get your copy here in the DoS shop. (no affiliate, simply a happy sew-er)
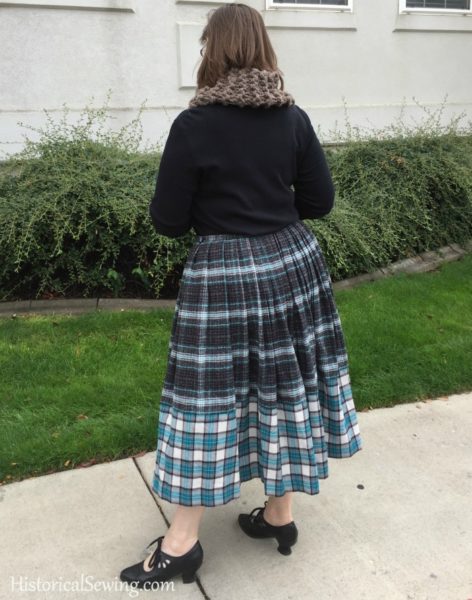
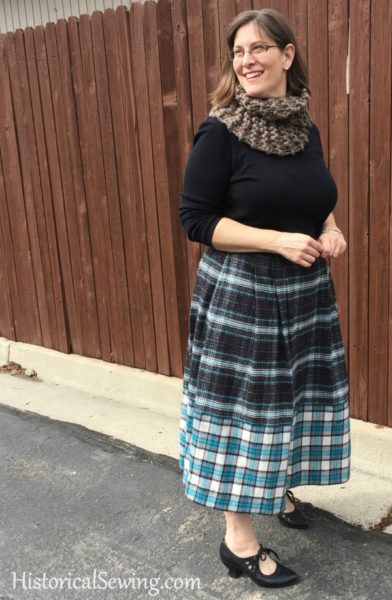
For those curious, my shoes are the Gibsons from American Duchess.
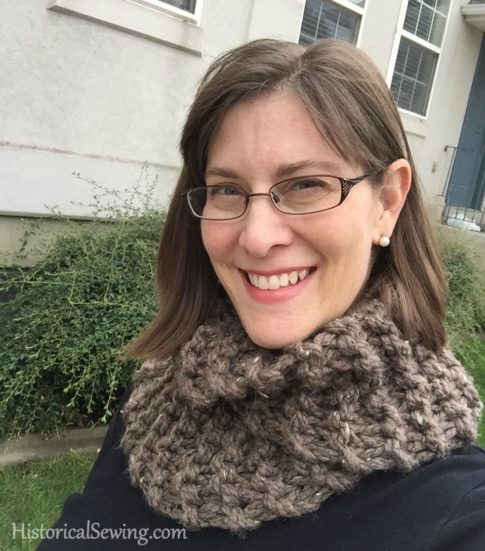
I knit the cowl from the pattern “Sassenach Cowl” by Kristen Brooks in the book Highland Knits.

You are so cute and that skirt is super fun! I love the use of two different fabrics! Loooooove!
Blessings!
g
I love the skirt and the way you’ve put together the entire outfit. I have the same pair of American Duchess shoes – they’re beautiful and comfortable.
I’d like to make this skirt, but I’m short – 5 feet 2 inches – and wonder how the 2 fabrics would look on me. Maybe I don’t have enough leg length to carry it off?
I’m 5’4″, if that helps, and find that 29″ to 30″ skirt lengths good on me where it doesn’t cut my calf at the point where it’s the widest nor too long where it just looks like it’s too long and should be hemmed up. I’d think you could easily chop off a couple inches – one on the top section and one on the bottom band – and make it up fine. If you have another ballerina length skirt in your wardrobe, measure that and compare the pattern. It’s not about the two fabric but more the proportion of the band and skirt top. Try it!
Sold! I’ve bought the pattern and am looking for fabric after work today. Thank you!
I’ve not used drapery weight cord in garments before. How does it impact laundry care? And how critical might it be for use in Wool? (Asks She who has a Pendleton sale yard pieces stash next to her Outlander (probably never going to happen) project stash.)
Also, I’ve always wondered how to set in a hidden pocket on the side with a placket (or zipper. Is that bit of magic explained?
Love it that you have already tested it before I got the publication announcement, too.
Thanks!
For the zipper – yes. I thought it was clever engineering and is described in the instructions. Take your time, follow the line drawings, and it will come out. I think it would probably be easier overall to hand sew in the zip anyhow with the pocket there.
The drapery cord is made up of little metal pieces that have been bent into a long bead shape then covered with a cotton cord wrapping. You can cut between them. I didn’t check the care instructions on the spool but I don’t have an issue with machine washing my skirt in cold and machine drying. You could dry clean them probably just fine too.
I love this skirt in the plaid cotton! Different fabrics – weights and prints – would make for a variety of looks. Comfy and beautiful for any season depending on the fabric. 🙂
I love this skirt, but feel intimidated at the thought of weighted drapery cord. Are the instructions beginner friendly?
It really wasn’t too difficult; and you could leave the weighted cord out. It is nice, though, as it keeps the front down as if over a petticoat or two. The cord is whipstitched to the interfacing and is described with a line drawing in the instructions. The skirt itself is fairly simple with panels cut full width and a guide given for the pleats.
You look absolutely gorgeous here, so cozy, dressy-but-casual, and ready for a fall adventure! 🙂 With those pretty shoes it would have to be a more civilized adventure, but I would also pair sturdy hiking boots with this ensemble and then you could be off on a more rugged, outdoor adventure! 🙂 Great job on the sewing, as always, and I LOVE full, pleated, calf-length skirts, so I’m off to check up on the pattern. Really, really enjoyed this article! I once used a ceiling fan pull chain to weight the entire hem of a skirt so that I could wear it for bicycling. 😉 So fun to read articles like this that inspire me greatly to get down to my sewing room and get to work!
Thank you for your kind comments! Yes, I intend to wear my tall boots and even short, ankle boots with this skirt as well. Perfect! Good luck as you pursue your sewing! 🙂