This tutorial is dedicated to Corinne Pleger who taught me the beauty of cartridge pleating in July 2000.
Cartridge pleats are eye-catching! Neat little pleats stacked in a row, stitched together and standing at attention. Those little pleats do a heck of job too with getting an enormous amount of skirt fabric into a tiny waistband!
If you’re ready to tackle this common method of pleating in the mid-19th Century, let’s get to work on how these pleats are actually made. Although cartridge pleats are found on sleeve caps in the 1830s, we’ll stick to gauging skirts in this tutorial.
Cartridge pleats (also known as gauging) are used when a large width of fabric needs to be fitted into a small space. As opposed to the other types of pleats, cartridge pleats are seen throughout historical fashion but practically disappear in the late 19th Century. Because they are completed by hand, they didn’t work in the new, mass-produced, assembly line garments.
Cartridge pleats are characteristic of historical sewing. Found on straight panel skirts of the late 1830s through 1860s and on full sleeve caps from the 1830s to 1860s, these pleats are very easy to create and can be adapted to all sorts of fabrics.
Supplies:
The skirt to apply cartridge pleats and finished waistband
Buttonhole or strong glazed thread that matches fabric
Long hand needles such as embroidery
Marking pencil/pen or Tiger Tape
Safety pins or long ball head pins
Overview:
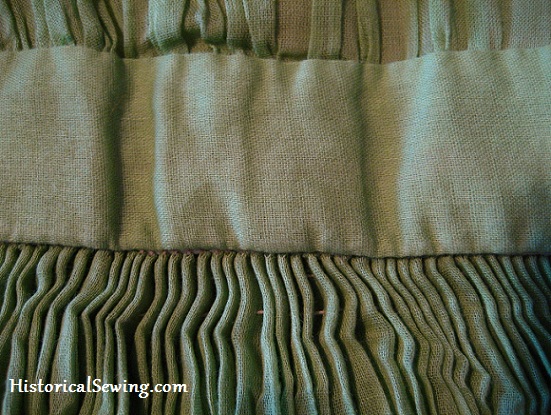
Cartridge pleats are made from 2 or more rows of uniform hand basting stitches run along the top edge of the skirt. The rows have to be exactly matched for perfect pleats. The stitch threads are pulled up to form the pleats that are then whipstitched to the waistband.
Cartridge pleating stitches are placed in evenly-spaced rows. The stitch marks vary and will change with different fabrics and for assorted projects. Make a sample using different markings on your specific fabric to find the best placement.
The spaces between the stitches can also vary for how full you want the pleats and the bulkiness of your fabric. Wool will have wider spaced stitches than cottons and silks.
Step 1: Determine Area for Cartridge Pleating and Prep
Piece your skirt panels, finish the hem, then mark the allowed skirt length from the hem up to the top at center front, center back and sides. Allow an additional 5 inches for the pleated top.
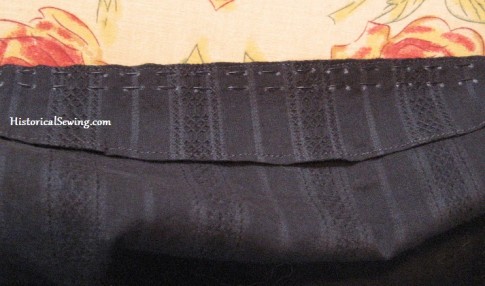
Finish the raw top edge of your skirt before folding to the inside for pleating (see below). You can trim with pinking shears, run a small machine stitch, sew a narrow hem, zigzag, or serge the edge.
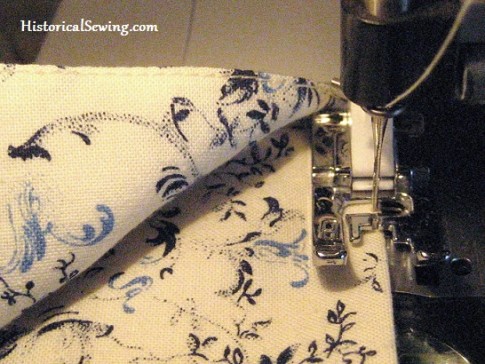
Fold the skirt top to the inside a few inches allowing for the skirt length needed as mentioned above. Fold at least 1 inch to the inside and even more for additional support. Keep this turn under within 5 inches or so. This amount will taper around the top of your skirt in accordance to your marked lengths.
A machine edgestitch on the fold of the fabric is a modern tip that provides support and makes the whole pleating process easier.
Step 2: Mark
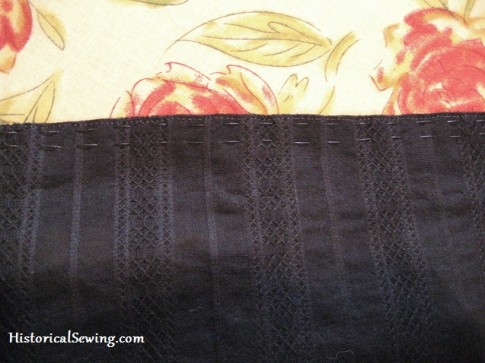
The first row of stitching works best at 1/8” to 1/4” down from the top fold. Additional rows should be between 1/4” and 3/4” down from the previous row, depending on fabric weight. The stitches themselves vary from 3/8” to 3/4” apart. Use these 5 tips, including how to mark your pleats, to keep them from looking like gathers.
Using a ruler, mark the entire length of fabric to be pleated with dots spaced according to your project. Mark all rows of stitching. Note: This will take some time – be patient!
A nifty sewing tool is Tiger Tape sold with quilting notions. The narrow tape is marked in 1/8″ lines. Place the tape along the skirt edge to make your dot marks. Remember to keep all dots in line with each other – along the horizontal rows as well as vertically (most important).
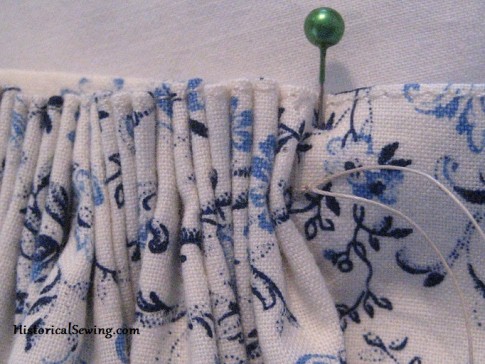
Step 3: Sew Pleating Threads
Cut a very long piece of thread. This should be nearly the length of the flat skirt width but could be shorter if you remember to pull up the pleats as you sew.
Use strong thread such as button thread or millinery thread. These pleating threads will remain in the fabric holding the pleats in place. If the thread breaks – the pleats come out.
Thread a long needle, such as an embroidery or millinery needle, and make a firm knot, leaving several inches of a tail.
Begin on the correct side of the skirt at the opening and make your stitches at each dot. Weave in and out of the fabric. Do not tie off the thread when you reach the end of your markings.
Repeat for additional rows. You can sew up to 5 rows depending on the fabric, but most 19th Century skirts have two to three rows. Some people find running all the rows at the same time faster than sewing each row separately.
Step 4: Finish Waistband and Pull Up Threads to Fit
Finish your waistband separately before attaching the pleats. The recommended width of your finished waistband should be 1” to 2”. You can also use a length of twill tape for the waistband.
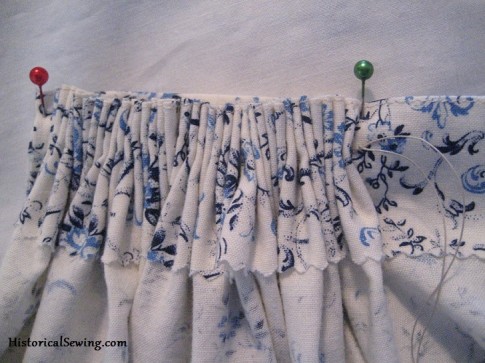
Quarter mark your waistband and skirt. This will help space the pleats evenly.
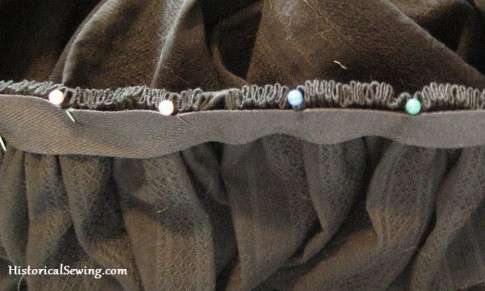
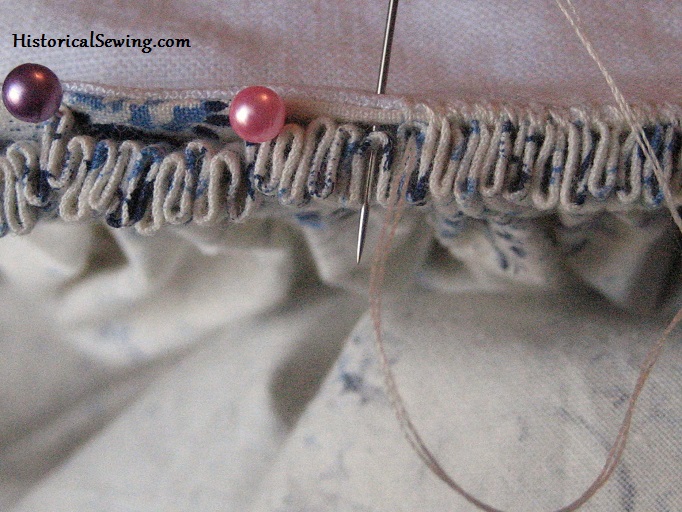
When all the rows are sewn, grab all the thread ends and pull up together. Align right sides together of the skirt to the waistband. You do not need to pin every pleat but only every few to keep the pleats in place. Spend some time working out the pleat spacing. I like to pin every one to two inches.
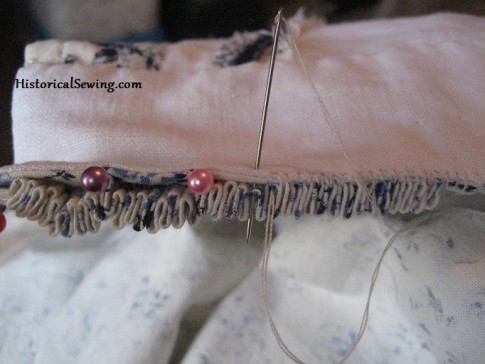
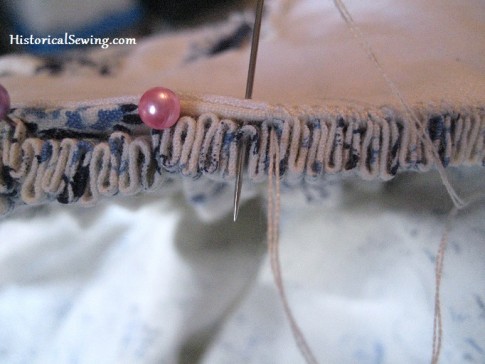
Step 5: Sew To Waistband
Start attaching pleats to the waistband or tape using an overhand whipstitch. Sew two stitches into every pleat for a secure hold.
Finish by re-threading a needle onto the long tails left at the starting point and push them through to the wrong side. Tie the threads together.
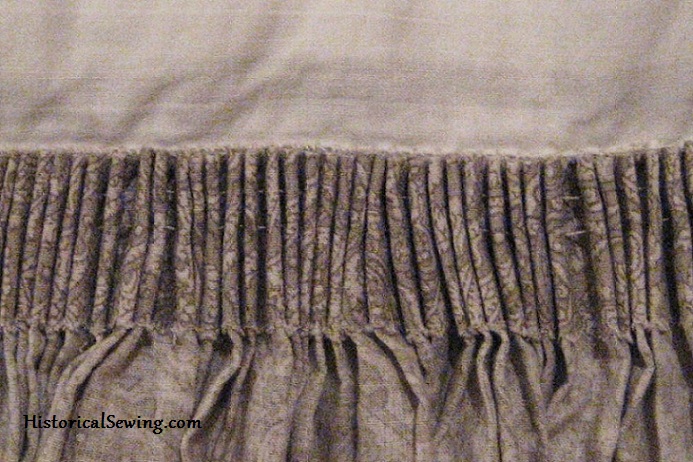
After sewing, fold the waistband up, kicking the bottom fold of each pleat out. The top of the pleats will sit flat against the body.
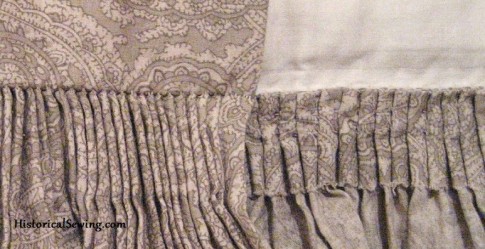
If your pleats are very wide on the inside, you can fold them to one side (check from the garment’s right side to see which way you want them to lie) and tack down on top of each other on the inside. This will make them look more like flat knife pleats.
And if you are overthinking how to do all these pleats, take a look at my article here to ease your head.
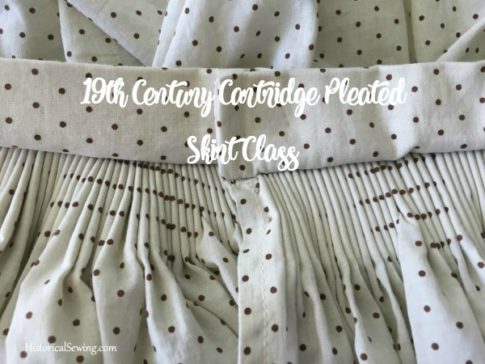
I now have a full online class about creating cartridge pleats in a 19th century skirt project.
Have you cartridge pleated before? What do you think about the technique? Feel free to share any other tips you might have from your own sewing experience.
Thank you for your detailed instructions! One thing is still unclear to me (but maybe I just missed it), and that is how wide the fabric should be in relation to the waist width for nice pleats? I would be very happy about some help
That is more dependent on the fashion styling of the era you are sewing for. For these mid-19th Century skirts, usually 2 to 4 panels of fabric are used, depending on the width of the fabric. The more fabric (more or wider panels), the tighter the pleats will sit in the waistband.
hey! lovely tutorial, i was just wondering if you had any advice for 1830s cartridge pleated sleeves? especially in how to finish the edge of the fabric, as obviously the straight top edge of a skirt can be folded over quite easily but I’m unsure in what to do with a curved sleevehead
thanks again!
The originals were left raw edge. You can run a hand running stitch or overcast stitch along the raw edge to stabilize it (and limit fraying) before running the cartridge threads. Good luck with the sleeves!
Hello, do you think it would be possible to sew pockets on the sides if I made a cartridge pleated skirt? I was thinking I could make front panel, 2 back panels, sew pockets in there and then pleat it, but im afraid it won’t work. Do you have any advice, or do you think it is not possible?
Thank you,
Anna
Side pockets can totally be accomplished! Our ancestors did it too. Make your pocket piece longer than usual. Set the pocket in at a comfortable hip or lower level. The pocket shape will extend all the way up to the waistline. Make the top pocket piece width about 3-4″ wide; sew into the skirt seam; flip the pocket to the front and baste the top of the pocket to the skirt panel. Then make the cartridge pleats as usual. Yes, the pleats will be slightly thicker in that few inches but this is completely possible. You could also piece the top portion of the pocket in a thinner fabric to reduce bulk at the waist/pleats.
Great tutorial! Everything’s always extremely clear and easy to follow, even for a non-native speaker like myself. I’m currently making an 1850s ballgown and I wanted to add three flounces (first one starting from the top of the skirt). I was wondering if I should cartridge pleat both the skirt AND the first flounce and, if so, should I do it separately or together? Maybe it becomes too bulky, I’m not sure. I’m very new to historical sewing.
Thanks again for the tutorial,
Federica from Italy <3
Hi Federica. Welcome! I’d actually recommend (based on my research) you place the top flounce a couple inches (5cm) down from the top skirt edge. Then cartridge pleat the skirt. This will reduce the bulk at the waist and within the pleats.
I’ve made a petticoat from around 1850-60 but the waistband is thick because of the pleating how do you get it to be thin.
Did you grade the waistband seam allowances inside the band? That may help. And press well with hot iron.
Super helpful thanks! Am brand new to historical sewing and so many of the terms and instructions are way beyond by knowledge so tutorials such as this are SO very helpful!
I do have a question – I am making an 1840s ballgown with a fully lined skirt and am wondering do I only cartridge pleat the outer skirt or both outer and lining together or…?
Once again thanks so much for sharing your wealth of knowledge! Deb
So glad to hear this is helpful for you!
A question back: do you need a fully lined skirt? Most skirts in that era merely have a deep hem facing and not a full lining. The support comes from the layers of petticoats and the top fashion skirt floats on top of them. Lined skirts can be rather heavy. Just throwing that out there.
You’d want to fully flatline the underlining and fashion fabric layers and you’d treat the top as one layer when pleating. Again… a full lining will be thick in the cartridge pleated section due to the fold over top portion. More on skirt flatlining here.
Thank you for this article though I am making an 1850’s dress and had planned on attaching the skirt directly to the bodice which has piping. Was this done at the time or do I need to sew the skirt onto a waistband and then attach the bodice to the waistband? Thank you.
We see many originals where the cartridge pleated skirt was attached directly to the bodice. I, myself, have sewn the top skirt edge to a length of twill tape that I then whipped into the bodice. You don’t need to set the skirt onto a full waistband; twill tape will do. Or whip to the bodice finished edge.
Thank you so much for this tutoriel.
I have to sew my skirt, 19° woman in the country in the Morvan (Burgondy in France) but I do not understand how to finish the waistband. When we fold the waistband inside to close it, do we have to insert the pleats so to sew the fold of the waistband with the other side of the pleats ?
The next dress would be “renaissance”. May thanks
The waistband is completely finished separately, then attached to the skirt. No raw edges are left on the long edge of the waistband for attaching to the skirt. So, sew all sides of two lengths of your waistband, correct sides together, leaving about 10cm open along one long edge. Turn waistband out and press. Close the opening by hand; or topstitch all around the finished waistband giving it strength for wearing.
THEN pleat up your skirt panels as in this tutorial. Place correct side of waistband (you choose which side looks best) to the folded top edge of the skirt and hand sew together as shown here. So the pleated skirt fold is sewn (whip stitched) to the finished waistband and NOT inserted inside the two layers of waistband. I hope this helps!
Great tutorial. Very helpful. My project is a neckline of a chemise. Is there a general guide such as X length of fabric turns into X length of pleats using either 3/8″ or 3/4″ pleat width?
Thanks,
You’d probably do best doing a quick test on your fabric as the thickness will vary in the pleat fold as to how much fabric is used. For a chemise I’d definitely go with smaller width pleats.
Can you help me with how and at what stage to add a player to the opening please?
Do you mean ‘placket’?
I don’t recommend full plackets with cartridge pleated fabric around an opening.
Thank you so much. Yes, I meant placket… So best to just finish the edge and overlap the waistband?
Yep!
This thanks is long overdue. It has been a few years since the first time I tried this and thanks to you, it was a huge success. I can’t tell you how much this helped me to understand hot to cartridge pleat and attach the skirt to a two-piece waistband. I modified it slightly for my needs as I wanted about a quarter of the skirt in the center front to lay flat as if it was a double skirt with a 3/4 cartridge pleated overskirt. The end result was amazing and something that definitely left a lasting impression. I received so many compliments. And it was so much easier than I thought it would be. I never could have achieved the same result on a machine. Thank you so much for sharing. And so here I am again after several years to reacquaint myself with the how to! Thank you!
So happy, Kathy, that you learned and learned again! 🙂 Glad to have helped your sewing journey. P.S. I use my own tutorials for projects as I come back around to particular techniques. 😉