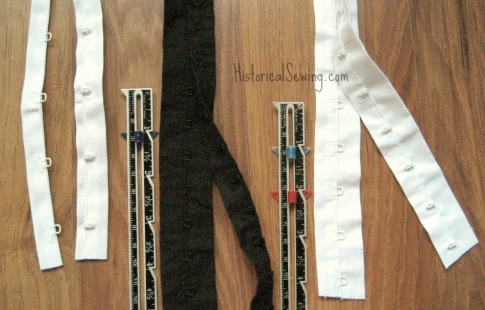
Yay! You’ve just finished the bodice proper but now you are faced with hand sewing on a dozen little hooks and corresponding eyes so you can actually close the bodice. Boo…
At this point many costumers let the garment sit. Not that it needs a time out, but that they are simply not looking forward to all that repetitive hand sewing.
If you allow for “cheats” in your Victorian costuming, those hook & eye sets don’t have to be drudgery. Why not use pre-made tapes? Here’s how to apply them neatly and correctly.
Purchased hook & eye tape is a modern time-saver – and half-cheater method – to finish a garment opening. I say “half” cheater because hook & eye tape IS found on late Victorian & Edwardian bodices.
In the 19th century individual hooks with matching eyes, bars or eyelets were sewn directly to the bodice opening or to a tape that was then tacked to the bodice. In later years the hooks and eyes were covered by a lining. But each little piece was hand sewn on… oh, the time it took!
Then some engineer decided to help his female relatives by creating tapes with the hooks and eyes already attached to a tape so she could simply whip the tape into her bodice. (Sources I’ve found range from mid-century patents for riveted hooks on tapes to 1920s patents that resemble our modern hook & eye tape (mostly created for brassieres).
However this invention came about, it’s awesome. Now let’s look at specifics about tapes and how to sew them to your bodice.
Getting Hooked
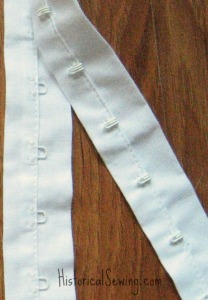
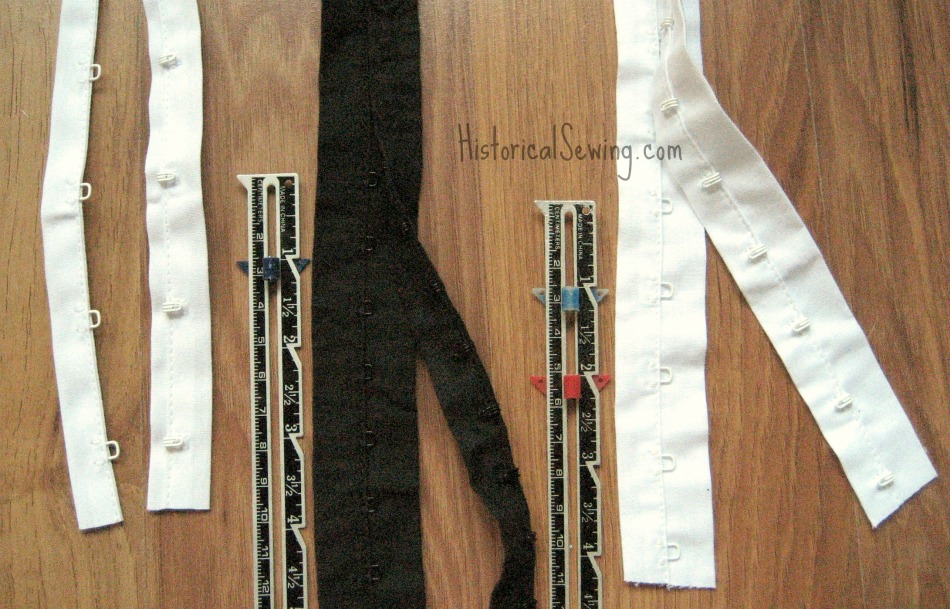
Modern hook & eye tapes vary quite a bit. Most are rather stiff and bulky. Avoid the pre-packaged 1/2 yard bits in favor of buying by the yard whenever you can.
Use white, black or linen colored tapes with silver or black wire. Colored wire is a 20th century thing and not appropriate for 19th century garments.
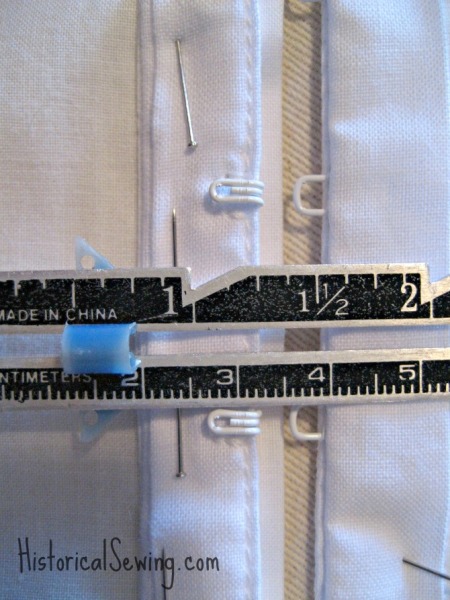
Hooks are generally spaced 1” to 1.5” apart depending on the type and vendor where you purchase the tape. Keep to this spacing; although, 1.5″ is verging on too wide. I recommend 3/4″ to 1.25″ spacing if possible for best results in historical garments. You could also add additional hooks to the tape if you can’t find 1” spaced hook tape.
The Sewing Process – The Hook Side
Please note that this technique is merely one way to attach hook & eye tape. It is how I sew it to my garments when I choose this method of closure. As with all sewing, do what comes naturally and most comfortable for you.
Tip: Hooks go on the right; eyes go on the left.
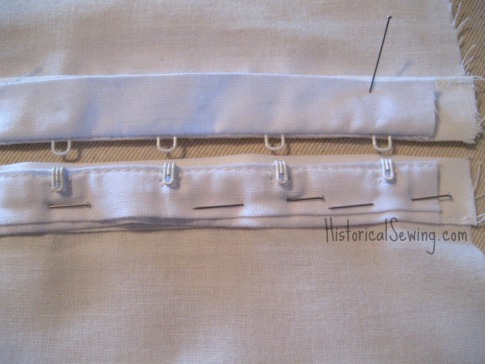
Step 1: Measure and Pin or Baste the Hook Tape to the Bodice
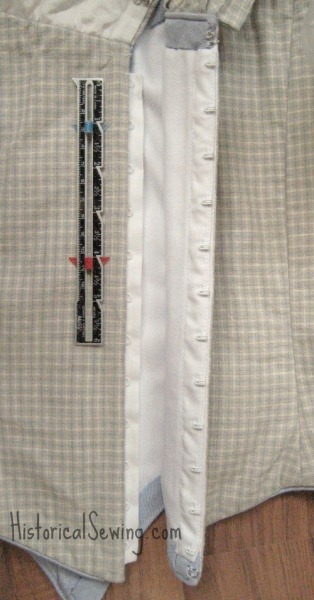
When placing hook & eye tape on a bodice, start at the waistline and pin in place. Connect the hooks and eyes together of the two tapes. From the waistline walk the tape along the length of the bodice opening, above & below the waist, pinning if necessary, to get the cut length. Leave enough tape at top and bottom for turn under before cutting.
(The photo above shows a center back bodice closure where the back edges meet with no overlap.)
The appearance of a bodice closure will be affected by hook & eye tape that goes completely to the top and bottom bodice edges. So don’t do that. It’s better to cut the tape short and add one or two individual hooks at the top and bottom for ease of closure, security and best appearance.
(The neck and waist raw edges should be completed (in most cases) before sewing on the hook & eye tape. Adjust the tape length to allow for finishing if necessary.)
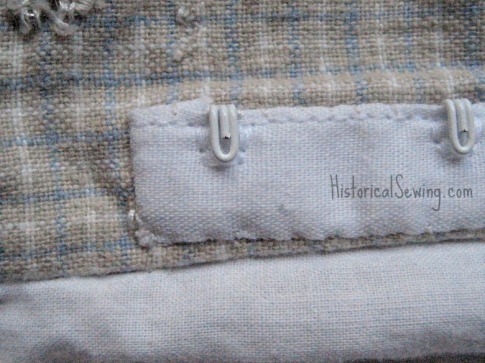
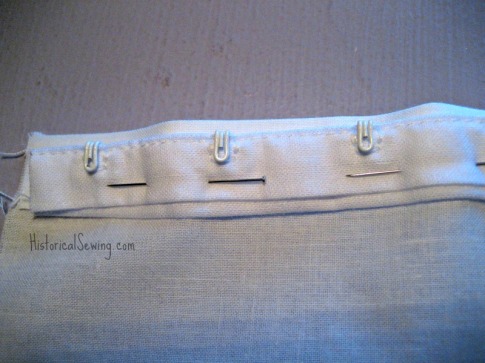
Fold the extra tape end of the HOOK side back behind the hooks. Align and pin the HOOK TAPE to the finished RIGHT SIDE edge of bodice with hooks set about 1/16” to 1/8” in from the bodice edge.
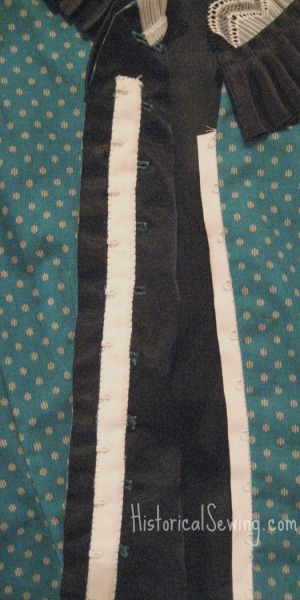
NOTE: If your bodice front has an extended placket (extra fabric overlap to disguise the opening), align the hooks on the center line. This will vary according to how much placket overlap is in the pattern.
Pin hook tape in place. You can leave the pins there as you sew the tape down or baste the tape in long running stitches to hold in place before stitching.
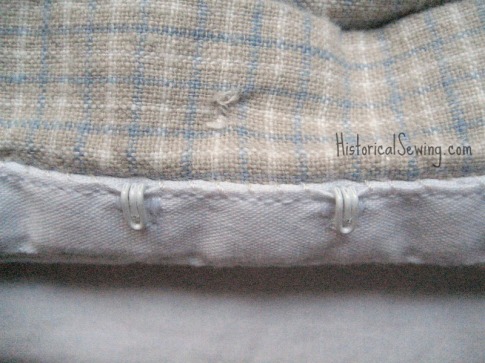
Step 2: Stitch the Outer Edge of Hook Tape Down
Using a double strand of thread, whipstitch the outer side of the hook tape tacking the head of each hook to the bodice as you go. Keep your stitches about 1/8” apart. (Closer stitches give better security to keeping your bodice closed.)
If tacking to a placket or extended bodice edge, only pick up the inside bodice layer (the underlining) and do not go through to the outside.
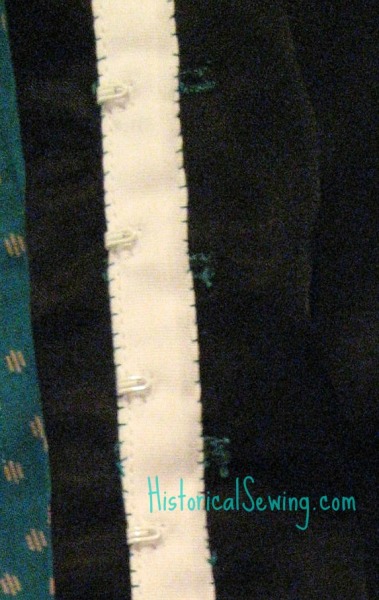
If tacking to the finished bodice edge, keep the stitches on the inside layers of the fold or seam allowance.
Sewing Tip: The key is to keep the tape in its exact position as pinned. Do not allow it to “stretch” or move out of place. Sometimes this takes some easing in of the tape as you sew. You may need to keep your pins in the fabric to help prevent everything from shifting until you’ve sewn past each hook.
The Sewing Process – The Eye Side
Next, match up and connect the loose eye tape with the stitched hook tape. Lay the left side of the bodice opening on top of the eye tape strip. The eyes should stick out past the finished edge about 1/8″. (Sometimes it may help to do this from the inside of the bodice.)
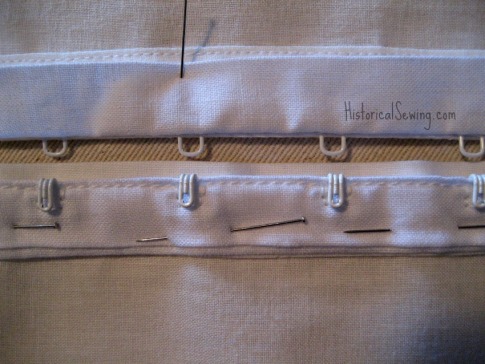
With some tapes and bodices, you may need or want to tuck the tape’s lip back (above photo) to create an even edge and only the eyes visible. This is simply personal preference. You can also leave the lip under the eyes sticking out past the bodice to create a tiny modesty panel.
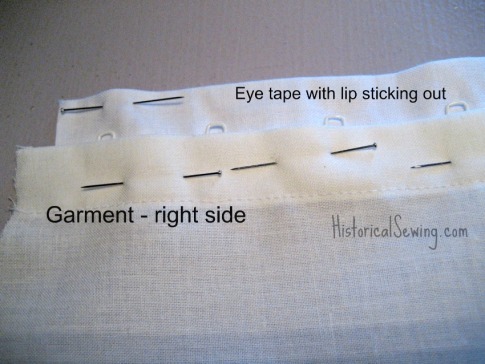
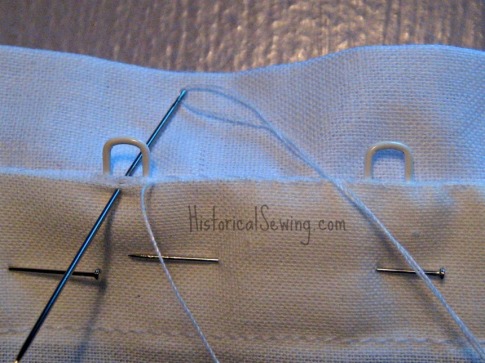
Pin eye tape in place, folding under the extra length at each end. Whipstitch the outer edge of the tape in the same manner as you did the hook tape, taking a stitch through each eye. Do not shift the eye tape in any way as you sew.
When placing the finished bodice edges together (no placket extension), they should be close enough that they overlap slightly. This allows for when a tightly-fitted bodice is worn the edges will not pull apart and show the hooks and undergarments.
Mastering the art of how far to set the hooks inside the bodice edge, and how far the eyes should extend, takes time and a couple of projects. How tight your bodice fits also comes into play. Keep this in mind when pinning down the eye tape.
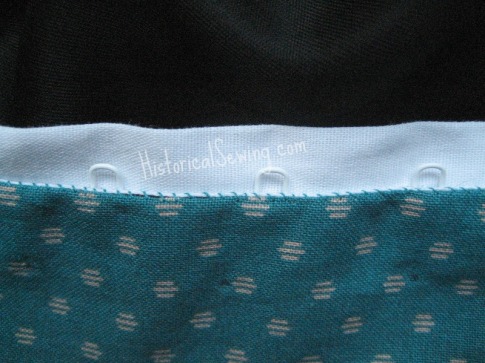
Sewing Tip: As you sew down the EYE TAPE, fasten with the corresponding hooks. The eye tape may stretch or buckle when sewing which can result in offset closures. Take the same care as you did with the hook tape and ease in the tape as you sew, keeping the pins in until you’ve sewn past them.
Step 3: Stitch Inside Edges Down
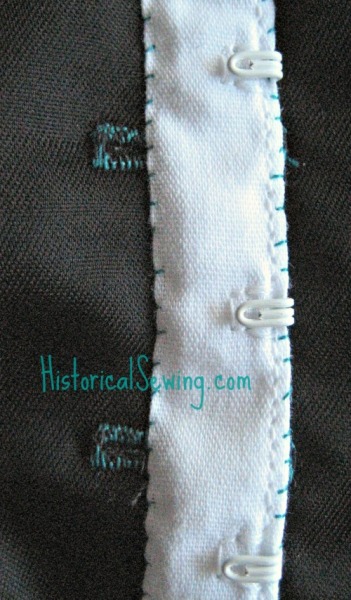
To keep the hook & eye tape from having that “pulling-apart” look or show a gap in the closure when the bodice is worn you’ll need to firmly tack the inside tape edges.
After the outer edges are sewn to the garment, go back and whip the inner edges of each tape to the underlining (or placket extension). Be careful not to let your stitches show on the outside!
The stitches should be 1/16” to 1/8” apart to hold firm.
Notice in the photo above the slight “buckling” of the hook tape due to it being eased in as it was tacked to the bodice.
Keeping the Hooks & Eyes Closed
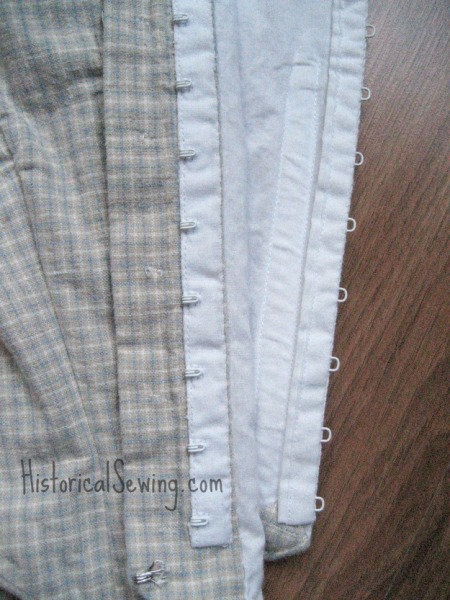
I’ve found that putting in a bone at the bodice opening helps keep the hooks & eyes closed. During the flatlining stage, machine-stitch bone casing to the wrong side of the underlining, allowing enough width for the seam allowance and to hand sew on the eye tape.
Another trick I’ve used is to test each set. If the hook slips out too easily then I use needle nose pliers to *gently* pinch down the rounded nose of the hook just slightly.
Be very careful here though! It’s rather easy to bend it down too far which makes for closing and opening the hooks & eyes hard or near impossible without damage to the bodice or you.
For more on hooks & eyes, read this article on how to sew them on by hand (based on how originals were done). Then head over to my tutorial on thread loops for completing your bodice closure at the neckline (and waist too if needed) with an individual hook and loop.
Have you or do you use hook & eye tape? Do you like it? Any tricks to share from your experiences?

Can I use hook and eye tape to close the back of a beaded top. I would place the tape on the lining and leave the beaded overlay loose. I appreciate your opinion.
I don’t see why not. I would recommend taking a pick stitch every so often through to the top beaded fashion fabric to help secure the tape.
Can you tell me where you specifially bought your eyelet tape? There are so many on the internet, and not at my local stores… it is so confusing.
The stuff here I think I got in JoAnn’s many years ago. It was by Dritz. Check around. Maybe Farmhouse Fabrics? I haven’t purchased in a while.
Will you be making this in a video? I have some problem with the instructions as english isn’t my first language and it’s hard to see where everything sits on the pictures
Sorry to hear it’s not clear for you. I have not thought about a video but will consider it.
Please can you tell if hook & eye tape can still be brought, if so,
Where. As I have a project that requires hooks and eyes down the back of the costume. I do not like the idea of all that hand sewing.
Regards
Maralyn FitzGerald
Yes it is available! You can try your local fabric shop in the notions section near the elastic – sometimes it comes in a package and other times by-the-yard. Also visit the Resources page for various online notions suppliers.
Very interesting. Now if I could only find the tape
I had the opportunity to view a garment in a museum collection which solved a problem that I sometimes face. As I hook one hook/eye combo, the combo directly above or below becomes unhooked. The garment I viewed used individual hooks and eyes. The placement alternated hooks and eyes.
Left———Right
Hook——-Eye
Eye———-Hook
Etc.
Brilliant!
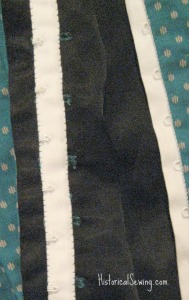
Great article – particularly regarding the care required to maintain accurate position of the tape while stitching it in place. Also, the idea of the bone in the in the underlining is wonderful and very helpful. I do have a question about the third from last photo. It seems that I can see buttonholes underneath the hook tape. Would you please talk a little more about that? Is the hook and eye tape the actual closure and the buttonholes, possibly with buttons sewn on top, a “dummy.”?
Keep up the good work.
Haha – good catch Shirley! Yes, the hook & eye tape is the closure. But it wasn’t always. The bodice was initially closed with buttons & holes but then it “shrank” and I couldn’t get them closed (well… I simply gained a few pounds). So I ripped off the buttons, hand sewed in the hook & eye tape (re-positioned so the bodice could close) and re-stitched the buttons on top of the holes on the right hand side of the bodice while closing them up too with whipstitches. You can see what happened on the bodice in this post: https://historicalsewing.com/cant-get-those-buttons-closed-easey-part-2
If you want a mock button closure to begin with, I’d suggest you stitch in the buttonholes then whip in the hook & eye tape, finally sewing buttons on top of the un-cut holes. Note that shank buttons don’t work as well as a faux closure. But it’s possible to cut open the hole a little to push the shank through and stitch them to the inside of the bodice. Be careful of the hook placement and/or workaround the button shanks sticking up inside.