We all want our garments to look marvelous. A lot of how they turn out is based on how we cut out the pieces. Their layout needs to work as a team with the weave of the fabric. Cutting patterns on the straight of grain is crucial for the garment to hang correctly on the body. It can make the difference between *fabulous* and, well… not so hot.
The grain could run in tandem with the main grainline, the cross grain, or even the bias grain. But your pieces need to be aligned correctly to whichever way you’ve decided before cutting them out.
Let’s take a moment to refresh our memory on grainlines – and better our sewing projects too.
Sewing 101:
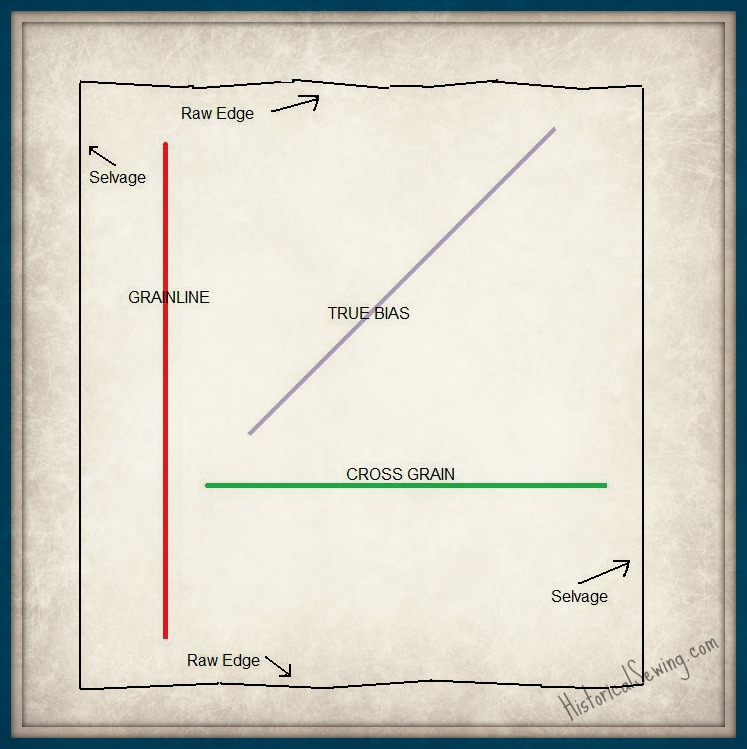
How a fabric is woven determines the grainline. The long vertical threads – warps – are considered the main grainline of a fabric because they are the sturdiest fibers and support the woven length. These threads run parallel to the selvage, or factory-finished edge.
The horizontal threads – wefts – are woven into the warp threads to create the fabric. The manner in how the wefts are put in establishes the type of weave & identifies the fabric (satin, plain, brocade, etc.). These cross threads run perpendicular to the selvage with this direction considered the “cross grain” of the fabric.
(Side note: this is about my extent of textile weaving, so you’ll need to google for other resources for more knowledge of the craft.)
So how do you use grainlines to your advantage while sewing?

Align Your Pattern to Grain:
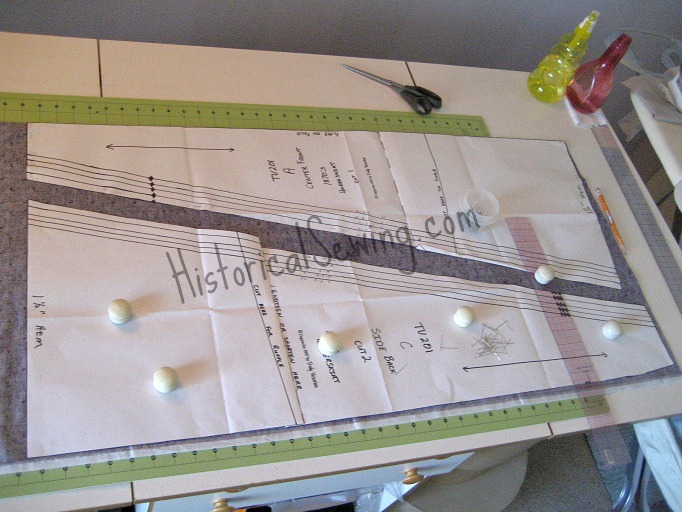
First, lay out your pattern pieces onto the fabric with the grainline marked on the pattern running parallel to the selvage. Then measure each end of the marked grainline to the selvage to make sure it is parallel and “on grain” and pin or weight down, preparing for cutting out.
Tip: Remember to measure EVERY pattern piece’s marked grainline to the fabric selvage or fold before cutting your fabric.
Cross Grain Training:
Sometimes you will have a design to be cut “on the cross”. This happens when you have a striped fabric or directional patterned fabric such as printed words or flowers all with a definite “top”.
Sometimes it is just more cost-effective to cut garments in a cross-grain direction. Then again, sometimes you have to be creative in your cutting, as you may have a limited amount of fabric, and this way of cutting can be a solution for you.

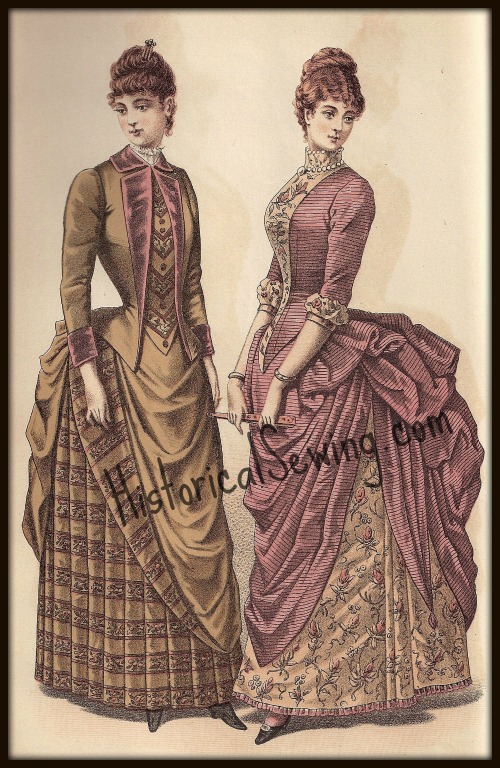
Many late Victorian patterns found in contemporary periodicals would list instructions for cutting skirt patterns on the cross. A visual example would be a 1880s bustle dress with the stripes running horizontally around the skirt.
Cutting “on the cross” means you must find the exact perpendicular line to the selvedge that runs across the fabric between the selvages. Remember, the cross grain follows the weft threads.
One trick is to open your fabric full and fold widthwise, matching the selvages down each side. You now have a widthwise fold to which you will measure from the grainline on your pattern piece.
Remember to pay attention to one-directional and napped fabrics when folding and cutting like this. Sometimes it might be easier to cut one layer at a time when cutting patterns on the cross.
Becoming Biased:
Bias grain is any degree angle line that goes diagonally across the fabric. True bias is a 45° angle to the selvage. Most often, when you need to cut a piece on the bias, find the true 45 bias line before pinning and cutting your fabric as your piece will handle better and fold and drape the way you want. (Many of the heavy duty quilting rulers have 45 degree lines marked for handy bias placement.)
Bias cut fabric pieces can give you amazing garment shaping and draped designs. Use a bias grainline to cut narrow strips for finishing the neckline and lower edge of bodices. Cut wider bias strips for hem facings on shaped gored skirts of the late 1860s through 1890s. The bias cut will allow you to shape the strip around curved edges. Use your steam iron to help hold it in place. (Watch those fingers under the steam!)
When making piping cut only on the true bias (45 degree angle to the selvage). Do not cheat and cut on the straight or on a slight bias. Your piping will look neater and higher-quality when cut true.
Years ago a good friend was making a 1840s taffeta day bodice and skirt, and she only had a small amount of yardage left after cutting the major pattern pieces. (Haven’t we all been there when the fabric runs short?) To make sure she actually got piping strips cut from the taffeta fabric, she cut them on-grain.
Well, they didn’t do so well for piping along curved bodice seams. They puckered, were evidence of “happy hands at home” and showed a poor dressmaking technique in what was otherwise a superb ensemble.
We both learned that it’s better to not put in piping at all rather than poorly made piping to be period accurate. She could have also sewn in contrasting piping or chosen another complimentary fabric just for the piping.
As with all sewing projects and fabric shortages, you might find yourself shifting a pattern piece off grain a bit to get every piece cut out. Don’t be afraid to do this if necessary – but be careful here! And don’t make it a regular custom, too, as if you get too off-grain the garment will not fit correctly and poor workmanship will show through.
Folding Fabric on Grain:
Here’s a video tutorial on how to get your washed & pressed fabric folded on-grain so you’re sure your pieces will be cut out correctly.
Be mindful of fabric grains and have them work for you in your costume projects. Play with them; mold them; shape them; but listen to them. They will tell you their most comfortable position.
Have you ever experienced working with a project that was (accidentally) cut off-grain?

I have a horizontal striped fabric . I would like to cut against the grain so the stripes are vertical. Will this cause a problem?. The fabric has some stretch- 2 way stretch with horizontal stripes
Depends on what you are sewing. It will work though. I’d recommend a non-stretch woven underlining to support that stretch and keep it in place.
I am planning to make plain, rod-pocket curtain panels out of linen. I would save a great deal of fabric if I could make them on the cross-grain, but I’m not sure if this is a good idea.
I’ve made lots of plain curtains over the years. Although it is tempting, I would highly recommend cutting the curtain length with the grain line and not on the cross as the panel has a big risk of stretching out off-grain over time. Especially with linen, which is prone to stretching over time. Good luck with your curtain project!
This is a great and helpful post! Thank you so much Jennifer!
Grainline and straightening the grain is something I include in every student’s first class. It’s that important! When I was still a novice dressmaker, I cut a blouse out of shot cotton–blue one way, green the other way, producing a lovely iridescent teal. In order to save fabric, I cut some of the pieces crosswise and some lengthwise. To my horror, when the blouse was done, it looked like it had been sewn out of two completely different colored fabrics! Oops! I quickly figured out where I had gone wrong, and now I include shot fabrics with “napped” fabrics and ALWAYS cut the pieces going the same direction!
Oh no! Yes, I think many of us have learned about napped and directional fabrics this way. 😉
Ah, yes. I learned this in class a few weeks ago, but your tip about going 18 inches at a time; neat! 🙂
I was taught to tear at the end across the grain line to find the corners to as to match them when you fold the corner of the selvage together. Or if the fabric is expensive, to cut a little bit into the selvage and pull a string to find that weft. Anyhow, I’m just talking to remind myself. 😀 Thank you for the tips!
I use the same method as Jennifer. I would prefer to be able to do it your way, Huy, but…. Fabrics these days are being produced to cheaply, that I swear they come off the loom at an angle. If you tear the end and then match the ends, the selvedges are way off. This can be devastating when you have a plaid or crossways stripes. Some fabrics shift back to straight with some pulling, but I have had some that would just refuse to true up.
I too have been having this problem a lot more. Cutting something as simple as a square for a petticoat ruffle can be impossible. If I use Huy’s method and pull a warp/weft thread, my square will turn out rhombus shaped. Or I can cut what looks like a square but doesn’t follow the warp/weft lines–but then I worry that it’s not actually on grain. Any added tips for working with badly woven fabric, Jennifer?
I’ve had some fabric where the selvages were clearly pulling in one direction off from the main body of the fabric. Sometimes you simply can’t use a fabric (which means – pay attention to what you buy!) or you trim off the selvages and use what you can (hopefully you’ve purchased enough).
If the a tightly-woven selvage pulls too much you can clip into it at 1″ intervals to release it which will help the entire fabric piece lie flatter. But this way you still have the selvage as a guide for following the warp grainline.
I’ve tried to pull threads across the cut edge to find the cross grain, but as Heather said, the textiles today are really hit or miss as to being woven well. Even silk taffeta, which I use often, the stores will clip & rip it off the bolt. But just last week I was cutting straight skirt panels from taffeta and it was not lining up at all. I ended up folding to match the selvages and completely ignoring the torn raw edge.
All this to say – it pays to put money into high-quality materials! 🙂