Flatlining. No it’s not dying in pursuit of that ultimate dream costume. Neither is it the process of killing your bodice to make it work. Ha! (Although, it feels like it kills us sometimes!)
I use the term “flatlining” often when describing this historical sewing technique. It is also called “mounting” and “adding an underlining.” Various sites and dressmakers call it whatever is easiest for them but it all describes the same procedure.
So today, let’s delve into what exactly IS flatlining and how do we do it with a bodice.
Flatlining, simply, is the process of cutting your pattern from an underlining (support) fabric and mounting (attaching) it to your fashion fabric. The double layer is then treated as one piece going forward in the construction. It’s a vital part of sewing a Victorian bodice.
This one step will elevate your dressmaking skills and take your costume to a higher visual level.

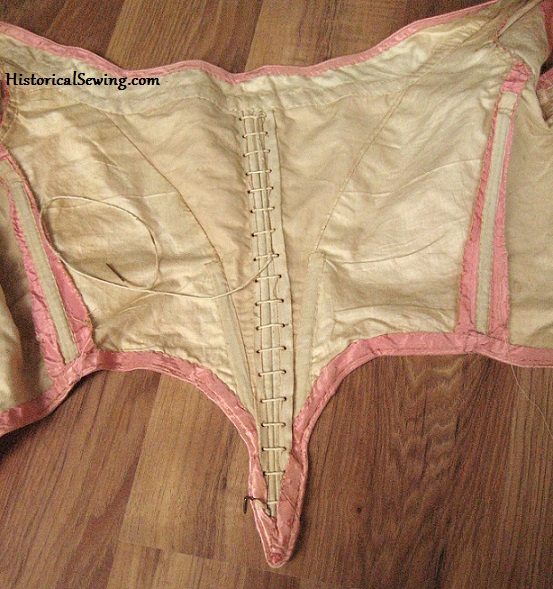
Most original bodices were flatlined with a tan or brown polished cotton. You’ll also find lots of sturdy linens used as underlining fabric.
Our polished cottons today are a bit heavier than theirs but still work fine. A cotton sateen, quilting cotton, silk organza, or linen are all very fine underlining fabrics available to us.

The Process of Flatlining
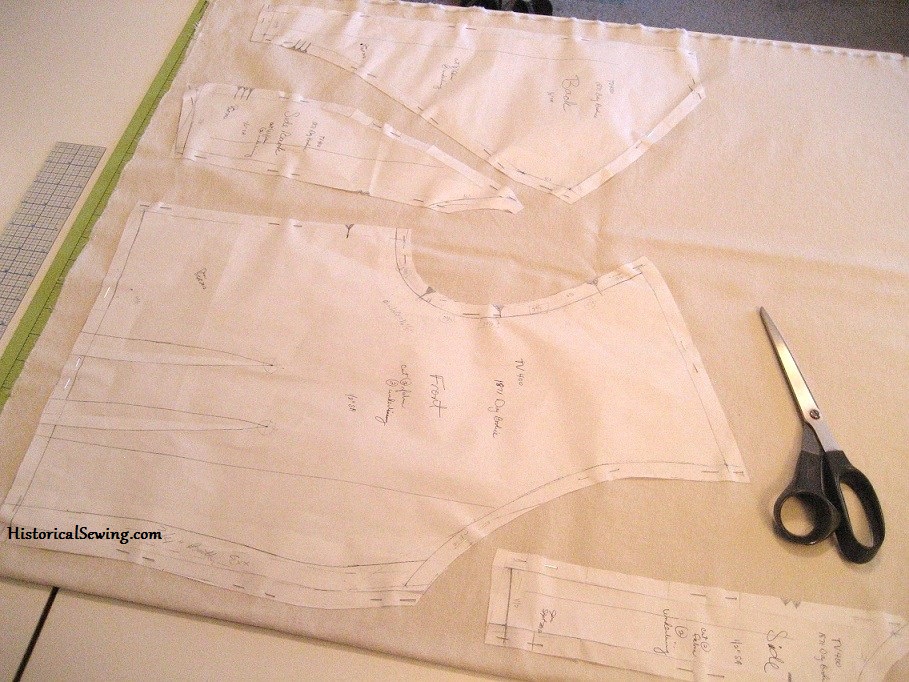
1. Cut all pattern pieces from your underlining and fashion fabric. This includes the all bodice torso pieces and the sleeves. (Sleeves can have a lighter underlining fabric depending on your fashion fabric.) Basically, you’re cutting out two bodices.
2. Mark the darts on the correct side of the underlining fabric ONLY. You do not need to mark them on the fashion fabric. Originals vary with making the darts separate in each layer or together, but in my research more often than not the darts are made in the two layers together.
3. Lay each fashion fabric piece wrong side to wrong side of its matching underlining piece. Machine or hand baste the layers together around the outside edges.
Tip: Do not sew to a corner, lift the presser foot to turn the piece and then continue to sew along the next edge. Sew each side separately and in full.
Baste side seams, shoulders, and neckline edges.
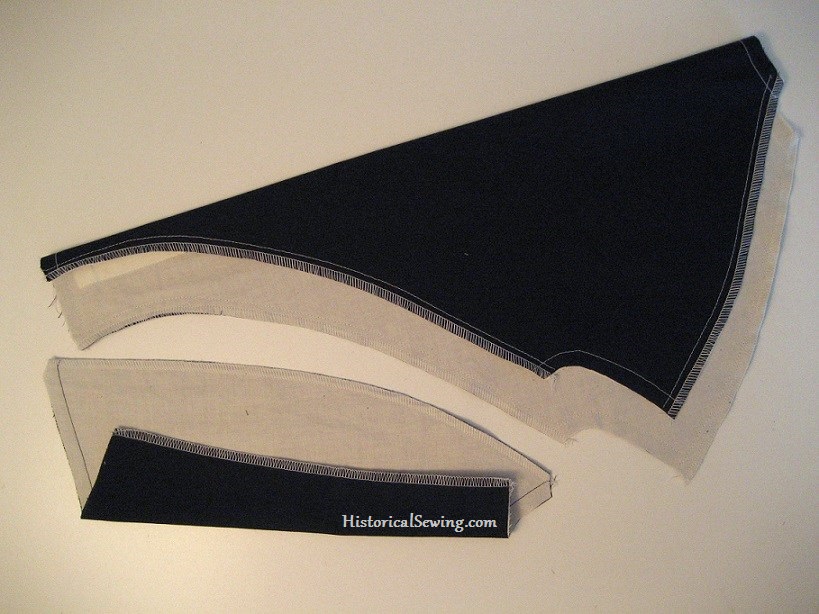
I generally use my serger to attach the layers together. This gives me a finished edge and flatlines all in one step. Although, I DO NOT serge any edges that will be enclosed such as the neckline or the bodice hem that will both be finished with bias tape.
You can baste the armhole and hem edges now or leave them open until later during construction. However, you’ll definitely want to baste the armhole edges together before setting in the sleeve.

Best Flatlining Tip Ever
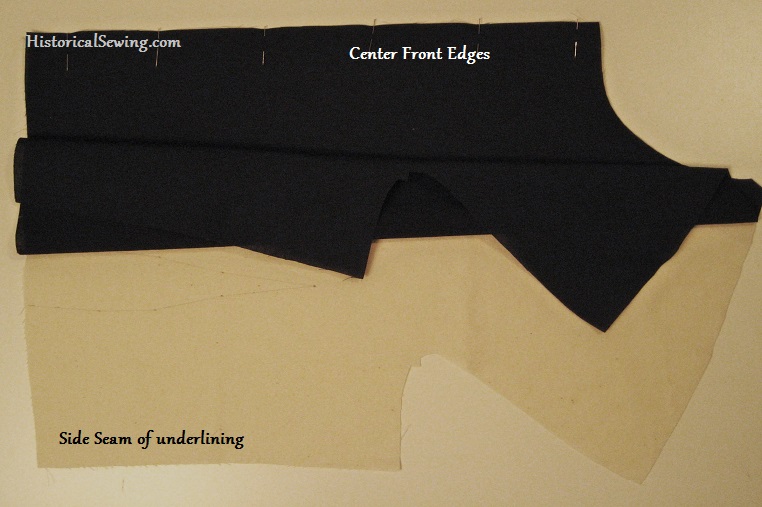
My favorite modern shortcut technique is finishing the center front (or back) edge during the flatlining stage. It is, however, based on period construction. The center front edge is finished (sewn) *before* the underlining is attached to the fabric.
Right sides together, sew the fashion fabric center front to the underlining. Do this for both left and right sides. Press flat, grade the seam, clip at the curves, turn and press the seam flat.
Next pin and baste or serge the shoulder and side seams. Baste (only) the neckline, armhole and hem edges.
4. For the sleeve, instead of basting the cap edge I simply run my ease/gathering stitches at this time to both flatline and ease in one step. Read more detailed steps for sleeve flatlining in my post here.
And now the bodice is ready for the major seams! Not too hard is it? Flatlining is imperative for a well-constructed historical garment.
Do you flatline your bodices? Have you not done so then realized how poorly the bodice looked without that extra layer of support?
Now, that your bodice is properly flatlined, get to working on your skirts. Read how in this post.

Hello Jennifer
I do not understand this part very well:
[–> My favorite modern shortcut technique is finishing the center front (or back) edge during the flatlining stage. It is, however, based on period construction. The center front edge is finished (sewn) *before* the underlining is attached to the fabric.
Right sides together, sew the fashion fabric center front to the underlining. Do this for both left and right sides. Press flat, grade the seam, clip at the curves, turn and press the seam flat.]
Do you sew the the two fabric fronts first together and then to the underlining ?
Or
Do you sew with an ordinary stitch (not the serger) the fabric fashion fabric front to the underlining each? So you have two pieces of the front (fabric and underlining)? Then using the serger to finish the seam?
Or do you mean something else :-)? I do not understand it completely probably because English is not my native language. Sorry for this.
Your second scenario. You sew the left bodice front fashion fabric to left side underlining fabric to finish the front edge. Press and fold underlining back so wrong sides are together. Repeat for the right front bodice pieces. It will look like a finished front along the center front opening edge of both left and right sides. Then baste the two layers together (the left front and right front), with serging if desired around the un-sewn edges.
Hello there! This is some very good information. I am attempting to make a piece with flat lining and I just want to make sure I understand this correctly because I am very new to tailoring. So, the dart should be the thickness of four layers? The shell and the flat lining folded on each other. Seems like it could be quite bulky- is there a way to try and reduce potential bulk? If it’s a fisheye dart snip in the middle to relieve tension? And iron the dart down? Thank you so so much! I am very excited to get to work!
Yes, you could cut open the dart take-up and press it open to reduce bulk in the layers of the fashion fabric and underlining.
Im trying to work with a very strict budget. So muslin is on the list, so thats one question answered, but can i use cotton canvas,
Im primarily wearing 1890’s but im lost for a underlinging/interlining. I know canvas comes in many weights, its cheapest for me but i dont know if it will work. Is it too flimsy or too stiff or does it depend on the weight?
Can i use it in place of hair canvas for tailoring needs? Or do i ABSOLUTELY need hair for tailoring? (Im REALLY trying to avoid fusible as ive heard horror stories and hair is hugely expensive for me, and i want to wash when i can, so canvas is looking the like the best option for me)
Is it historically accurate? Is it accurate for the lower end of the working class? Im really trying to not spend a ton of money on the inter layers, but i want to look to the best of my abilities.
If the canvas isn’t too heavy it could be used for the bodice panels, but not for the sleeves. I’d recommend cotton organdy for the sleeves; or even a couple layers of poly organza would work for short budget. The muslin *might* work in the sleeves depending on your fashion fabric. Layer some swatches to see how your interlinings and fashion fabrics work together.
You do NOT need hair canvas. But using stiff organdy is a nice alternative for tailored collars and cuffs. And yes, avoid any fusible materials/interfacings. As another alternative, use the muslin but starch it well. Dip starch is best for stiffness, but a spray will work too (and easier to find).