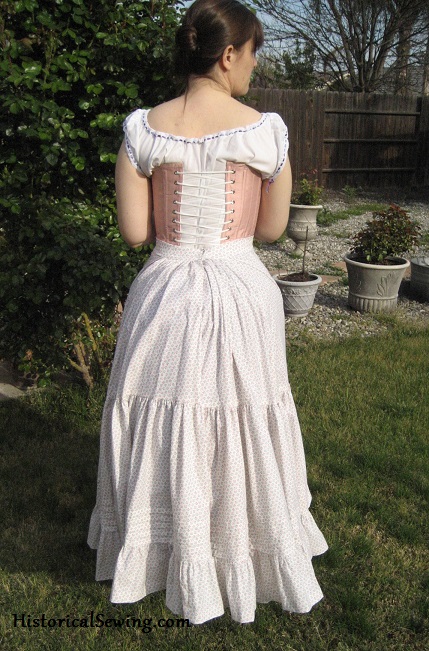
Once upon a time there was a girl fascinated with all lovely things Victorian. Her dress-up box (i.e. closets and hat boxes and shelves) was cram-packed with dresses and accessories made in luscious silks, light cottons, and other wonderful things.
She had so many delights to be satisfied for a century, but it wasn’t enough…. The foundation of any good-looking Victorian costume hanging in that closet is, well… the foundation! Bustles, pads, hoops, panniers, and the like were also stuffed into shelves in that closet (what a thoughtful idea to have shelves in there!).
But they just weren’t right for all the new gowns she was planning in the coming year. Yes, she needed new foundations. And not just one would work. No. A whole trunk-full must be had. So off to work she went humming a merry tune and preparing for the task at hand.
“Well, I say! If I’m to make an 1887 dress with full bustle shelf then my flimsy little wire support that happens to be too small for my womanly hips won’t cut it at all!” she exclaimed. “Why that lovely merchant Truly Victorian has a new pattern, I believe, in the ginormous shape my skirts need.”
So off she went to purchase the 1887 Imperial Lobster Tail Bustle pattern. Not for being boring YET AGAIN with white undergarments, the girl selected a period appropriate paisley cotton for her new support.
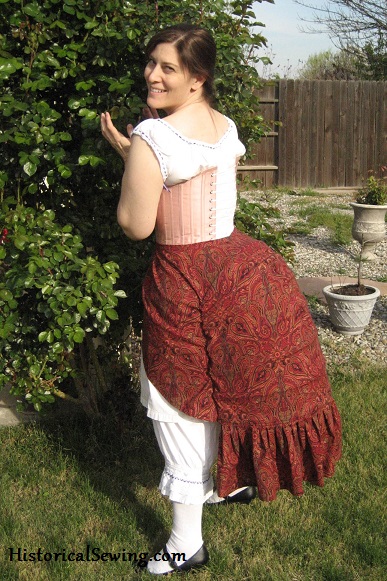
The pattern was very straightforward. The red fabric – fabulous fun (of course)! When all was said and done out popped a tail of enormous size. Huge!!
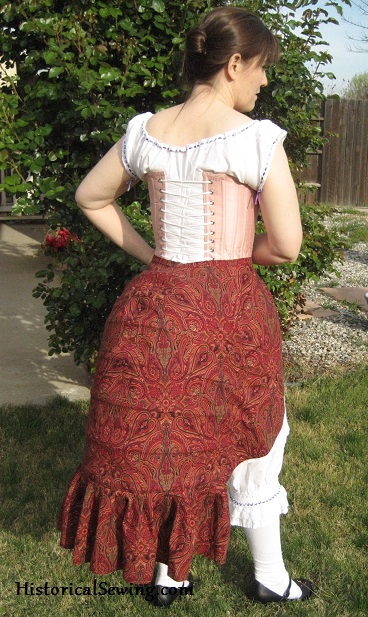
The appendage fell over her hips, gently easing out from the sides to create a smooth silhouette. Even the wide ruffle at the hem fell nicely – a great touch to keep her skirts from breaking at the bottom wire of this tail.
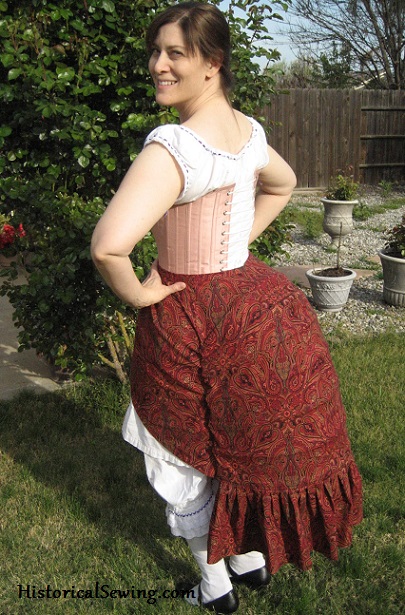
“How fun is this!” she squealed with laughter. Bouncing along she threw on a new petticoat and danced in the garden.
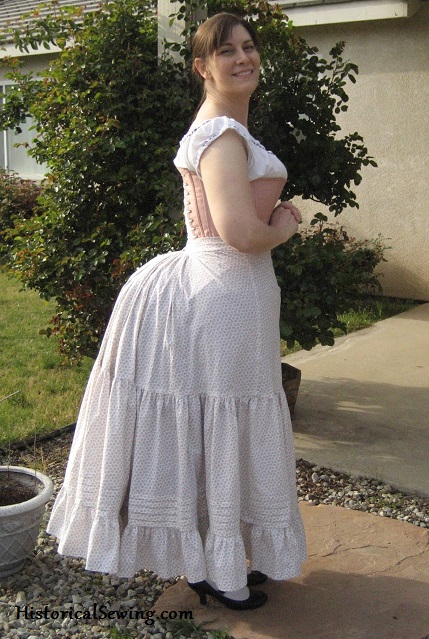
She had such a wonderful experience with this project she decided to teach others how easy it is to make one for themselves. So off she pranced to make new friends….
Now that the girl had a fun new bustle tail to support that upcoming project, it stirred her mind that there were many more dresses on that list that needed new supports as well. The old petticoat bustle was entirely too small for her womanly figure, and having an improper silhouette is just not the thing to be had in this part of Bustle Land!
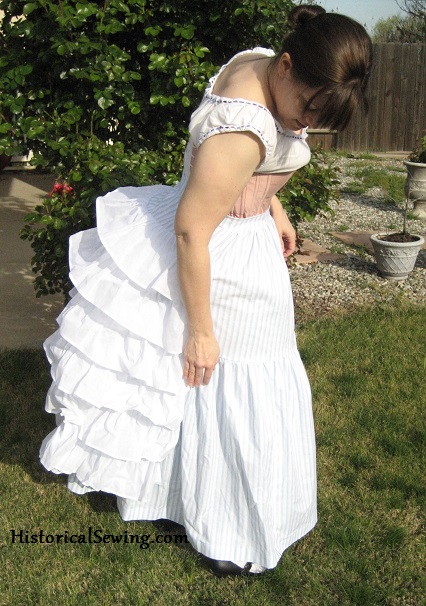
Back to the trusty merchant for a new copy of the Petticoat Bustle pattern (because sometimes it’s just easier to start over, if you know what I mean kids). She even decided to skip dealing with the cutting and gnashing of hoop wire by ordering pre-cut pieces from the merchant.
Keeping with the trend of avoiding white underwear, the girl decided to make this new bustle from, what else? A striped cotton! Blue stripes, you know, as black and white should be reserved for Worth gowns and prison costumes.
The idea of making a ruffled petticoat (here, the overlay of the bustle) was nothing new for the girl. Frills are Fabulous! And appear on a variety of her petticoats already.
But after years of being dragged down from petticoats made from heavy muslin (ugh!) and invisible lead sewn into the hem (it’s hard to dance in the meadow with such weight!), she decided to go with super stiff, serve-tea-on-them-layers cotton organdy for the ruffles.
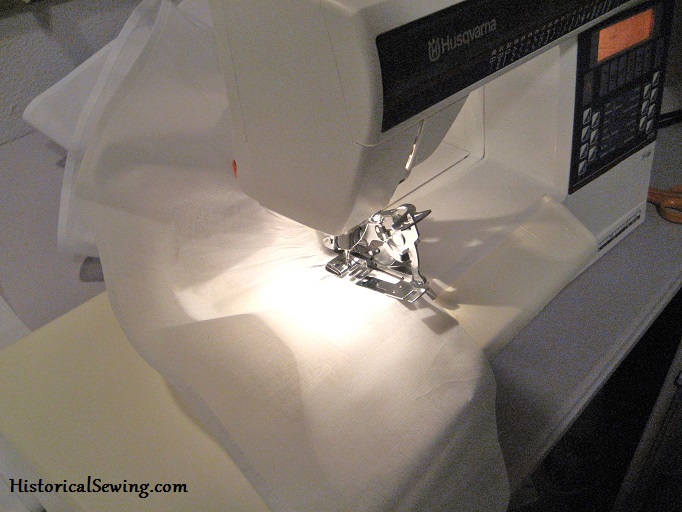
Her friend Mr. Ruffler Foot came for dessert that evening and chewed through all 442″ of hemmed organdy strips to make a pretty mountain of rolling organdy hills.
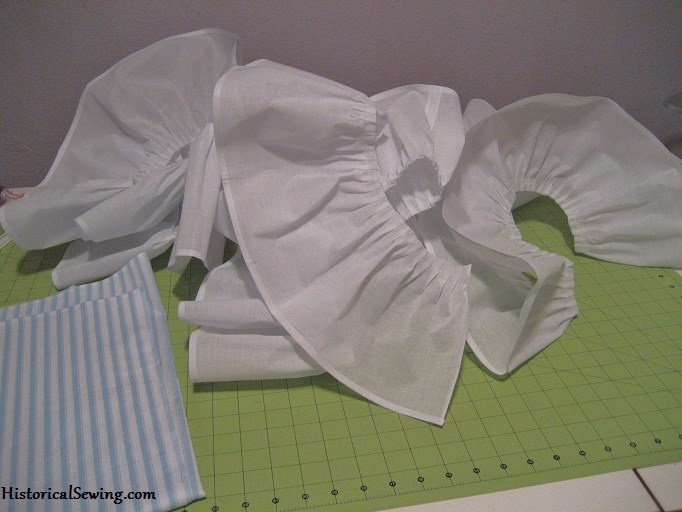
Quickly she mounted the hills into neat little rows (six to be precise).
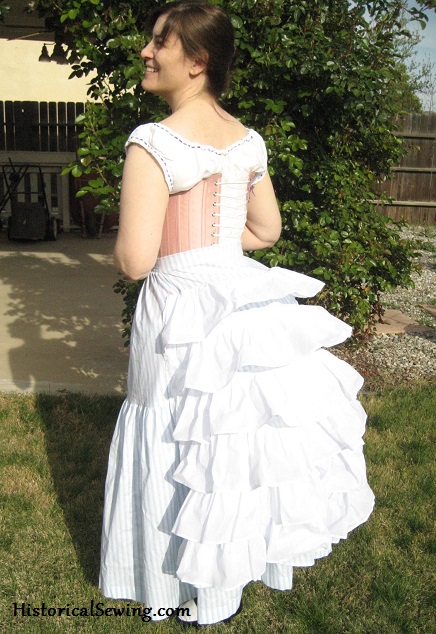
The wires were inserted and tied with blue ribbons into their curved shape. Oh, for pretty bustles! Now it’s time for a hoedown in the garden to shake and wag that poufy tail.
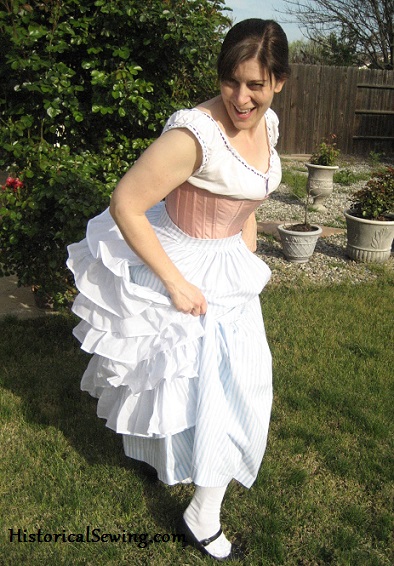
Exhausted from dancing and laughter, the girl dropped to grass. “My, but all this bustle making is so exciting! I should make a third one!” cried our heroine.
“But what shape do I sew now? I have one that looks like a lobster and one that’s puffy like clouds roaming through an azure sky.” Hmmm… She thought and thought.
“I know! I need one that’s tailored. One in a funny shape to help hold the train of my princess gowns” (because as we all know, every girl is a pretty, pretty, princess!).
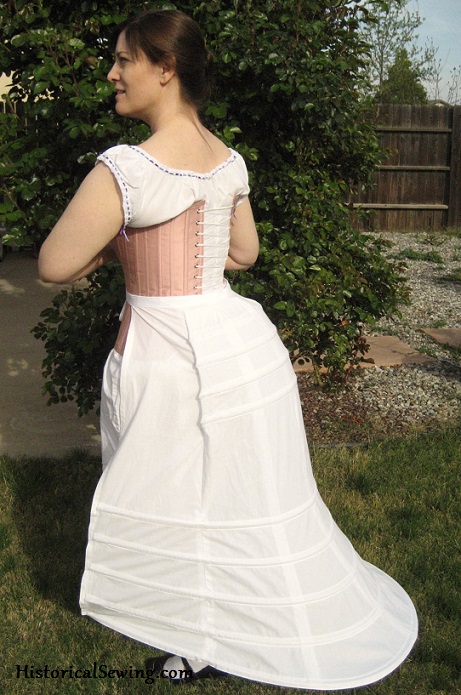
Remembering her Obsessive Pattern Collection™, the girl dug into the depths of the bins to find just the pattern – the Laughing Moon Hoops & Bustles pattern – for goodness knows, she ain’t about to draft that thing herself. No way! Dressmaking awaits and there’s no time to dawdle with fiddly bits like drafting a bustle pattern.
Now after two other bustles, you would think this one would about make itself. Well, this girl doesn’t own a wand or have magic pixie dust, but she does have experience going for her.
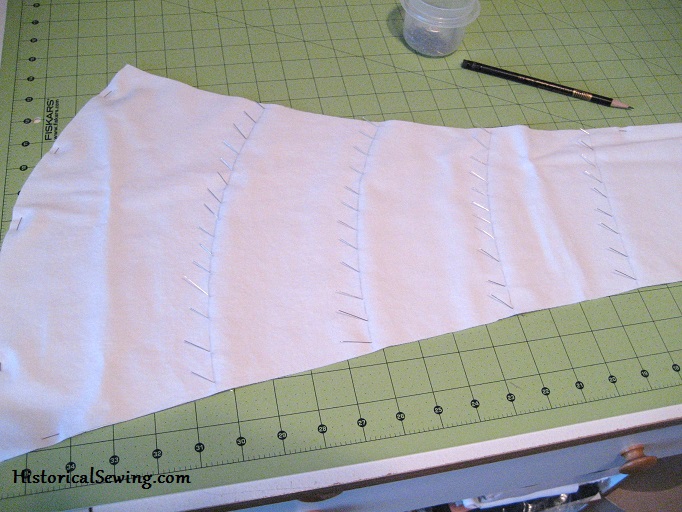
The marking of the hoop lines took forever – you must be precise with this as this is not your usual everyday bustle for visiting wear. No, the lines must be right on target. And once they were the twill casings went on smoothly.
But the waistband instructions were… what exactly? Pithy. And their technique didn’t allow for enough support for holding up the bustle on the body. “Seems rather unsupportable and weak and unfinished,” the girl thought, and then figured out a new method that pleased her immensely.
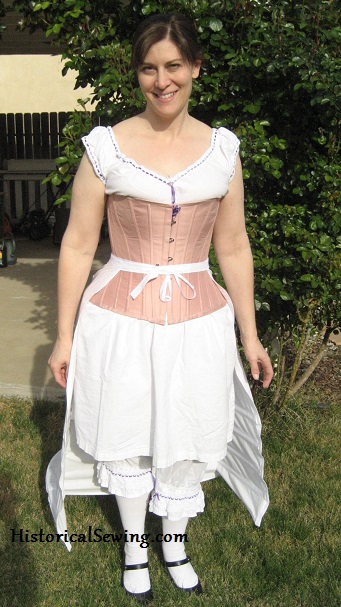
Then came the panels. With grommets. And bones. And the fat tears from the breaking of the marble that had been so lovingly used for grommet pounding for over 10 years. But the grommets went in. And so did the bones. “How on Earth am I to sit down in this thing with bones going straight up my back side??” she thought aloud.
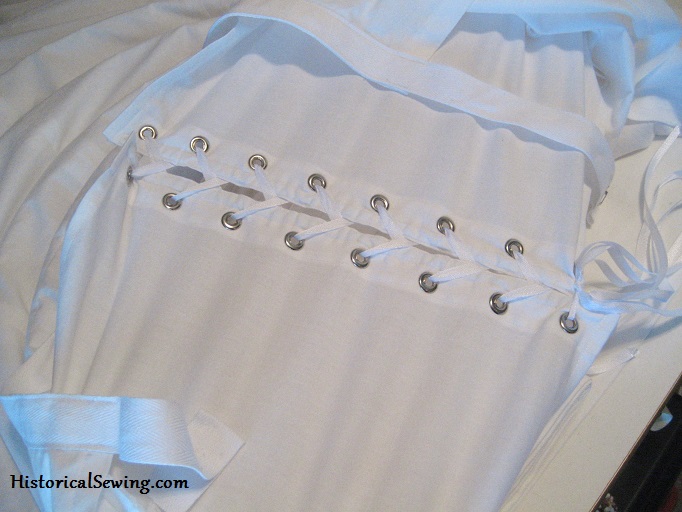
Later the girl was frustrated with the bones as they were too short to sufficiently support the entire row of grommets. If she could share her knowledge, she would pass on the note to use 11″ long bones for the top panel instead of what was listed. Ugh… changes only found out at the end of a project… yeah, those suck.
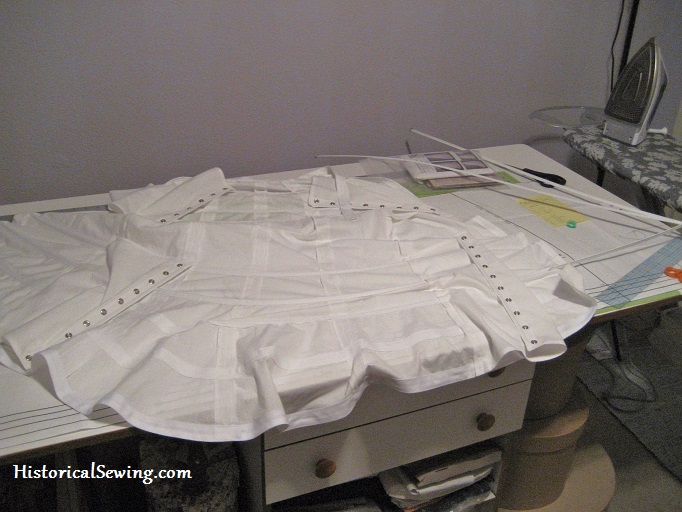
After a lengthy session of severing plastic covered hoop wire into nine pieces, nearly stabbing her kitties and blinding herself, the girl then wrangled them into their proper casings. Before this, she was so frustrated at the lack of information on how long to cut each wire. No pretty little chart with numbers sitting in a row telling her exactly how long each row needed to be. Nope.
So she measured and cut and glued tips to the ends and inserted the wires into the neat rows trying to keep the whole thing from twisting into a bad origami lantern that should have come from China but instead from a Kansas tornado.
At last!
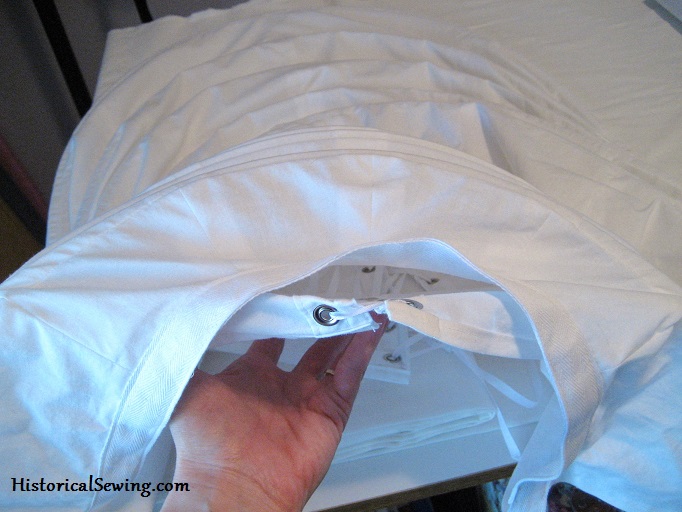
But oh no! The bustle part turned out rather flat instead of a rounded form. As she finished tying the panels together, holding back frustrated tears at a project she wanted to love but found lacking, she sighed at the completion of the thing anyway.
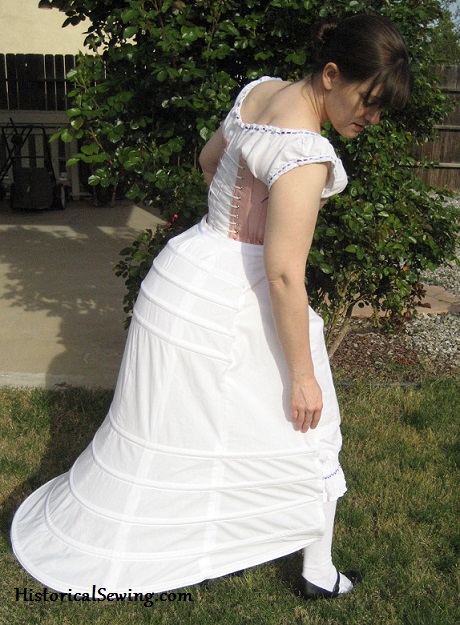
Putting on the new tailored undergarment, she floated around, noticing how high off the ground the hem landed, how the support didn’t move much (which she was grateful for)… and how flat that bustle back side was.
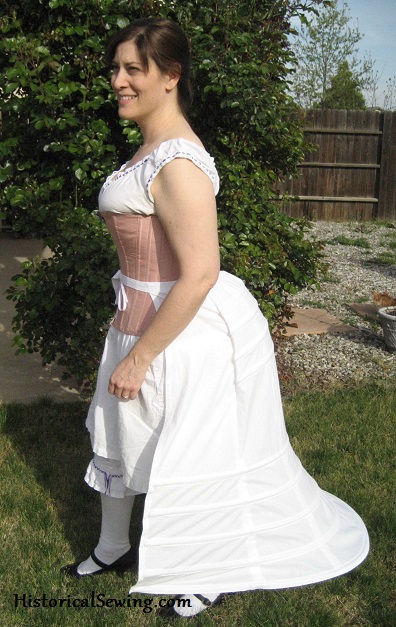
Then the girl had a thought. A marvelous thought. Yes, the girl had a marvelous, wonderful thought. “Why I’ll just add a pad between my hips and the stay. Then the bustle will jut out, rounded out in its way.”
The ideal thing did this solution present. For now she had the perfect mid-to-late 1870s silhouette. Brilliant!
And that, my friends, is the splendid tale of how a girl, who had too many Victorian undergarments to count, ended up with three more bustle tails for her overstuffed wardrobe trunks. Now back to the regularly scheduled dressmaking – gowns to wear over these pretty new bustles!

Is there somewhere I can buy, or find the pattern for the lobster tail brussel (the short one) without taking the class
Yes, you can find bustle patterns in my shop here: Old Petticoat Shop.
Did you leave off the front panel (number 22) for a reason? I noticed it wasnt on yourphoto…but I could be reading the pattern wrong?
The lower panel? No, it’s there. You can see it in the “inserting the wires” photo above – it’s the lower panel with the grommets for lacing.
Hello!
I’ve been searching high and low for as much information about bustles as I can gather. I’m currently researching to make not a Victorian era gown, but a gown from Star Wars (Episode 2, Padme’s packing gown), of all things. I think I can tell the skirt has a small bustle, and I’ve been trying to find out if it’s possible to create a bustle that can be worn either over or under a 3-layer taffeta petticoat (top two layers will be pleated, bottom layer is tiered). I’d like to know if it’s possible to do this for a petticoat that doesn’t have any kind of train, because I’d like to make the petticoat usable for other things.
I’ve been looking at bustles that don’t have any padding, and are mostly just ruffles. Would that work for what I’m after? I’m a fairly amateur seamstress, but I’m not daunted by complicated or time-consuming patterns– I’m really just looking for what will function best!
Thank you!
Even with no train you’ll need extra length in the skirt/petticoat back to go over the extra height of the bustle – whether it’s a wired form or simple pillow/pad. It really comes down to the silhouette you are going for. For a small bit of back side a moon or oval shaped form lightly stuffed and/or with ruffles mounted on top will give you that. Make sure to take your natural shape into count. (I need a bigger bustle for an average look due to my flat back side.) Make the bustle pad a separate item with ties on the ends to tie around the waist.
Good luck!
I’ve made the trained bustle before and was also underwhelmed by it. The bustle portion seemed too flat and I had issues with the bottom wires being pushed too far forward by the weight of the gown. I added an additional flat panel behind the legs to keep it pushed back, but the entire thing felt too insecure. Did the hip pad provide a permanent solution for you?
I’ve only worn it a couple times. But I did tack in some twill tapes on the inside to hold the outer edges closer behind my calfs. I agree, it seems a bit flimsy. Multiple petticoats would help though; I think I’ve worn just two with it.
I would always wear the bustle pad with it for extra silhouette (and because my back side is a little flat anyhow so it is definitely needed). My pad is a separate piece and I simply safety pin it in to whichever bustle I happen to be wearing. So I could wear this trained bustle as-is for a late 1870s look and be happy with it.
I am using a ruffler for the first time to make the Grand Bustle (TV 108) ruffles. What a wonderful timer saver! Not to mention stellar ruffles! Your ruffles on your TV 101 look more lush than mine do. Do you know what you had your ruffler set at? My depth screw was set at 8 and my pleat lever was set at 6. Or could your ruffles look fuller because you used a cotton chiffon and I am using a medium weight cotton/poly blend. (I know, I know!)
Did you do anything to the top edge of the ruffle? My pattern directions do not address this. Did you just leave a raw edge or overcast it?
I recommend using the Grand Bustle pattern. It is a fairly easy pattern to follow.
Hi Rene’,
Rufflers can be different depending on your machine. I have a Viking. My ruffler foot has 0-12-6-3 for the settings. I leave it at 6 for a 2:1 ratio and use a 2.5 stitch length. Gives nice little pleat tucks every 6 stitches. Also, after cutting & piecing my ruffle strips I press up and sew the hem. Then I run the top edge through my serger to finish the raw edge before I run it through the ruffler foot. I’ve also simply pinked the top raw edge before pleating.
Hi, I am considering using this pattern for a first attempt at a reproduction dress for my daughter and am considering stiff organdy for the ruffles based on the wonderful and very informative advice on this website. However, we are on a bit of a strict budget and are trying to assess all costs before committing to purchases of patterns and materials. Though this comment is from a few years ago, I am wondering if anyone could advise on the yardage needed to complete just the ruffles so that I can price the organdy and see if we can go that route or if we have to stick to muslin. Thanks for any advice you can offer! This website is a fabulous resource.
Hi Lauren,
For the overlay of the ruffled bustle (fabric panel and ruffles): 45″ fabric is from 2.75 to 3.5 yards or 60″ is 2.5 to 3 yards depending on the size you’re making. The bustle itself requires 2.25 up to 4 yards depending on fabric width and size. If you don’t want to use organdy a nice, stiff cotton muslin or broadcloth will be very lovely and work just as well as the organdy. 🙂
Hi Jen, I too, am working on a Laughing Moon Bustle. The instructions are less then stellar, and they give you no clue as to the length of the bones for the bustle.
I sent them an email regarding this exclusion from their patterns, hope to hear back.
I noticed you said you were not happy with the “flatness” of the bustle. Could it have been the bones were not cut long enough?
How did you measure the bones for this bustle? This is my first bustle ,so I know nothing about construction..etc.
Thanks for sharing
melody
The flatness is partly from my own flat back side that doesn’t help for protruding bustles out the way they should. Also, it’s from the width of the bustle section itself – it’s too wide for my taste. If the inner support fabric was cut more narrow it would allow the wires to curve tighter thereby pushing the slope away from the body more giving a more full bustle shape. But that is simply how it looks on me and what I wanted from the pattern. It turned out ok though for my 1875 tartan dress.
I absolutely love your bustles they are truly beautiful to behold. I am interested in making one myself however i’m not sure which one would be best. I would like a really big bustle for an 1880 dress which one would you suggest.
Hi Asha! Have you read this post on bustle silhouettes yet? It’ll give you the best shapes I recommend for each of the Bustle Eras. 🙂
You know, a nice class in underpinning making isn’t a bad idea…
finished by lobster tail bustle…now on to the petticoat….do you adjust the length of the petticoat to fit over the larger bustle, if so…what would be the best way to do that? thought about just adding the extra inches to the back piece but i’m worried about how it would then match the sides? any suggestions?
You can lengthen the petticoat in the back only. Compensate by creating a rounded bottom edge that’s longer in the center then comes back up to the original side seam; OR simply take in a few tucks on the back panel at the top on the sides to match the length of the side panel you are attaching it to. Depending on how much extra the Imperial lobster size adds to your specific back length you may not need to add much if at all.
LOL! My current purchased lobster tail looks just like a bad origami lantern right now where it has twisted and bones are popping out of torn holes. This comes from using insufficient twill tape that didn’t have the strength to hold them in. One of these is on my horizon to make soon.
And I enjoyed reading your fairy tale very much.
Val
Congratulations – I’ve nominated you for the Very Inspiring Blogger Award.
http://victoriantailor.blogspot.com/2013/04/award-night.html
Cheers! Andrew
Why, thank you very much Andrew!
Wow, that organdy petticoat looks so nice and the red lobster tail bustle cage is awesome.
I recently finished the Imperial (which was SO easy and wonderful!!) and am halfway through my TV 101 bustle in garnet taffeta. both are great patterns and gorgeous!
Wow, you’re a foundation-making machine! I have to confess that I don’t know that much about the nuances of shape within the two bustle periods. Would you consider doing a post that shows fashion plates or photos with the appropriate type of bustle to get each particular shape?
Great idea Ginger! For now you can read about the overall silhouette of the Bustle Era here: https://historicalsewing.com/bustle-era-changes-the-highs-lows-in-the-1870s-1880s
What a darling story Jennifer. LOVE the colors you chose. Was sorry to read how difficult the 3rd bustle was to make and all the alterations needed. I probably need that 3rd bustle, but after reading about your challenges it won’t happen.
Oh, don’t get me wrong. It was fine and went together quite well. I just found the issue of having to measure the wire lengths myself as well as finagle a new waistband (two layers of twill sandwiching the top of the bustle) made it not as smooth as I expected. I would encourage everyone to try it if they need the shape. It’s about the only pattern around for such a thing without drafting from a book or on your own.
Ooooh, I love them! The ruffled organdy one is my favorite– kind of a shame that such gorgeous undergarments have to be hidden!
So now I’m really curious, having never worn a bustle… how on earth DO you sit down in them?
Thanks! 🙂 I just so happened to make a video tutorial of sitting down one the same day. Watch for it to be posted soon!