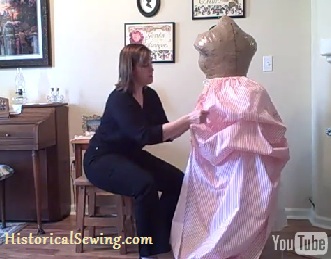
In this video tutorial you’ll learn how to create a bustle pouf from the skirt back panel. Although an 1870s skirt is shown here, the technique can be used for 1880s bustles as well.
Following the video check out the photos for a more detailed look at what you learned in the video.
Showing the side seam pleats.
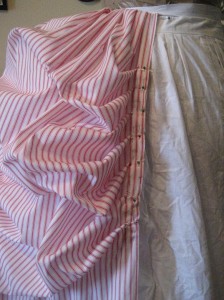
You can see here two safety pins marking where to pin the back panel to the tape inside.
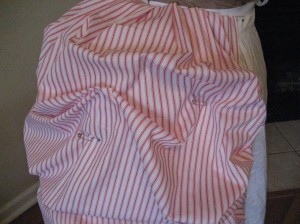
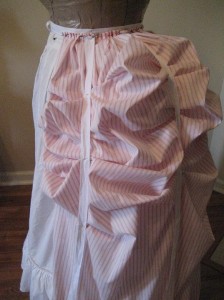
The side view of the pinned bustle:
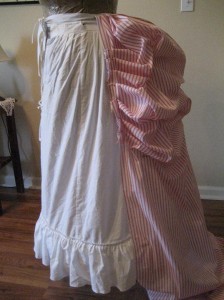
The back view of the pouf-y bustle:
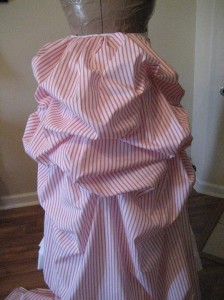
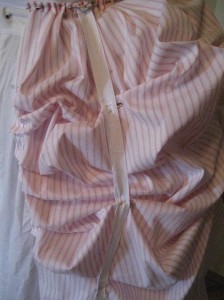
Inside view of pin pleated bustle:
The twill tape holding the bustle poufs:
Cottons are the best fabrics for bustle skirts. Read about which cottons to use and how to work with them. And after you make your bustle dress learn how to sit in one.
I hope you enjoyed this tutorial. Easy method to make a bustle skirt Have you used this tutorial for any bustle projects?

hi i’m trying to be mary walton for a history project and i would love for tips on how to make a bustle quickly and a appropiate dress quickly and do a corset thingymerbob. suggetions?
Hello! I noticed you gave measurements on where to mark your twill tape for pinning the bustle ( highest in middle tape atleast 10″, sides a bit higher and pin 2 times in the center and three on the sides, all for a total between 14 and 30″) in the written description but I was wondering where on the fabric do you make the marks to pin to the twill tape? How much difference in retrospect to the twill tape do you measure on the fabric to pin? What would be those measurements? I noticed you mentioned you pre marked them in the video, but didnt give specific measurements. Thank you for this video, I am a complete novice at this and I’m more visual, just need to know where to measure my fabric to pin!
Hi Melissa,
I made the fabric marks to progress the video faster. 😉 The tape markings are all for reference and a good starting point, but can be adjusted to taste. Even more so, the markings on the fabric are all to how puffed up you want the back. Keep the points in line (on grain) vertically and play with where you want them attached to the tapes. Start with 1.5 to 2 times the length on the fabric between points in relation to the marks on the tapes. Safety pin or straight pin in place, then adjust to how you want the bustling to look.
That’s a beautiful bustle! Well explained thanks.
yeah! you just solve my mystery problem whit the bustle to my wedding dress! I´m so happy! Looking forward to jumping into the bustle world, and now whit tips to dress bow, I´m gonna fall in love whit my wedding dress! So grateful thank you SO much!
Lots of love and thanks
Malou
Denmark
Best of luck with your dress! 🙂
I’m new to sewing bustle- period skirts. Your tutorial video is immensely helpful. Thank you!!
Thanks so much for this information! Now that I know what to do to get the bustle look for the back of my overskirt, I’m wondering how I can get the front of the skirt to lie in comparatively flat swags, with the overskirt pulled up to just above knee-length in both CF and CB. Would I sew all the gores together normally, then pleat the side seams as shown, and not use the tapes in front? Or would there need to be a difference in the original length of the front and back, to make a bustle in the back and swags in the front separately, before closing the side seams? I’m thinking I would flatline only the back for this look, right? Also, for the bustled back, how would the hem be shaped?
The overskirt generally does not have tapes in front to bustle up. The pleats at the sides are done last after main seam construction. Flatlining is to support the fashion fabric with an underlining fabric. An overskirt can have it on the back and front, or just the back. It’s whatever the fashion fabric calls for. And the hem can be what you want it – square cut or curved/rounded.
Can you draw up the top of the skirt or does it have to be pleated? thanks for this video it is great!
As with drawstrings to let down or up as desired? Yes, you can. Run a vertical casing along the three columns of pin placements; sew a string or tape at the top and draw through the casing; pull up into position and tie with another short tape sewn to the end of the casing. 🙂