
I love ruffles! Lots of them. I love flounces too which are essentially long ruffles. I also love skirts with a few deep flounces attached. (I’m such a nerdy girly-girl.) Perhaps you love flounces to.
So when your design calls for three flounces on your wide c.1855 skirt, where do you begin?
I mean, it can’t be that easy to simply gather up a few lengths of material and attach them to a skirt.
Well, maybe…. But how do you figure for the width of each one? And if you’re like me, you’ll want to know exactly how many inches up from the hem they should be attached.
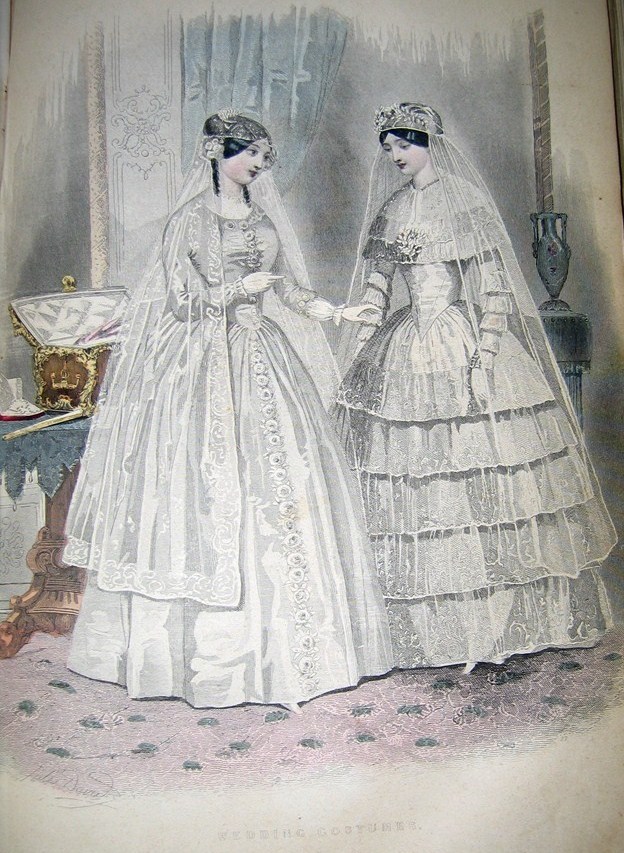
Many skirts I’ve seen in period photographs or fashion plates tend to be 3 to 5 flounces. Of course by the time 1860 rolls around they’re showing as many as 10+ rows of ruffles! But for the sake of simplicity, we’ll just stick to 4 here on our example – which happens to be an organdy petticoat as this method is PERFECT for petticoat flounces too.

Figuring Stitch Line Placement
- You’ll want to figure the finished length of your skirt. And then you’ll want to actually finish the hem before mounting the flounces. But leave the waist unfinished as it’s easier to set on the flounce.
- Decide on the number of flounces (3 to 5) and where you want the top flounce to start. This will be your stitch line. Take a look at existing garments and fashion plates to give you an idea of where to place it. Generally, a few inches below the waistband is good.
- Measure from the top stitch line placement you decided on down to the finished hem. If your finished skirt length is 40″ and you want the top ruffle 10″ below the waistband, you have 30″.
- Divide the measurement by the number of ruffles you want. 30″ divided by 4 = 7.5″ This is the space between stitch lines.
- Mark the stitching lines on your skirt with a hand basting stitch or disappearing pen. Measure up from the finished hem 7.5″. Move up another 7.5″ from the first stitch line and mark the second line. Repeat for the final rows of stitch lines.

Figuring Cut Width of Your Ruffles
Now, avoid this mistake: DON’T just take the measure of your skirt from that top stitch line down to the hem and divide by 4 (the number of ruffles you want) and think that is your finished ruffle width. No. This would make your project look like it came from the 10th grade sewing classroom.
- You now know that there will be 7.5″ between each ruffle seam. You’ll have to decide how you want to mount your ruffles: 1) flat on the skirt (wrong side of ruffle to right side of skirt; 2) the seam allowance tucked under where you sew right side to right side then flip the ruffle down covering the seam allowance; or 3) with a header.
You’ll want to allow for an overlap of each ruffle. Even if your three flounces are all 12″ wide, the placement stitch lines will be more like 10″ apart so the ruffle above covers the seam of one below it.
- Take your 7.5″ and add how much overlap you want. Start with 1/2″. You can go deep with a 2″ overlap if you want. We’ll use 1″ for our example. So 7.5″ + 1″ = 8.5″.
- Add to this a hem allowance (I like 1/2″ but it depends on your particular project.) 8.5″ + 0.5″ = 9″
- Now add your top edge treatment allowance. For now let’s use #2 (from above) which will add only a 1/2″ seam allowance to the top. 9″ + 0.5″ = 9.5″. This is the ruffle cut width.
- Cut strips of your fabric needed to gather properly around the skirt, piece the strips, hem and prepare the top treatment.
Attaching to the Skirt
- Start from the hem and work your way up.
- You may realize that all ruffle strips include overlap. The very bottom ruffle, when stitched on at your first 7.5″ stitch line will hang over the hem by the 1″ overlap. This is cool as it hides the hem.
But you may not want it that way. That’s ok. You can either re-draw your stitch lines by starting the first one above the hem at 8.5″ above the finished hem then re-mark the other three lines at 7.5″ apart.
And that’s how you make an even-tiered flounced skirt!
What kind of skirt is best to attach all the flounces to? Just a plain cartridge pleated petticoat?
Any good base layer fabric will work. It can be in the same fashion fabric or a more inexpensive fabric in the same color as the flounces. The top can be cartridge, knife or box pleated to fit the waistband.
Hei
I have a question, how was it actually the flounces sew on to the skirt, straight stitch? any specially stitch? and ended up with a nice finish. Thanks
The top was often folded down and the gathering stitches (by hand, of course) run across. Ruffles were commonly attached with running stitches, even or uneven length. The occasional backstitch was most likely used to secure. I’ve not seen ruffles attached with all backstitches, but it was probably done at times.
Dear Jennifer , Thanks so much for your answer, sorry for bothering you again, but, do you have a any picture as example, I have been looking through in internet but there is not really so much. Thank you.
Here is an original 1850s dress with two ruffles that are top gathered over a small cord (a popular technique in this era).The ruffle is most likely sewn on with running stitches just below the cord. You might do more searches on the Antique Dress site as she gives wonderful detail photos.
Excellent!
Appreciate the comment recommending 1.5 vs 2x gather ratio. I’ve usually worked with 2:1 depending on fabric thickness/hand just because the math is easy, lol! With this kind of yardage involved, nice to know “less is best!”
I know it! Now that I’ve done less full gathering, everything else looks so out of control to me. Plus it’s easier to manage when it’s not so crazy. Always a plus!
This is so helpful! Flounces look great, but they can be a real hassle. I really appreciate info on the overlap in particular – it really finishes the look.
A couple other suggestions, gleaned from people who know a whole lot more about 1840s-1860s clothing than I:
* Cut ruffles and flounces on the bias. In a stripe or plaid it’s a smashing fashion element, and bias material ruffles better and looks more full. Leading to…
* Don’t cut the ruffles too full. 1.5 times as full is plenty. The skirts are already so full, plus being held out by petticoats or hoops, that too-full flounces just eat fabric and in the worst case can stick out funny.
I LOVE using bias now. I’ve even used it for frills on a 1940s pattern – I love how they look, they’ve never flattened like straight-cut ruffles do, and I think I got by with only 1.2x fullness. Yay!
The suggestions you’ve shared are right on point! It’s amazing the difference that only 1.5x gathers will do versus 2x. And if you look at period photographs and existing garments you can see that they didn’t gather the ruffles too much. It wasn’t like our modern sewing lessons where so many things are 2 to 2.5 times larger.