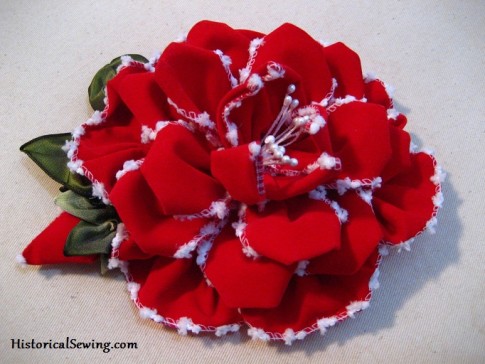
This particular design is from Camela Nitschke of The Ribbonry from whom I purchased one of the kits for it years ago. My tutorial flower here is made in a red velvet Christmas ribbon with a fuzzy white edging snagged in the Christmas clearance aisle at JoAnn Fabrics.
I’ve made this flower several times, mostly to wear in my modern hairstyle or give as gifts. But this large design would be stunning on an early-to-mid-19th Century bonnet or even as trim on a gown. Be creative!
Here are the basic directions I’ve adapted for one flower. Get supplies for dozens! They make great gifts. 😀 (This tutorial is very photo heavy and long. Allow time for all pictures to show up.)
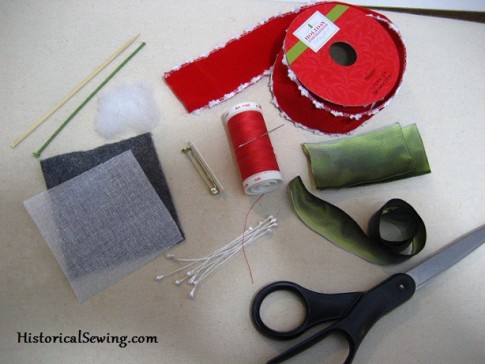
Supplies
- 1.5″ wide wired ribbon, 3 1/8 yards – wired ribbon is best for this style flower as soft or satin ribbons will not hold the shape
- 13″ of 1″ wide green ribbon for calyx around bud
- 12″ of 1″ to 1.5″ wide green ribbon for two leaves
- 5″ green stem floral wire
- Stamen – 7 to 10 pieces
- Tiny bit of fiberfill
- 3″ x 3″ square of crinoline
- 3″ x 3″ square of matching felt
- Bar pin back
- Ka-bob skewer or 1/8″ dowel (a toothpick is too small but will work in a pinch)
- Matching thread, hand needle, scissors
Instructions
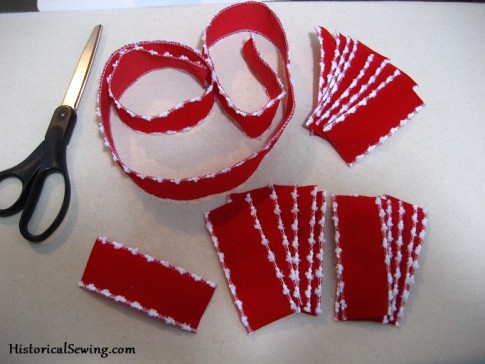
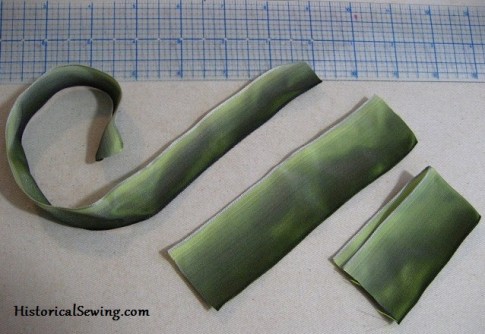
First cut your flower ribbon into the following bits:
- One length 37″ long
- 7 pieces each 4″ long
- 5 pieces each 4″ long
- 5 pieces each 4″ long
- 1 piece 4″ long – remove wire from both sides
Bottom Petal Layer – 1 length of ribbon into 6 petals
For the petals, choose an inner edge and outer edge of your ribbon. Remove the wire from the inner edge of the 37″ length.
Place pins ½” in on both ends and on both long sides of the ribbon. Then place pins every 6″ along the entire length of ribbon. Each 6″ space will become a round petal.
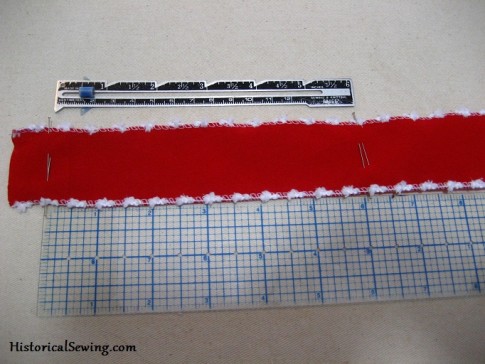
Using a single thread, start at the top (wired) edge at the pin 1/2″ in from the cut end. Secure the knot.
Run a gathering stitch (a simple running stitch) down to the opposite side. You’ll want to angle your stitching to about 1/4″ away from your pin mark when you get to that side.
Then continue to run a gathering stitch along the lower selvedge until you reach about a 1/4″ from the next pin. Angle up and run the thread back up to the top edge.
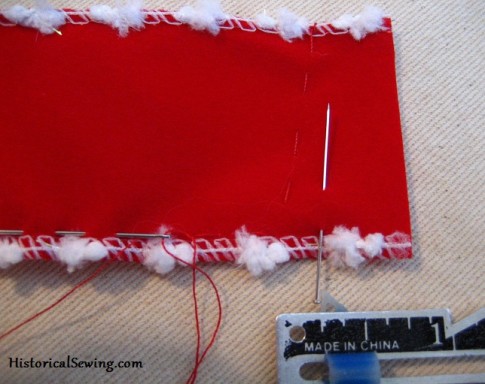
When you reach the top edge, make sure your thread is out on the correct side of the ribbon. Then go OVER the top of the ribbon selvedge and back in the ribbon at the pin mark.
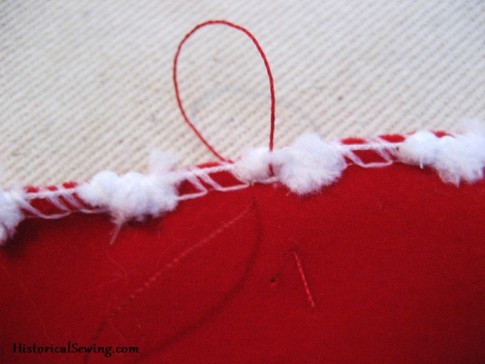
Continue back across the ribbon again, angling down to 1/4″ away from the pin. Then keep sewing the running stitches along the bottom edge until you reach the next set of pins. Repeat with remaining sections.
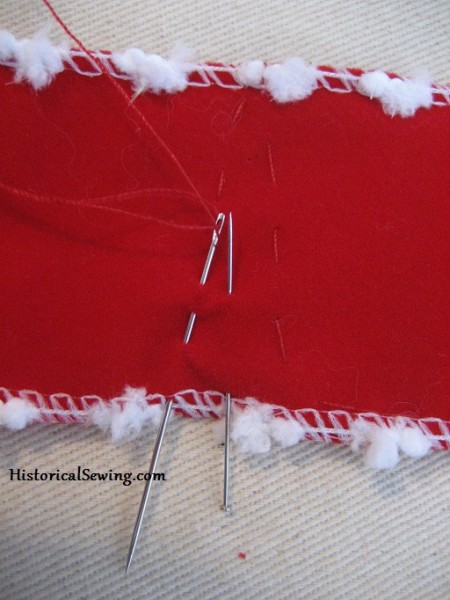
As you finish each petal, gently pull up the thread to gather up the ribbon. You want to pull the ribbon up as tight as possible. Some ribbon will be easier to do this on than others.
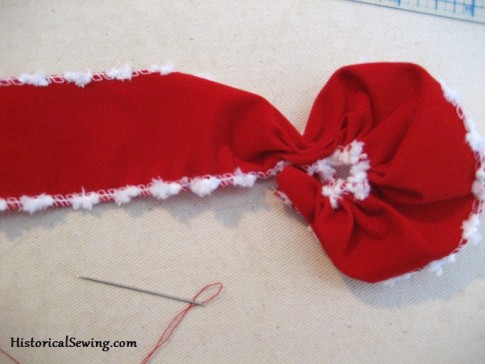
When you reach the next pin (1/4″ away remember), angle up to the top, make the loop over the top, head back down to the lower edge and continue. Do this on the entire length of ribbon, ending at the top edge where the pin is 1/2″ away from the cut end.
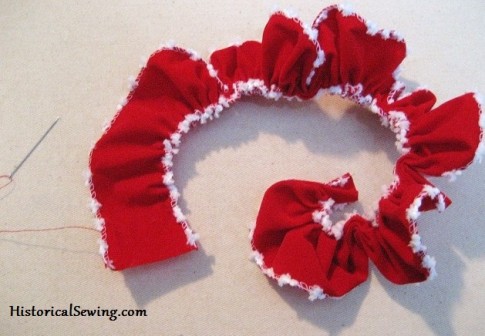
After you’ve pulled up the ribbon petals as tight as possible, knot your thread to secure the stitching but don’t cut it. Even out the gathers along each petal. Match the end petals together forming a ring and tack together.
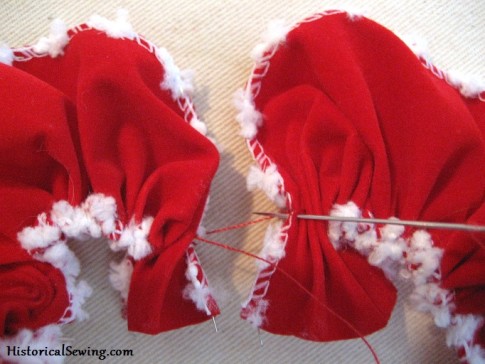
Grab the crinoline square and center the circle of petals on it and pin to hold. You can mark a dot in the center of the crinoline to help set the ring.
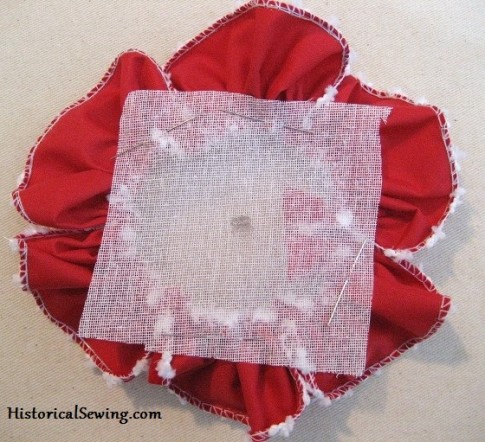
Tack this bottom petal layer to the crinoline sewing around the inner circle. Set aside.
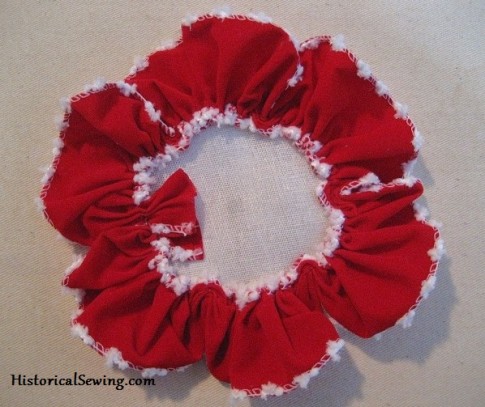
Second Petal Layer – 7 pieces
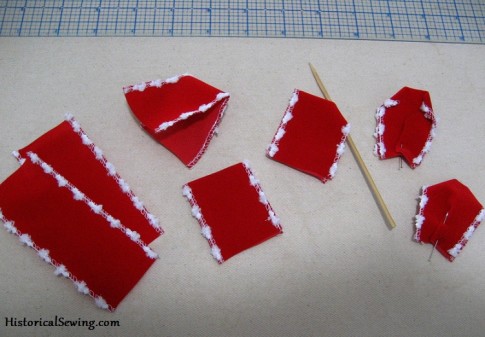
Do the following steps for each of the 7 pieces in this second petal layer.
Fold the 4″ cut piece in half so the petal is 2″ high. Using a bamboo ka-bob skewer or dowel, roll the folded corners under a couple of times to shape the top edge. Mold the wire in the ribbon to help form the curls into place.
In the center of the lower ends, fold up a tiny pleat and tack down. Fold both layers of ribbon together.
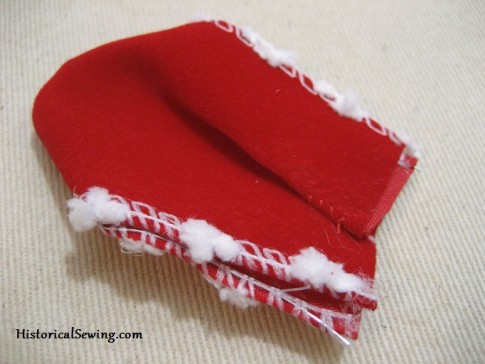
Run a gathering stitch through the bottom of each petal, attaching one to the next, and sewing about 1/4″ up from the cut edge.
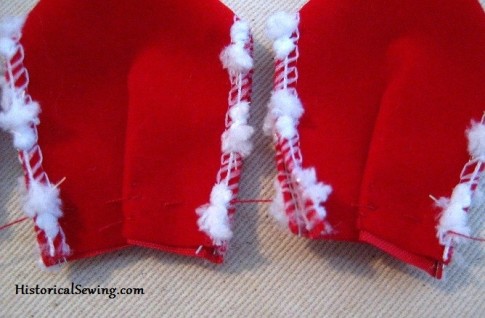
I like to finish the stitches on one petal with my thread on top. I will then start the stitches on the next petal from the back side so my petals overlap slightly in the circle (or vice versa).
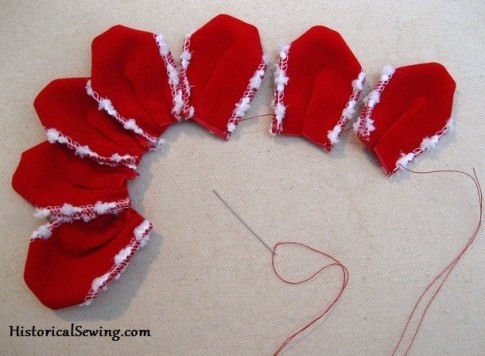
As you did with the first layer, pull up the stitches to gather the petals tightly. Knot to hold. Bring the end petals together, forming a circle that will fit inside the first layer, and tack.
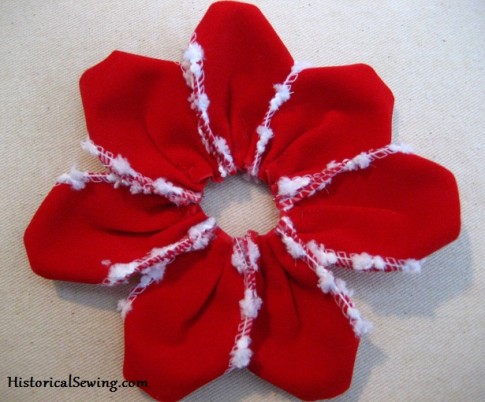
Place this 2nd petal layer inside the bottom layer and tack to the crinoline along the inside of the circle.
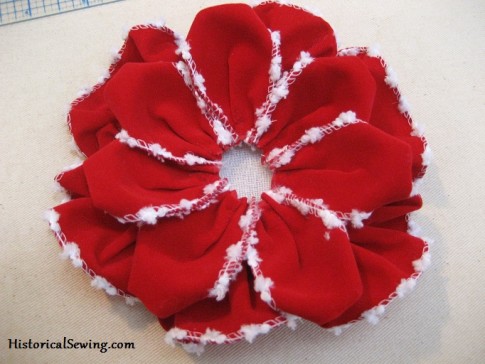
Third Petal Layer – 5 pieces
This next layer is made the same way as the last one but is only 5 petals. Start by folding each piece in half and curling the top folds under. Next, make a tiny pleat at the bottom and tack down. Then run a stitch about a 1/4″ up from the cut end connecting each petal together.
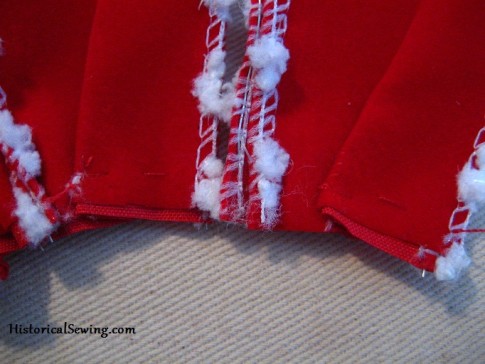
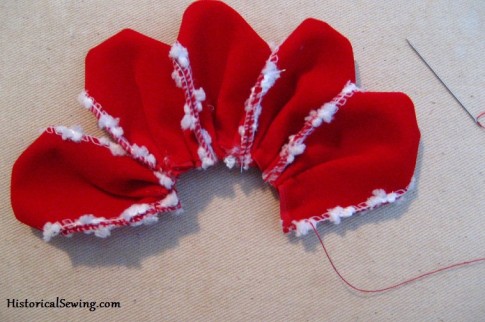
Pull up the thread to gather the petals tightly and knot to hold. Bring the end petals together to form a ring. Tack to hold the circle.
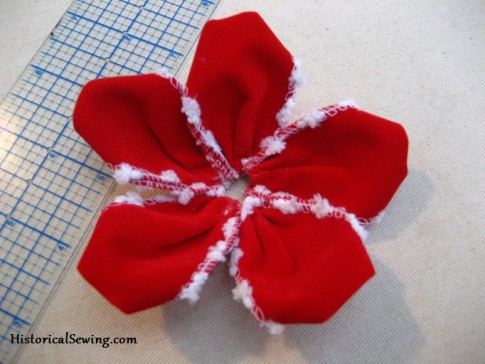
Place this 3rd petal layer on top of the other two and tack to the crinoline.
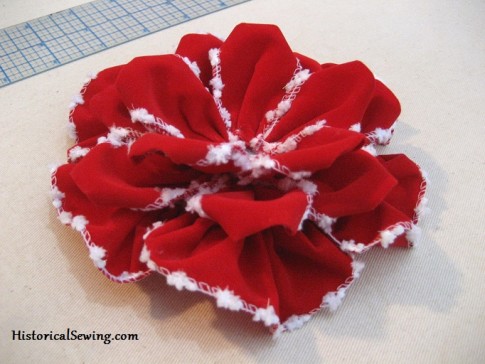
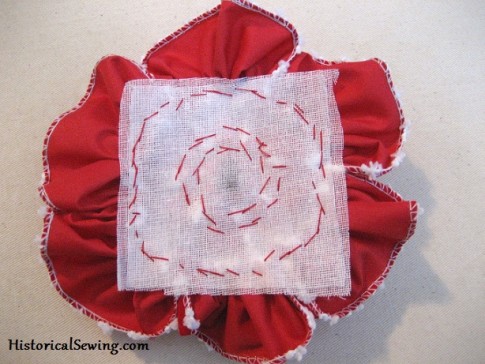
This is what the underside of the crinoline should look like at this point.
Fourth Triangle Petal Layer – 5 pieces
This final layer of petals is formed by making triangles or teepees.
Find the top center of the piece and fold the ends down creating a triangle. The back side of the petal will have the selvedge in a straight line. Pin to hold if needed.
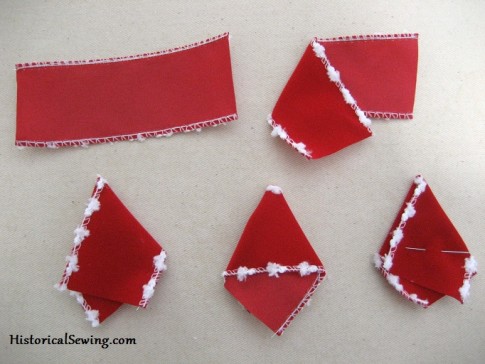
This final layer of petals is gathered up the same as the others. Run a stitch through all layers of the triangle. (I have to pay attention to the back side here to make sure the thread stays parallel to the selvedge on the back side.)
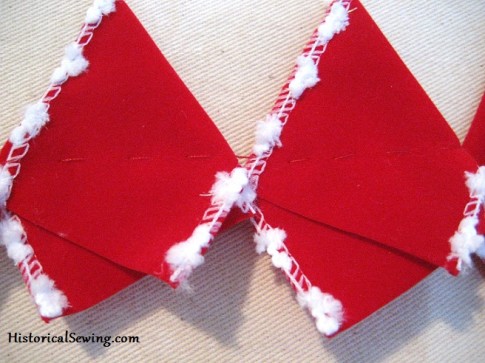
As you run your stitch, connect each petal to the next one by overlapping slightly at the edges.
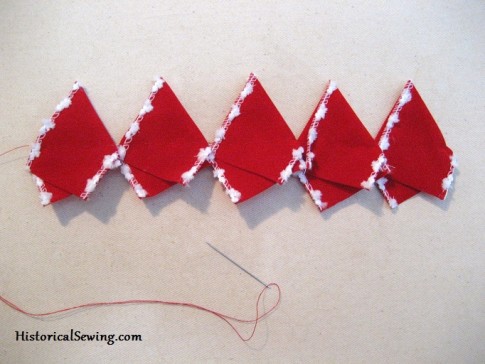
Before pulling up to gather, trim the loose ends 1/4″ from your stitching.
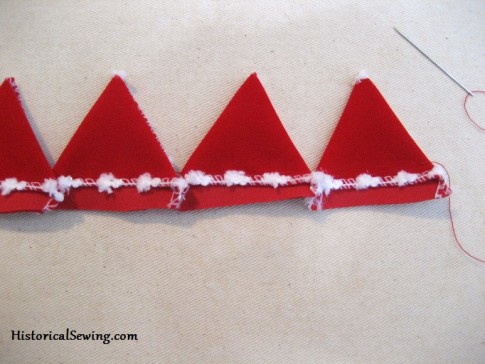
Pull up the thread gently to gather the petals tightly. Knot to hold.
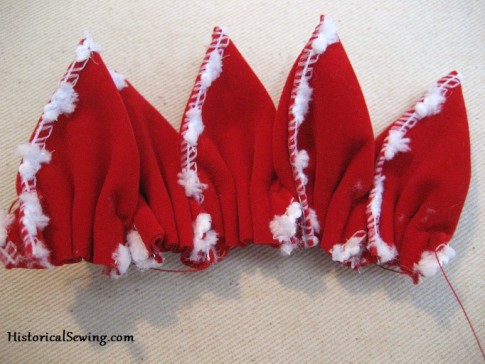
Bring the end petals together and tack to form a tight circle. This layer of petals will stand up and not lay flat like the others. (You’re making a 3-D flower here!)
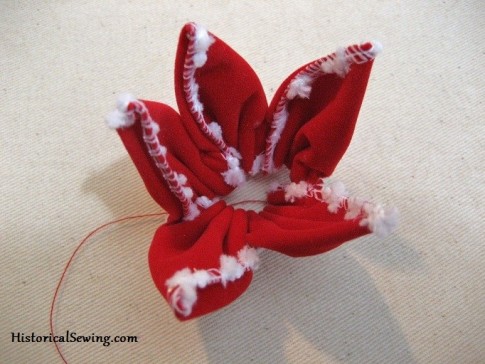
Stamens & Tacking Fourth Layer
Before we can tack this final layer of petals to the crinoline, we have to add the stamen. I used 7 stamen here that have a ball on each end. Fold them in half and place them on a spot inside the triangle petal circle where they fan out the most.
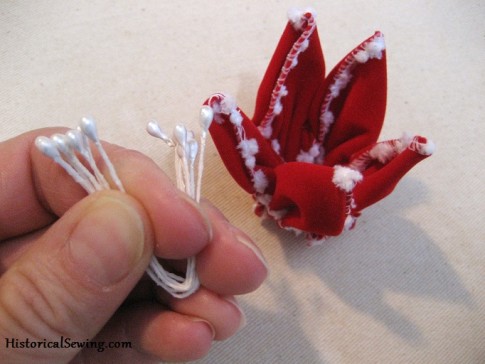
Sew the stamen to the petal bottom edge. Don’t worry if the stamen are not in the very center or perfect looking. Flowers in nature are never perfect so reproducing them in ribbon shouldn’t be either.
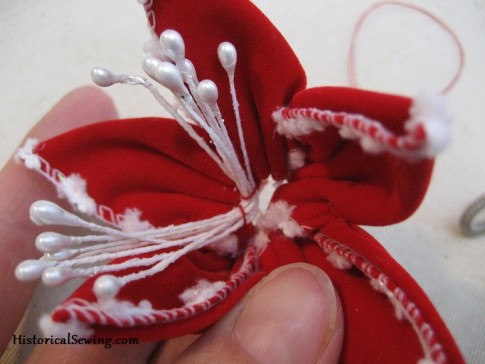
Place this final petal layer with stamen into the center of the crinoline and tack down. Your flower is done – now onto the final touches!
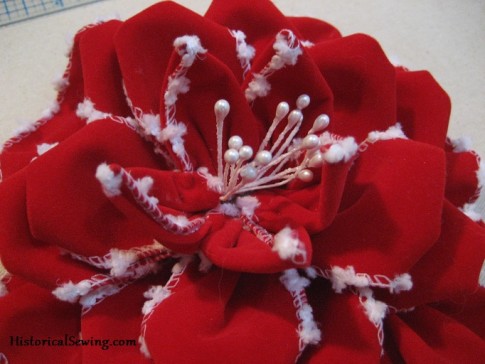
Flower Bud & Calyx – one 4″ piece and 13″ green ribbon
Of course you can stop your gorgeous rose at this point. But adding a tiny bud and leaves will help complete the design.
The bud is simple and starts exactly as the triangle petals did. Form the triangle first. Then whipstitch the side of it closed. Knot to hold.
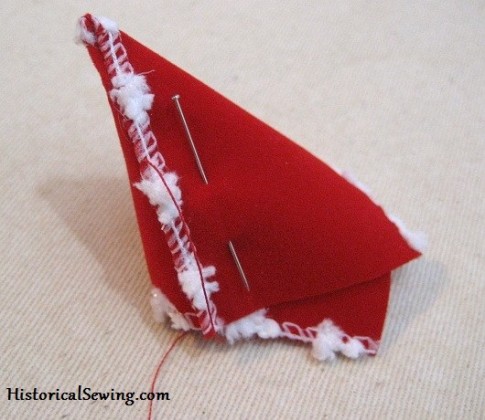
Next, run stitches around the bottom through all layers like you did on the petals.
To form the stuffing, curl the end of the 5″ green floral wire around the ball of fiberfill.
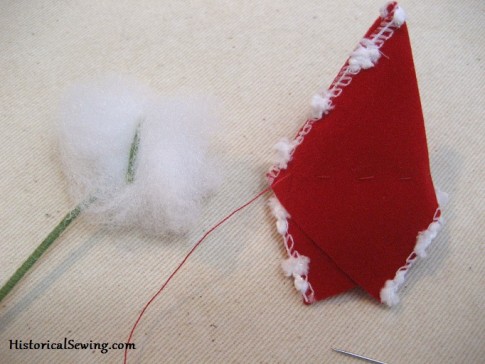
Place the stuffing into the bud and pull up on the gathering stitches. Pull gently but tightly to close up the bud around then wire then tack down.
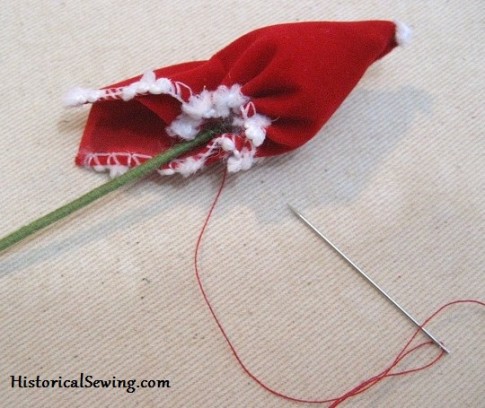
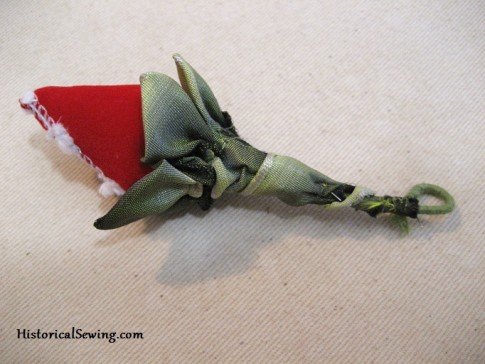
Finished bud waiting for the green calyx base.
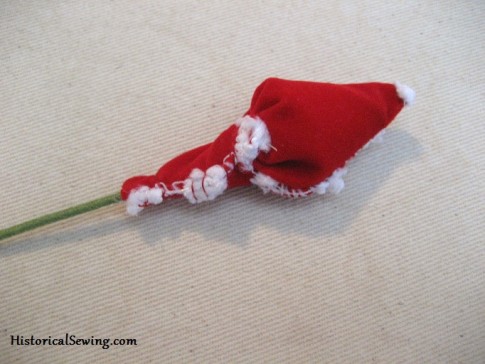
Making the calyx (bud base) is a bit tricky. It took me a bit of fiddling with the ribbon to get the folds to come out as you see.
Fold the 1″ wide green ribbon into 90 degree angles, starting about 1.5″ from one end (the far right in this photo).
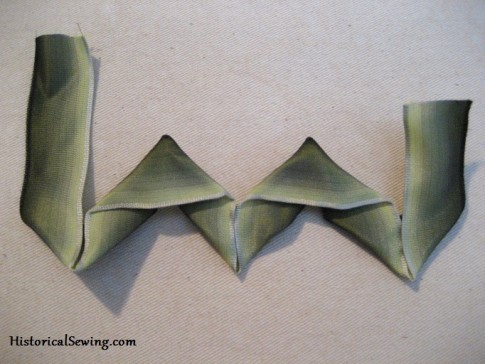
Once you have the folds in place, bring up the bottom points so you have a neat row of smooth points (sepals).
Run a gathering stitch along the straight, bottom edge of the calyx.
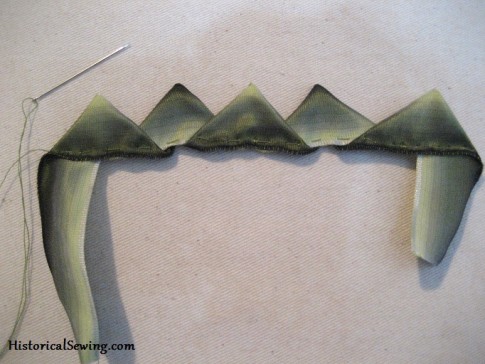
Begin pulling up the thread to gather. Connect the end sepals and finish gathering up tight to fit the base of the bud.
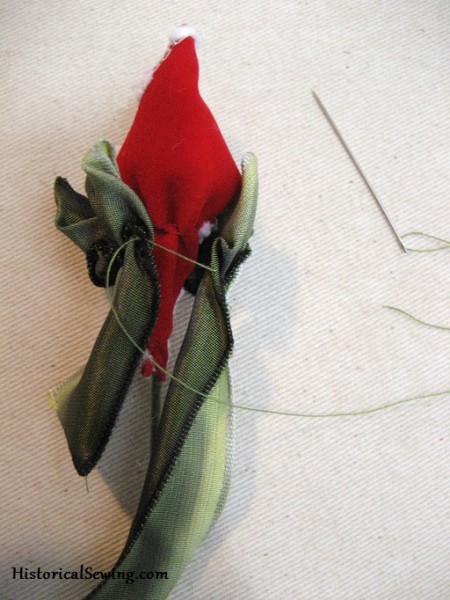
Stitch the calyx base to the bud base. To hold firmly, I will stab stitch with my needle through the bud base to pull in the calyx tight and do this around the whole base.
Wrap the loose green ribbon ends around the wire stem. Tack in place to hold. Curl the very end of the wire into a loop (pliers work well for this).
Pick a spot on the back of your flower where you like the look of the bud poking up from the bottom row of petals. Tack securely to the crinoline on the back.
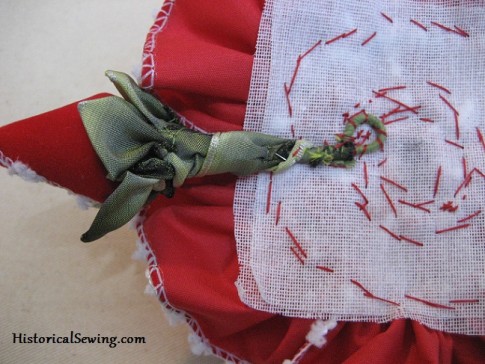
The finished bud peeking from underneath the flower petals.
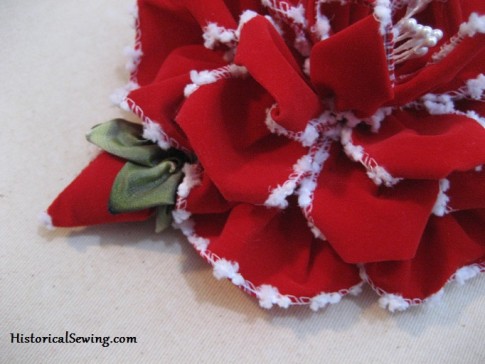
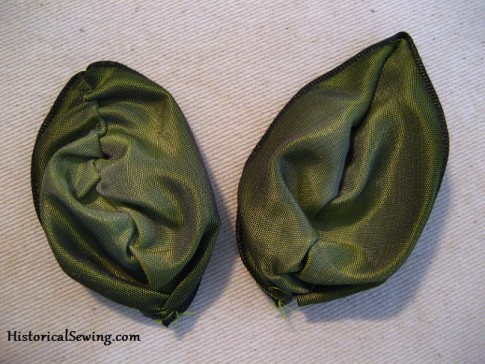
Leaves – 2 pieces each 6″ long
Every rose needs a couple of leaves to finish the look
Fold the ribbon in half. Then fold the folded end down into a triangle. Sew a running stitch along the top and down along the folded triangle edge. You can also start your stitching at the along the raw ends of the ribbon to finish them.
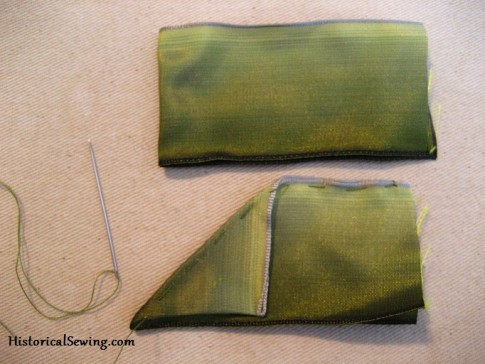
Pull up the stitching to gather the leaves a little. Open up the leaf and check the look. When it is gathered up to your preference, knot the thread.
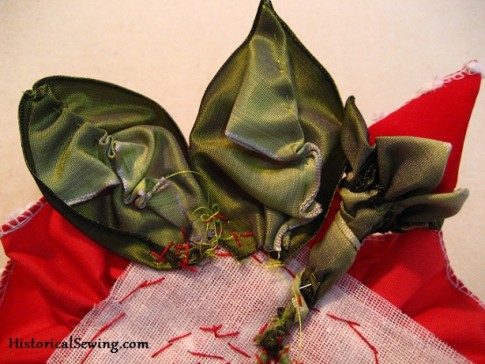
Tack ends of leaves to crinoline near the bud.
Finishing
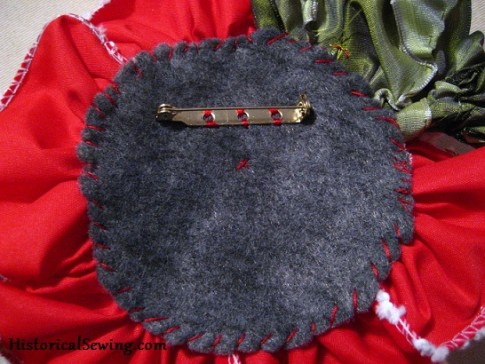
Trim the corners of the crinoline to round out the edges. Don’t trim *too* close to the stitches. Cut a circle of felt to match trimmed crinoline.
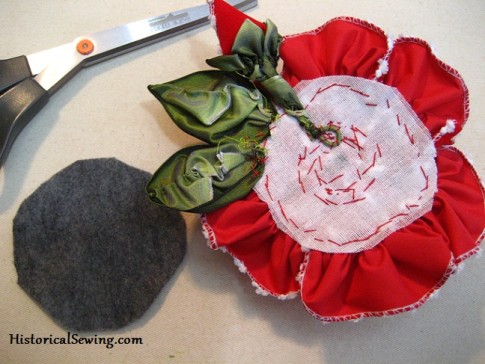
It’s easier to sew the pin bar to the felt before tacking to the crinoline (I found this out the hard way). I’ve also noticed that when the pin is centered on the back of the rose, the flower flops around when wearing. So pick which side is the top of the rose and sew the pin back on the felt closer to that side.
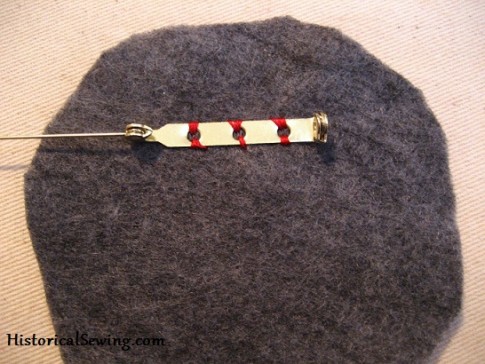
Finally, lay the felt over the crinoline and whipstitch the edges together to cover all the stitching. For extra security, sew a couple of tacking stitches through all layers in the center, hiding them under the petals.
Wear your new flower with pride! Or give as a merry gift to someone special.
You can make these in all kinds of colors and patterns for a nice variety. Even vary the number of petal layers for smaller flowers. Enjoy!


Thank you for sharing this lovely ribbon rose tutorial.
I just found this. Don’t know how I missed it. These are so perfect! I just cleaned up and repainted my wicker bassinet for the 4th generation and took the sad (brittle and faded synthetic) 25 year old ribbon roses off of it. I plan to make three of these from the ribbon that will be woven into the hood of the bassinet to go atop it. We’ll be going with yellow roses. Thank you for the tutorial. I hope to share pics when it is finished.
Might make one for Nana’s sun hat while we’re at it.
Sounds beautiful! Happy sewing!
I hope you still see comments from this.. in any case, it’s beautiful!!! I can’t wait to try making one!
Am I correct that the green ribbon is NOT wired?
Nope, the green is wired too. 🙂
Thanks so much for this tutorial!! I made a rose to put on my straw bonnet. It turned out SO pretty!!! I made a small change in that my green was a bit wider than yours, so I ended up using less leaves on my bud, but I love it!!!!!!!!!!!!!!
Yay!
These are lovely. Thank you for the work of posting the tutorial.
Thanks so much for posting this! I love doing ribbon work on my hats.