
Have you ever noticed how many welt pockets you come across when researching menswear? They are everywhere in the 19th century! You’ll even find them on waistcoats and riding habits for women.
I get asked from time to time about the process of creating a welt pocket. Most of the time the pocket is for a gentleman’s waistcoat/vest or coat. They can be placed most anywhere you like, but are often found at the breast level, either side but right is favored, and just above the waistline.
Yes, making the welt pocket has multiple fabric pieces and multiple sewing steps. I’ve broken them down here in an detailed tutorial for easy following. Our example will be for a larger waist pocket for a man’s vest.
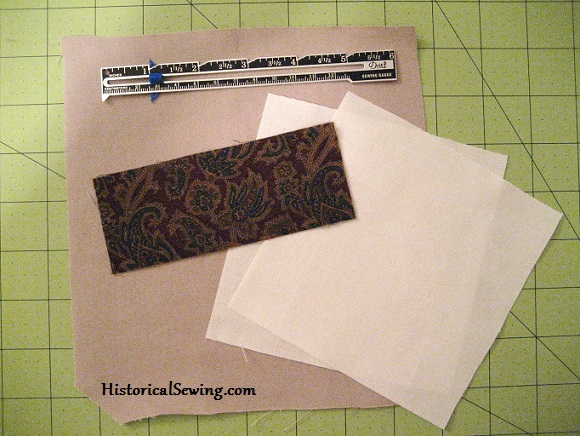
1. Calculate size of pocket pieces & welt
First you must determine the width and height of your welt pocket and placement on your garment. I like one that is finished 4″ wide and 3/4″ tall which we’ll use as the example.
The pocket lining pieces are simple squares/rectangles cut from lining fabric. The width is the 4″ of the pocket plus 1/2″ seam allowance on each side which makes our pieces 5″ wide.
You need AT LEAST 1/2″ of fabric above where the opening of the pocket will be. The length will be however long you want the pocket to go. Then make sure you have a seam allowance on the bottom.
You have to be careful with waist pockets in vests as the pocket should not be longer than the bottom hem edge of the vest or it will bunch up inside. Here we will cut 5″ long pocket pieces which are big enough for a pocket watch and perhaps a handkerchief too.
So in our example, we need to cut two pocket lining pieces 5″ x 5″.
The welt piece is cut the length of the finished opening plus seam allowance on both ends (same as the lining pieces above). This makes for a 5″ long welt.
The width is calculated as the finished welt width doubled and seam allowance of 1/4″ added. This figures as 3/4″ + 3/4″ plus 1/4″ + 1/4″.
Our example welt is cut 5″ long by 2″ tall.
*In the photos, the welt is a burgundy paisley fabric, the “garment” a tan colored twill, and the pocket lining pieces in basic white muslin.*
2. Mark garment and pocket lining for welt placement
It is recommended to use a disappearing pen or chalk marker for your vest fabric. The pocket lining marks will be hidden inside but you’ll want to keep your garment neat from sewing marks.
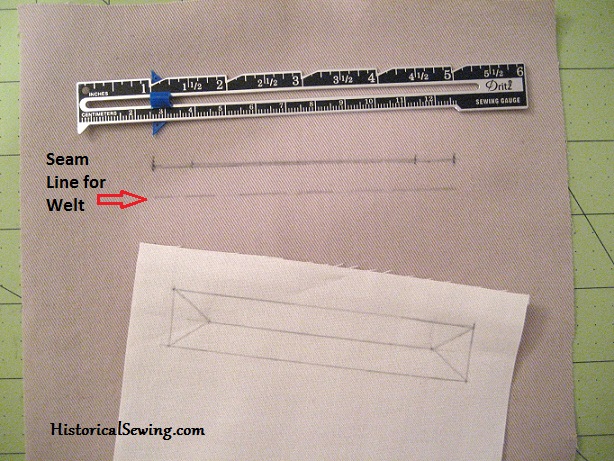
Determine placement on the vest front. On the right side of your vest, draw a straight line 4″ long with dots at 1/2″ in from the ends. You will be cutting along this line later and will be the exact pocket opening.
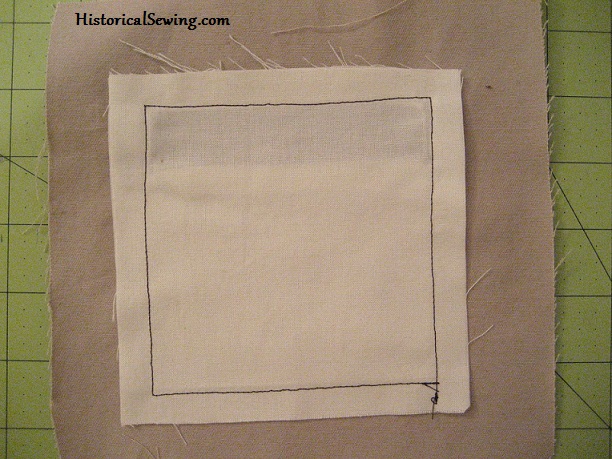
Even though it is shown in the photo above, it is not necessary to draw in the welt seam line. It is there for reference in this tutorial but you’ll need to know where it is for step 3.
On the wrong side of one of the pocket pieces, near the top, draw the middle pocket line stopping 1/2″ shorter from the 4″ length of the finished pocket. Your middle line should be 3″ in length. Dot the ends.
Next, divide your chosen welt width in half and draw parallel lines to the first one. For our 3/4″ welt size the lines will be 3/8″ above and below. Extend these top & bottom lines out 1/2″ past the dotted ends of the center line.
Finish by drawing in angled lines from the corners down to the end dots of the center line. (The rectangle end lines are there only for visual reference. They are NOT used at all when sewing a welt.)
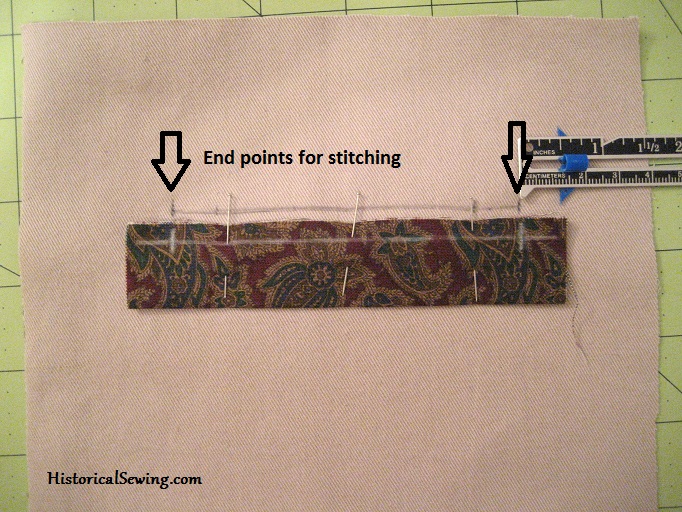
3. Sew welt to garment
Fold welt in half lengthwise and press the fold well.
If needed, draw in the 1/4″ seam line on the welt (seen in photo) stopping the line 1/2″ in from the raw ends. (This line should be exactly 4″ which is your finished pocket opening.) Also, mark the seamline on the garment which is half of the welt size – here, the seamline is 3/8″ below the first line you drew on the garment.
Align the welt seamline over the vest seamline with the end points in line as shown. Sew the welt to the garment backstitching at the end dots.
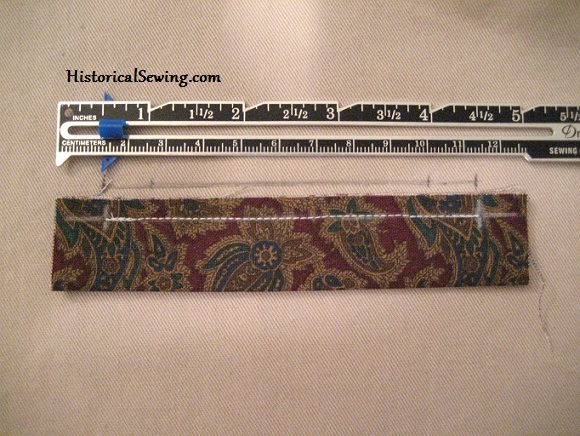
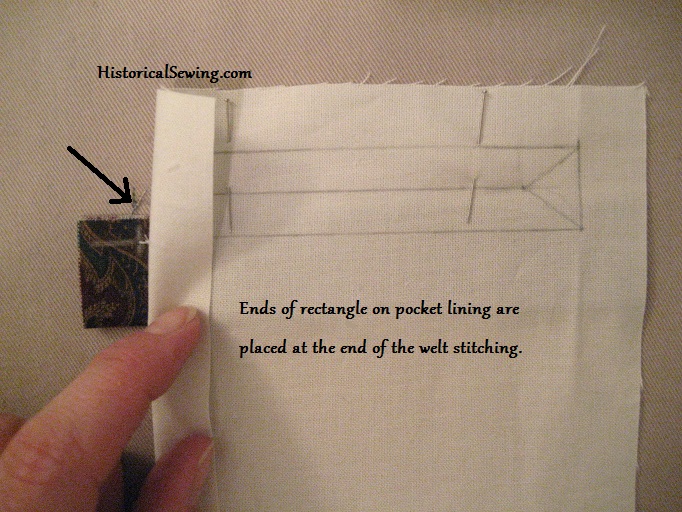
4. Stitching first pocket lining
Place marked pocket lining piece over the welt and vest. Align the rectangle ends on the pocket to the ends of the welt stitching. The lower line of the rectangle is exactly on top of the welt stitching.
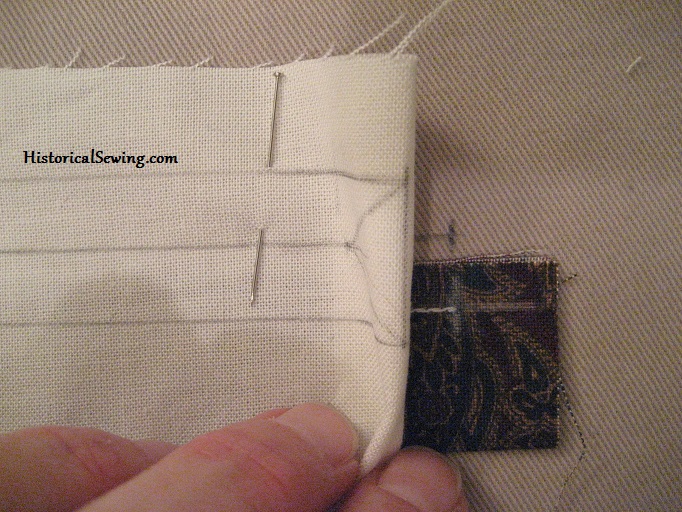
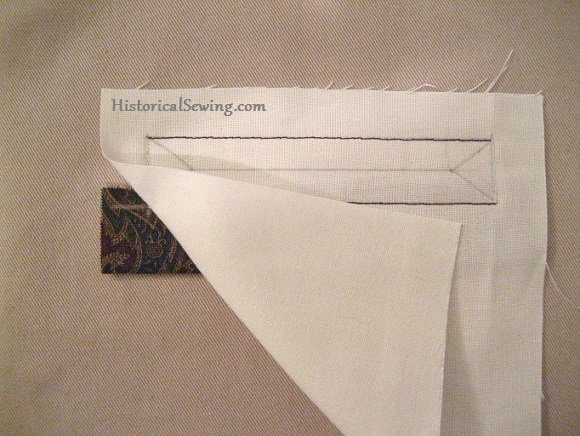
Pin in place. Sew only the bottom and top lines of the rectangle marked on the pocket piece. Stop stitching at ends of the rectangle lines. Backstitch to hold. Press stitches flat.
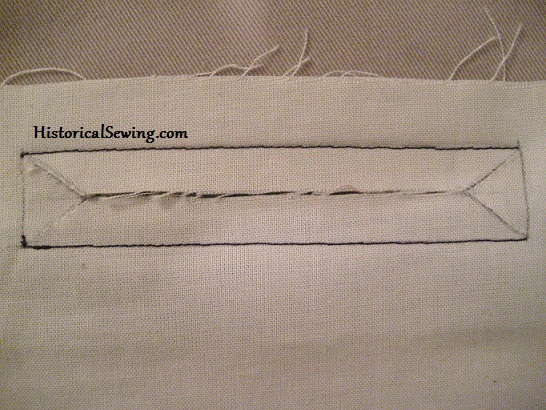
5. Slice open pocket
Very carefully and with sharp scissors, slice open the pocket lining AND vest fabric on the center line as marked on the pocket.
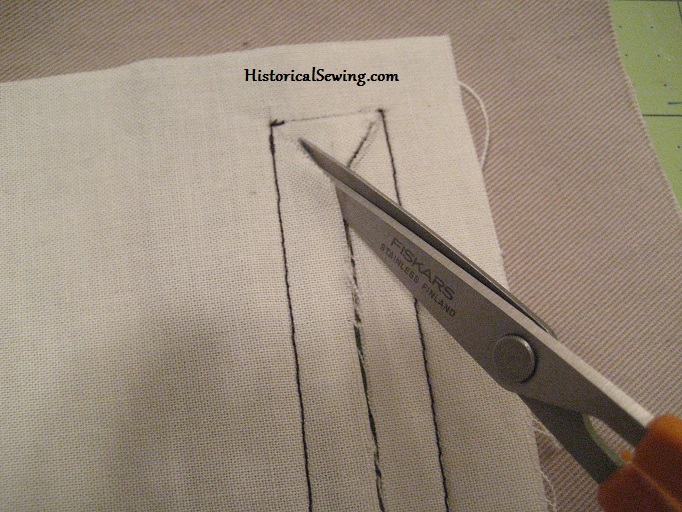
At the dots cut an angle to the corners of the rectangle. It is quite helpful to use tiny embroidery scissors to clip single fabric threads to get as close to the stitched ends as possible. Doing so will produce a sharper corner on the right side of the vest but can also weaken the corners. Be careful!
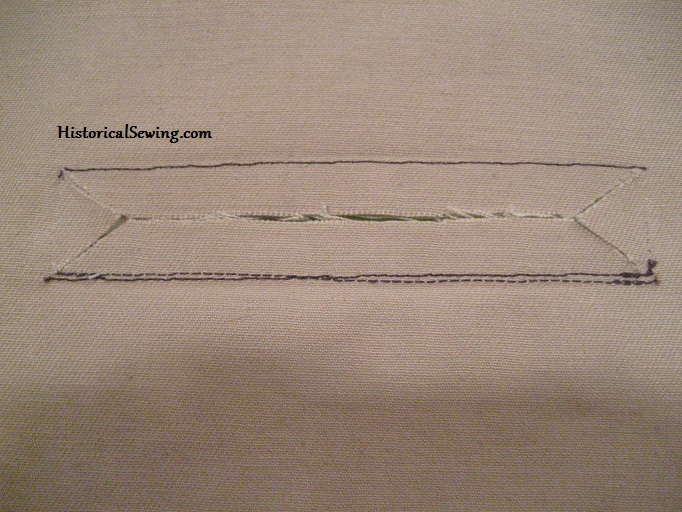
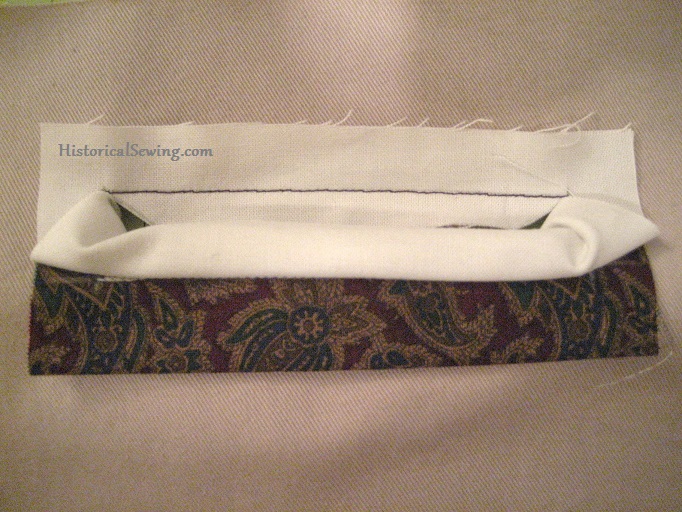
6. Push pocket and welt through opening
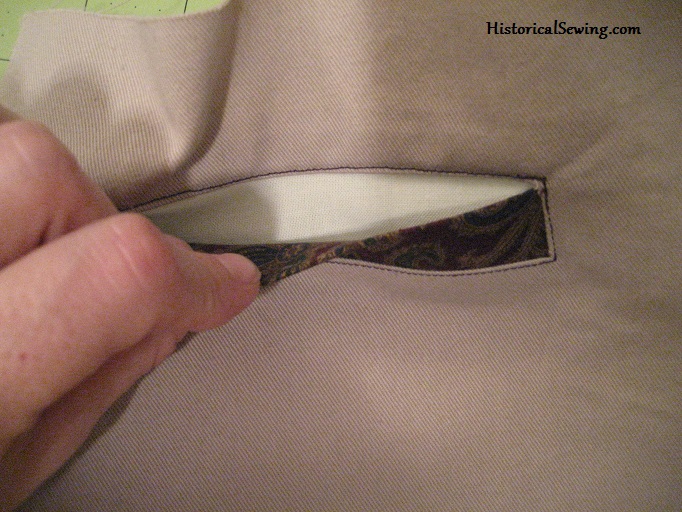
Turn all edges of pocket through the open slit. Turn welt up as you push the pocket through.
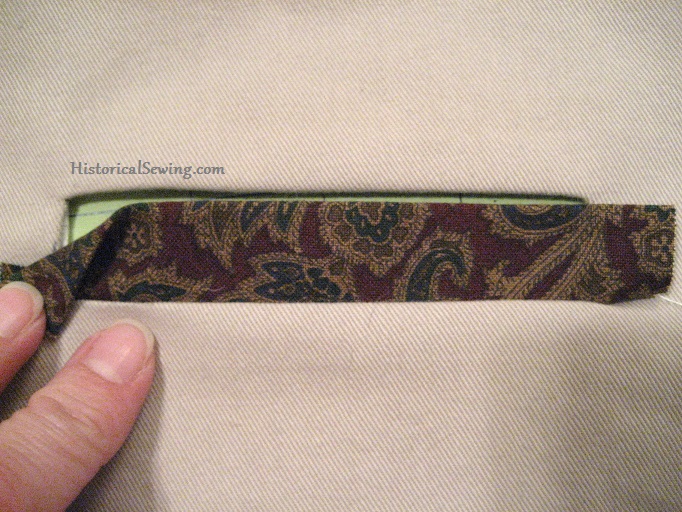
From the back side of the vest, gently pull the pocket piece into place creating a nice open rectangle. This is where you’ll notice if you clipped too much or too little at the corners. Clip more if necessary or dab with FrayBlock or FrayCheck. Press well.
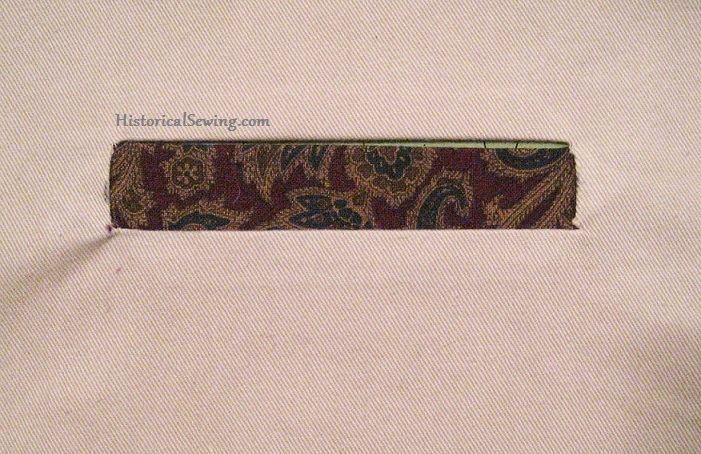
Push the ends of the welt through the open ends of the rectangle opening.
Notice that the ends of the welt match the pocket piece edges on the back and fit exactly into the rectangle ends.
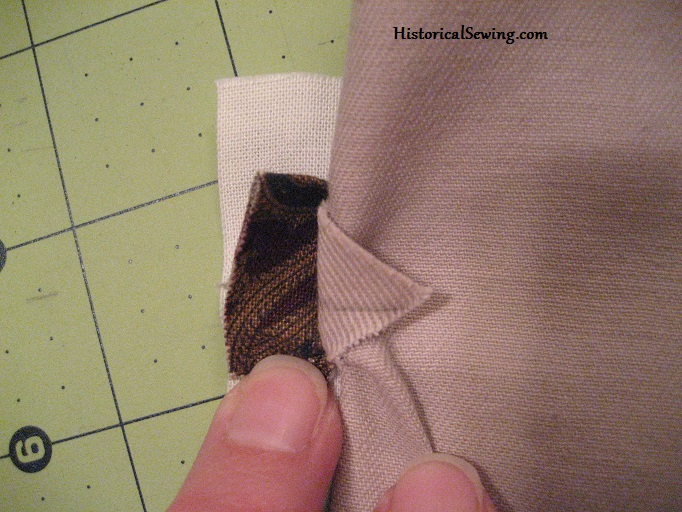
Fold the vest fabric back. The clipped triangle of the garment will be on top. Pin all layers.
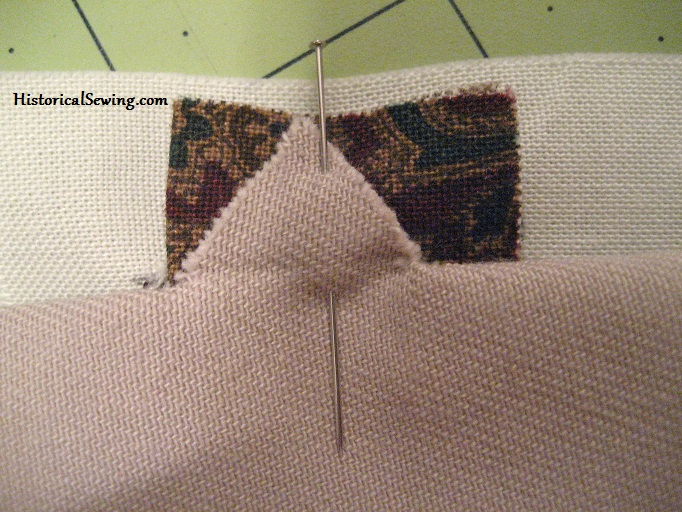
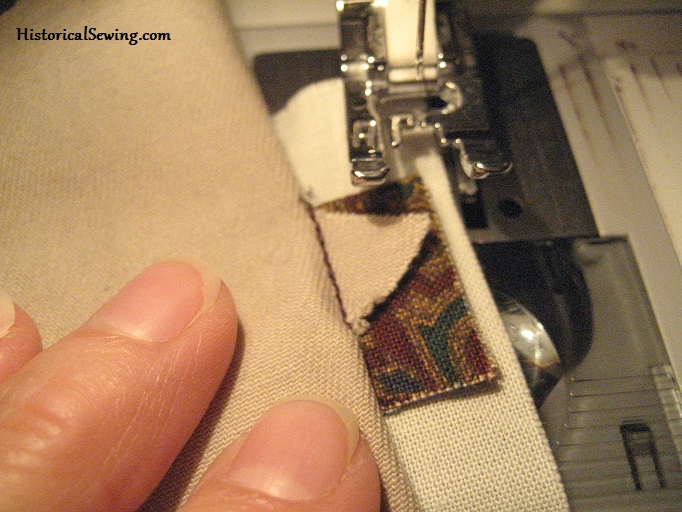
Stitch across the end holding the vest triangle, welt, and pocket lining together.
7. Topstitch around pocket opening
From the garment right side topstitch, if desired, around the entire pocket opening.
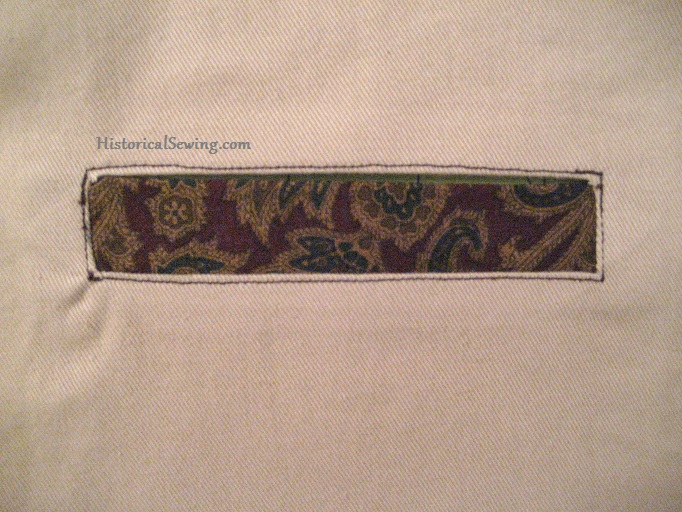
Although optional, this stitching helps keep the pocket flat and neat. Instead of topstitching you can also simply make a close zigzag/satin stitch on the short ends to secure those vulnerable areas. The pocket ends get much strain from use, and with only a triangle as a seam allowance securing them with stitching will keep your pocket from unraveling.
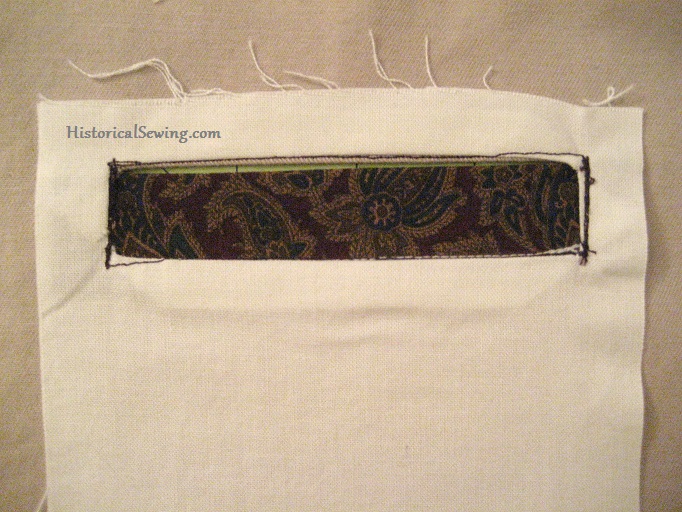
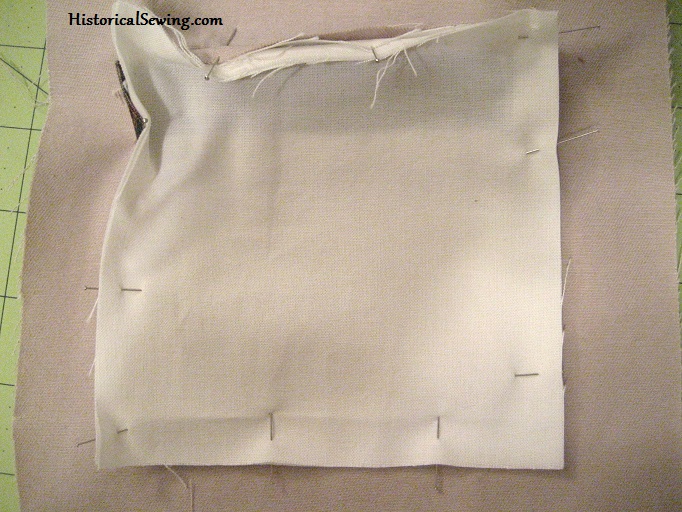
8. Finish pocket
Turn your vest wrong side up now. Grab the other pocket piece and lay it directly over the attached pocket piece. Pin around the edges.
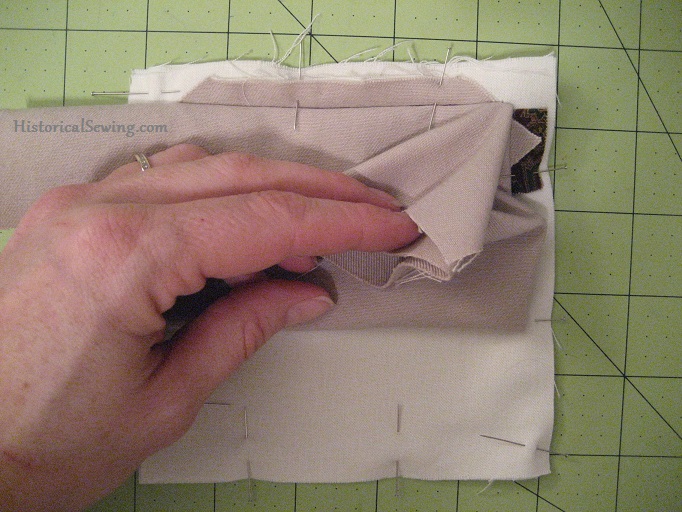
Turn the vest back over so right side is up. Fold the vest fabric out of the way so you can finish pinning. Stitch around all four pocket sides with the pocket next to your machine and the vest on top as seen in photo above.
When stitching the sides, sew right over your first stitching on the triangle piece.
Turn pocket side up and press again. Double stitch the bottom edge if your gentleman likes to load his pocket with heavy gold or lean on the pockets for support while standing. 😉
Your welt pocket is now ready to use!
Have you tried your hand at creating welt pockets? You’ll find a number of menswear patterns to sew these handy and historical pockets into. With carefully selected fabrics I can see quite the potential for Steampunk costumes too!

Love this tute. I’m putting in pockets in a boys vest and this is so helpful. Even the same size I need. BTW, what are your thoughts on a self welt pocket. One piece method with just the pocket backing. What would be the difference. in the final outcome (not considering historical methods)? I saw both, the self welt seems easier, but I can’t really see too much difference in the final outcomes on my try outs. Thoughts?
I’ve not heard of a “self welt” pocket. Is the rectangle welt part cut in one with the garment piece?
Thank you so much for this easy tutorial….because of this tutorial I was able to sew welt pocket to my dad’s kurta so perfectly without having any prior experience of stitching pockets…thanks a lot…
You are welcome! Happy to hear it helped you with sewing the pocket.
By far the best single welt pocket example I have seen. This example was very helpful. Thank you for taking the time to put this online.
Thank you so much for your instructions and photos…honest to Pete, I was about to rip my hair out trying to follow the directions to make an 1880 era vest for my husband. I found your site and was able to finally (finally!!) make the welt pockets. Thank-you, thank-you…
You are most welcome Ruth. Welcome to our Joyful Community! 🙂
Thank you so much for showing how to do welt pockets. I bought a simplicity pattern # 2895 for the frock coat, the directions were unclear and I had never made a welt pocket in this way before even having been sewing for over 20 years. Your directions were perfect, after some adjustments on the pattern to move the inside lining for the pocket higher it way pefectly. Thank you so much. I found your site after having looked at several others that swore they were the one. None of them were even close to the way the pattern was but yours was perfect, you give simplicity some advice!!!! Thank you so much you have gone onto my favorites list and I will be visiting your site often now.
Oh, I’m SO glad the instructions worked for you Ginger! Welcome to our Joyful Community!! 🙂
You mention pockets on ladies riding habits…are they welt pockets or different kind?
Also is technique different if you sew by hand? I’ve tried welt pockets by hand and they just look ugly. 🙁
You can make welt pockets like this for ladies’ garments. Although, the welt size should be in proportion to the garment (e.g. smaller in width). Not sure the technique would be different by hand. In fact, you’d probably have more control of all the little ends. Keep your stitches small to make defined and sturdy pockets. Pockets take a beating when used. Larger stitches would make the pocket appear sloppy and welts should give off a tailored look.
Thank you! Just in time! I have hubby’s vest cut out that will be a Christmas present.
Thank you so much for this article. I have made welt pockets and they are always messy looking. Your article will help greatly next time I do this.
These scared me until I realized that the construction is very similar to that of bound buttonholes, which I’d already conquered.