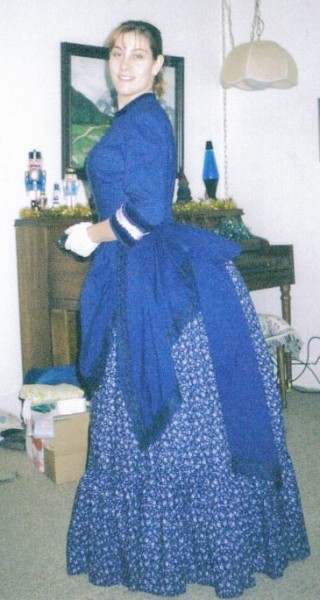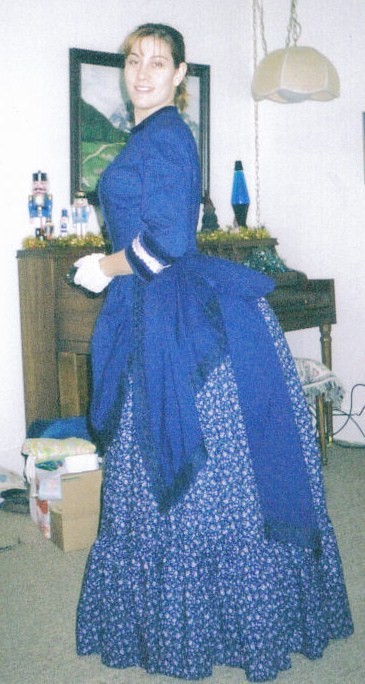
For a newcomer to the world of historical costuming it can seem overwhelming. “Where do I start? What should I make first? What about my hair, my shoes?”
Perhaps you’ve sewn a few period things but want to branch into a new time period. You don’t have to be a newbie to feel like a beginner when attempting new historical clothes. You simply need to know what to focus on making first.
Where Do You Start To Build An Historical Wardrobe?
When studying historical fashion, how do you describe a particular era? If you were to explain what 1890s styles looked like, what would you say? How is Regency different from the 1840s?
When answering these questions, you are generally talking about the silhouette of the period – full skirt, puffy sleeves, slim appearance, droopy look, etc. If you want to make a Civil War outfit, you look first at the overall dress. But what you need to focus on to re-create it is to start with what makes up the silhouette.
To accomplish the general look of the fashion period you need to start with the undergarments and structures that support and create the silhouette. You may have heard the phrase “build your costume from the skin out.” Well, that is exactly true.
What makes a Civil War dress look the way it does with that large domed skirt and fitted bodice? It helps to think of your new project in terms of how you will get dressed into it. What do you put on first? Then what next? Of course, research on the era you want to produce is the essential first thing to do. Once you know the layers of the era, you begin sewing, or building, them from the inside out.
Let’s get that silhouette shape started!
Undergarments
For nearly 100% of the costumes we make and wear, there will be an article right next to the skin. This will be a shift or chemise – they’re rather like a nightgown. Easily laundered, a chemise is made of cotton or linen and protects the outer dress from body oils & sweat. You want this basic garment simple because it will take the most wear and be washed often.
I have friends who started out wearing a modern cotton tank top under their costumes. It’ll work but there’s nothing like putting on a chemise to get you in the mood for time travel.
If you have time, make up a pair of drawers, also in cotton or linen. An open crotch seam (unsewn) is period accurate for functional reasons. Don’t be afraid of them.
Corsets
Next comes your corset or other supportive garment. This really is an essential item when dressing up in period clothing. Corsets are not (and should not be) uncomfortable if made to your measurements. Don’t let the bad rap of corsets coming out of Hollywood detract from you wearing one. Women for over 400 years have been wearing them. I don’t think they would have lasted that long if they were painful.
If you don’t want to or can’t make a corset, get one custom made. They’re not all that difficult to make and only require a straight stitch machine.
Support Structures
Corsets help lift the bust and narrow the waist – the ideal garment to produce your desired silhouette! They create a smooth surface at the waist for hoops, bustles and petticoats to sit, distributing the weight around the body and off of the lower back. For a historical wardrobe, a corset is indispensible. It’s rather more functional than anything but you can also make them pretty as well.
So now that you have your chemise, drawers and corset, next you’ll need to know what support structure produces your chosen fashion. This is where you’ll spend some time making up those more involved projects – a hoop, bustle, pad and/or petticoats. Again, research the era to know what you’ll need. At a bare minimum you’ll need at least one petticoat but I highly recommend two to three – depending on the era.
Once you have the basic foundation garments you can proceed with your dress. Your simple chemise & drawers can be used for most 19th Century costumes making them the most versatile garments in your historical closet. Get them made right away so you can get on with more fun items.
And remember the importance of a corset. If you had to decide on the most important garment, get to work on a corset. I can’t stress this enough. You can get away with a tank top underneath and even pajama shorts, but you can’t fake a good 19th Century silhouette without a corset. Sew a chemise first to get you rolling. Then attack the corset.
It’s important to not jump the gun and start your main garment first. We all at some point fall in love with a beautiful fabric and immediately want to get the gown started. If your undergarments are in place, your imagination can take off right away on that new ensemble.
Focus on sewing your primary undergarments to develop your silhouette. When you develop the correct figure, you are making garments that reflect historical styles. An improper silhouette can look too theatrical. Decide if that’s the look you want. But for a true-to-life costume, get that chemise and corset done first. Once you have those done, your fashion fabric gets to come out and play.
Have you made a costume without building the foundation garments first? What did the costume look like? Would you have done it differently? Post your thoughts below.


I am young and trying to get into Civil War rennacting. I made drawers, petticoats, and am about to start making a chemise. I also will be ordering a hoop pattern from Truely Victorian. Where should I be looking to get a pattern for a corset cover type garment?
Welcome to your journey!
You can adapt a Truly Victorian bodice pattern. Wearing History has a lovely corset cover that would work. Period Impressions too has one.
Thank you! I checked it out and loved it! Exactly what I was looking for.
Hi Amanda, welcome to Civil War reenacting!
Having made several corset cover-type garments to go underneath sheer dresses as a lining, here are a couple tips:
-If you use a bodice pattern and adapt it, cut it longer than your natural waist by quite a few inches so your petticoats hold it down.
The first one I made ended at my natural waist, and it would NOT. STAY. DOWN. It just sort of kept flipping up and floating around under my dress, making it lumpy particularly in the back. Boning would probably also help with that.
-If you are wearing it underneath a sheer gown and need the coverage, definitely interline the whole thing. On a different corset cover I made, I did only a single layer of muslin and the lacing of the corset was technically shadowing through, although you did have to peer rather hard.
-Corset covers are not particularly neccesary under gowns that aren’t sheer.
My mother, (who passed away, at nearly 90), had a friend who was still playing golf, several times a week, well into her 80’s. That friend always wore a tightly laced corset, regardless of the fashion of the day. She credited the corset for her ability to remain competitive in golf, long after others were forced, by back problems, to give up the game. She maintained the corset was very comfortable. It lent support to her back, control to her stance, and freedom to her arms and shoulders.
I’ve got my sights set on someday making an Empress Sissi gown. This site is really helpful! 😀
My first ever historical event was the jane austen festival in bath. I started with good intentions. Of building it up form the foundations…but time ran away with me I struggled with fitting the stays (went in the UFO pile) was confused by the shift gussets etc. So in the end I just managed a very wonky scruffy petticoat (got fed up of unpicking and resewing it) and a dress with an elastic waist worn over a tank top and a push up bra. And my spencer was a jacket I cut up. I also attempted an open robe.
I thought it looked passable…but looking back at the photo’s I could see the bra didn’t give the support needed.
So now I’ve started on a mini regency wardrobe (got my eye on a regency festival in lincolnshire, yep I really have to travel far and wide to find anything historical.)
Made the shift (will need a 2nd one at least) made from a poly cotton though as I couldn’t find any linen. Finished my stays eventually. Made a waist petticoat. and two dresses. Dyed my open robe and modified it so it sat right. I have one more dress and a spencer to do. Oh, I’ve also made a habit shirt. And I have a chemisette in my eyesight. I also retrimmed my bonnet. 😉
We all start somewhere. So glad you’re moving forward and improving your skills!
Oh lordee.
I remember the first time I did a big costume, parts of which I still use. It looked AWFUL. It was an Elizabethan garment, made from a Simplicity pattern that was actually fairly well-researched, even if it combined things it shouldn’t have for historical accuracy. I had to size it up, and I sized it up wrong, and then wound up basically with my, ah, lady friends up under my armpits. It was just plain BAD.
Then I made an “Elizabethan” corset with no straps and using metal strapping. As bad as this was, it was SUCH an improvement over the previous costume! By now I have a proper, well-made, spring-steel-boned strapped corset, an actual linen shift which is sooooo amazing, open-seamed drawers, bum roll, petticoats…$120 reenactor’s shoes…
It has really made a TREMENDOUS difference, not just to the silhuoette, but to the wearability of the clothing. It’s so much more comfortable to wear the well-fitted costumes than it was to wear that first disaster, even if it takes about six times as long to iron and put on in the morning.
I will say, though, there have been a few costumes where I haven’t actually started by making the undergarments first. It actually has to do with the fact that it’s faster to make the undergarments than it is to do embroidery, so sometimes I’ll start there, and wait until closer to the event I’m making the costume for to start on undergarments. My embroidery isn’t going to change its size on the finished pieces, but my waistline might! (Sadly, it’s never gone down enough to require a new corset….sob…)
I came here from your link in the comments on your status on Facebook. I did make my dress before image/had the proper under garments. My dress looked terrible, but slowly improved. Once I got the proper under garments, I had to do extra work making adjustments to some of the dresses and bodices I made.
Ahhh, now I’m sure where to start from 😀
As an added step, before I start making anything, I have learned that the shoes MUST come first. They dictate how many inches my finished skirt will be off the ground, and let me know how much to hem or lengthen the skirt.
That is very true Tracey!
Yes! And also good for fitting corsets. If you fit your corset not wearing shoes and then wear higher heels than like 4 cm you will feel difference in the backside. I got puzzled over the sore spots on my back hips and then I realized oh it is the shoes! It apparently make you stand differently..