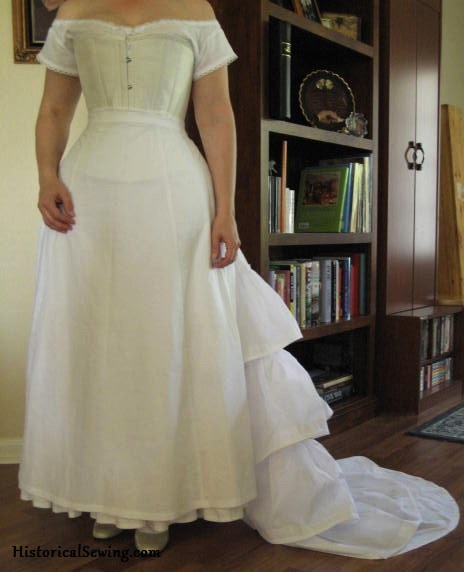
![1870s Trained petticoat with corded ruffles 1870s Trained petticoat with corded ruffles [how it was made] | HistoricalSewing.com](https://historicalsewing.com/wp-content/uploads/2nd-Petti-side.jpg)
From that detailed project list came the need for a trained petticoat to 1) support the trained silhouette, and 2) keep the underside of my skirt relatively clean (you know how *that* goes).
It was also at a time that I was deep into writing easy-to-follow instructions for making corded petticoats. Well, for some reason I decided to combine antique (c.1840s) with historical (c.1870s) AND modern methods and see if it worked to support my train.
(Aren’t we suckers for costume innovations? 🙂 )
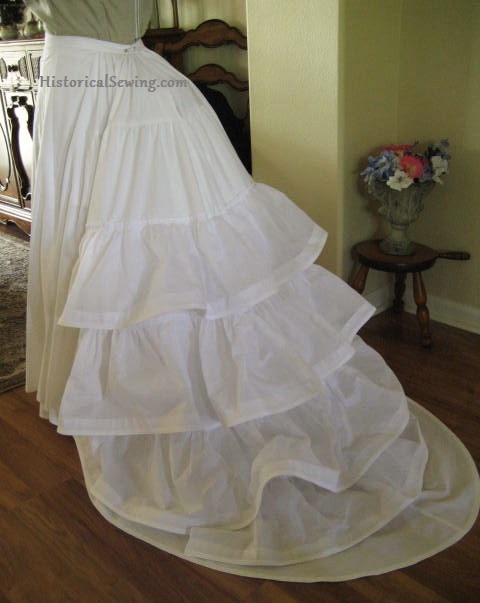
The base of the petticoat was made from the Truly Victorian #208 Trained Skirt pattern and was cut from simple 45″ cotton muslin from JoAnn Fabrics.
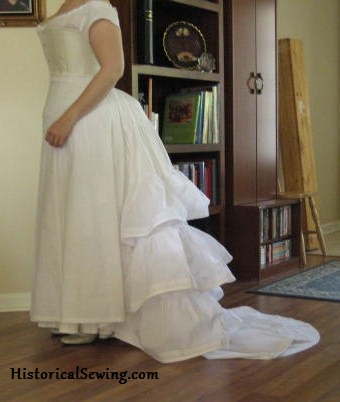
I really wanted to have a trained petticoat that supported my skirt train. Ruffles are definitely the way to go – why? – because the Victorians used them on their petticoats.
And I wanted mine to not be heavy. Have you ever made a petticoat from basic cotton then added rows & rows of ruffles? Yeah… H.E.A.V.Y.
Because I was starting to become addicted to this marvelous cotton fabric called organdy, I decided to make all my ruffles from it. Perfect! Lightweight but stiff. This is exactly what you want in a petticoat.
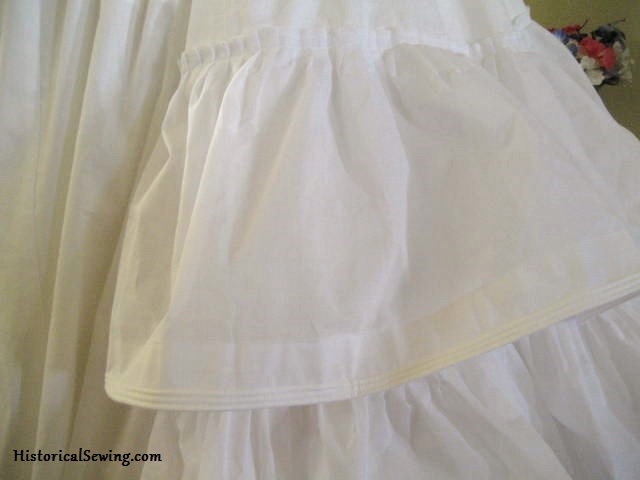
But I didn’t just stop at using organdy. No. I was insane [totally not a new state of mind].
I had to *cord* my ruffles. Yep… just like a corded petticoat. (Remember I was deep into corded petticoat research.)
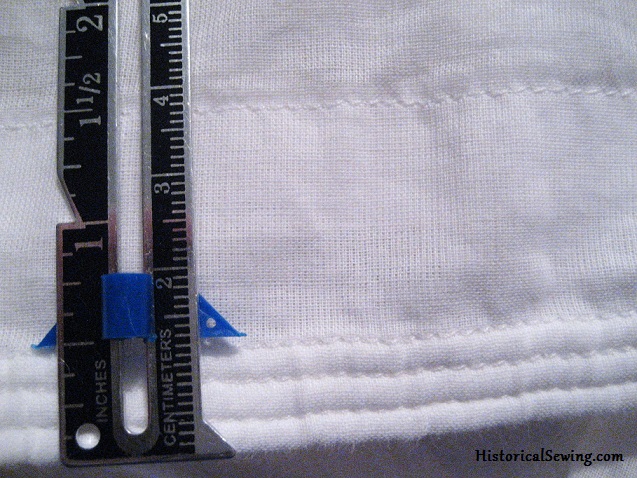
The total hem is 1.5″ wide and finished as a self-facing. I folded up about a 2″ hem to the inside. Then the cords were sandwiched between the ruffle and hem. The top raw edge of the hem was simply pressed under and sewn an even 1.5″ from the bottom cord.
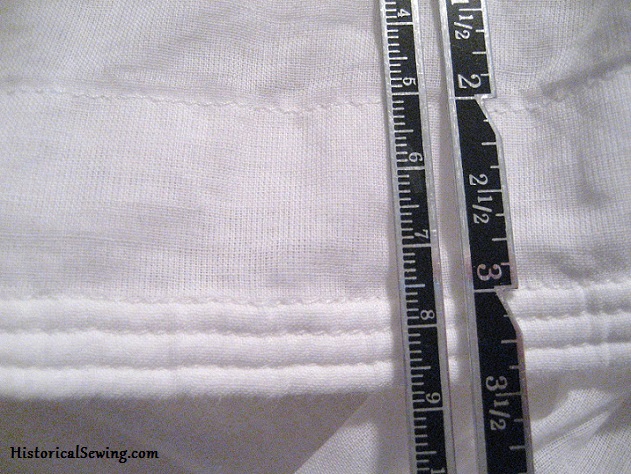
I used 3/16″ cotton twist cording that I get from the home dec department. It’s great stuff! You can see that the three rows don’t quite make up 1/2″ in width.
I tell you, the ruffles are about as inflexible as a banana peel – sturdy, bendable, and annoying to deal with until they are put in their place.
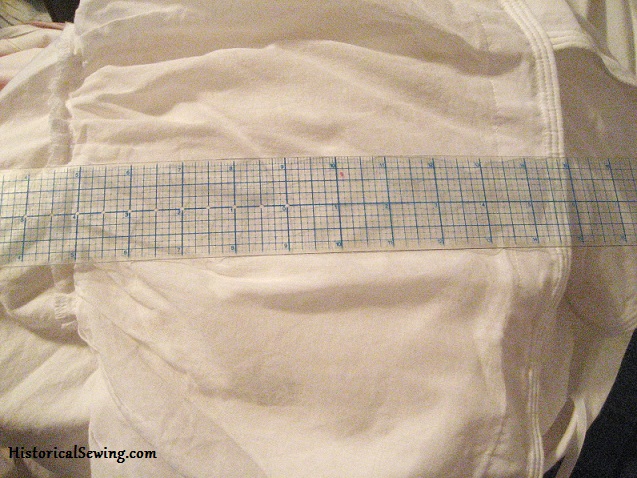
The ruffles were made in one strip with a finished width of 11″. The hem was finished first. The top edge was simply serged then run through the ruffler foot.
I then laid out the bottom ruffle section first on the train, cut the length and hemmed the edges. To get the position of it, I placed the ruffle far enough down on the train to where the ruffle hem ends almost lined up with the finished train.
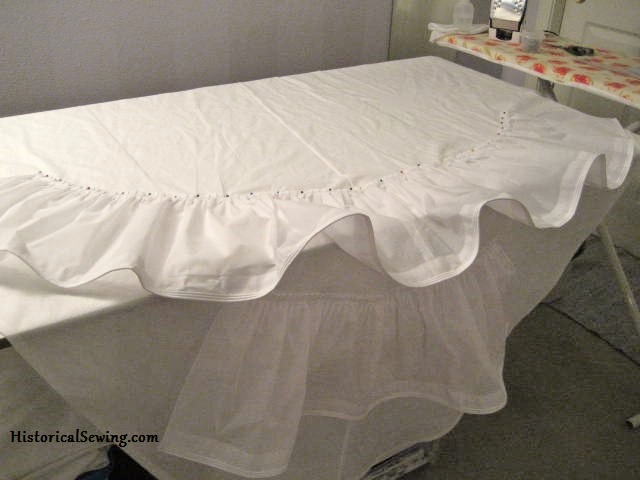
The next ruffle up was then pinned on in a U shape to cover the top edge of the first ruffle. The U was loosely positioned the same as before with the hem points of the ruffle coming close but not over the train hem. You can also see in the above photo the center back seam of the train – this was a wide petticoat!
The last two ruffles were set on in the same manner: covering the top of the previous ruffle and placed to where they would not go beyond the train hem.
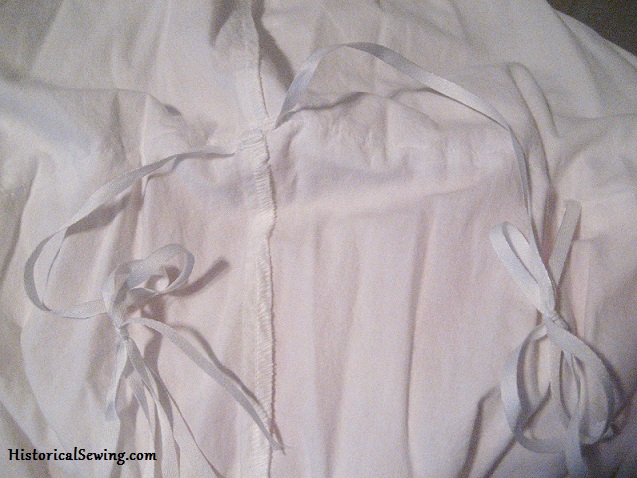
The last bit of construction (besides the waistband) was the ties on the inside. Taking a cue from other methods of bustle skirt construction I added twill tape pieces to the sides and center back seam where the ruffles were sewn on. There are four sets of ties: one on each half of the train and placed just below the hips and the other behind the knees.
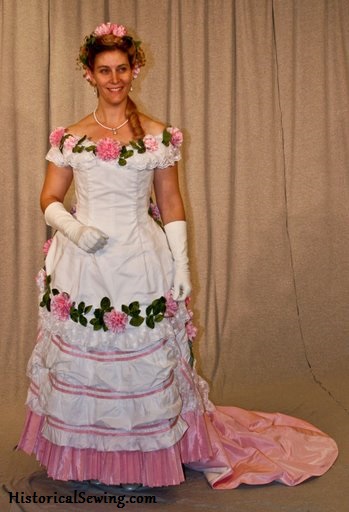
The other issue I thought about as I was making this petticoat is how to keep it right under my skirt to actually keep the skirt clean. I decided to tack on more twill tape ties to the edges around the train with corresponding ties on the underside of the skirt.
For the most part the two garments stayed together. Although, I believe the muslin fabric of the petticoat was not stiff enough on its own to really support and protect the skirt train. What was really missing was starch. Yep. [I really need to starch my petticoats more often – it’s wonderful!]

This looks great. Did you find any evidence to support the tying the train to the skirt thing? It makes sense but I’m looking at pictures of originals and can’t find anything.
I have seen ties (tiny ribbons) on the inside of skirts but can’t find specific resources now. So, no, I don’t have firm evidence of tying/tacking petticoat to skirt train to keep them moving together.
I really, really enjoy your blogs…. I always learn something interesting! I think this idea is really ingenious……
Thanks Juliana! Glad you find them helpful. 🙂
Loving this site. I’m new to the historical sewing. I just have the patterns and will start doing the online corset class shortly. I need a 1870’s garment for an author conference in July of 2015. Obviously, I need to do lots of research.
As soon as I get my corset mock-up made I’ll be starting on bustles and petticoats. This idea was one I thought might be workable before I read this post. I’m glad to see you tried it first. 😉
Sophie
Have found your site very helpful for the research that we are doing for a project which the Bathurst Bead & Wirecraft Guild are staging next year 2015 as part of celebrations for the 200 yrs of Bathurst being named the first settlement over the Blue Mountains in NSW, Australia. I had no idea so many different bustles were worn or the different styles of petticoats, corsets etc were worn all in the name of fashion.
Our project is called ” REFLECTIONS , 200 YEARS OF WOMEN’S FASHIONS FROM 1815 TO 2015″.
Your site is great and very addictive.
Thank you Elaine Holland
President Bead & Wirecraft Guild Bathurst, NSW. Australia
Welcome to our Joyful Community Elaine! We have quite a number of followers & readers from Australia. 🙂
Actually it’s very time accurate to cord your bustle era petticoat 🙂 Because when the hoop went out of fashion and bustels came in, only supporting the back top of the garment, these “old school” methods were found and used again! But they Didn’t cord the flounces, but the lower part of the petticoat in 3-5 rows all around above the trimming, including the train. But techniques as flounce sqeezing and starching were pretty common to give the special silhouette and to avoid that the train gatheres in a very ugly tucks under the garment.
I can believe our ancestors used older methods of support but I’ve not found any corded petticoats (hem, flounces, or whatever part) from this era in my research. If you’ve got original sources I’d love to add that to my fount of knowledge.
Well I have “original” source, if fashion articles with pictures is good enough 🙂 It’s hard to find vintage petticoats, ‘cos they were used out or reshaped after fashion, and what we can see in the museums or in the collections of some resoluted collectors, doesnt give the full picture, only the top of the iceberg! I can put up pics to your fb site to see how they did it.
What a beautiful piece of insanity. You really are a sucker for punishment, aren’t you (sayeth she who is struggling through turing a bedsheet into a Grand Bustle)?
Please, Jennifer, never NEVER change. I am now considering the wisdumb of cording my new bustle.
It’s so beautiful that it could be made into a stunning skirt.
I was thinking that it would make a beautiful skirt too! The sweeping lines are so very lovely.
And I too was reminded of a bustle I’m working on! I’ve decided to cord the edges of all the ruffles on this one for that extra rigidity. I’ll use any trick I can take to make the butts of my skirts look bigger. Once, in a costume emergency, I actually folded up my most beat-up practice tutu from ballet class, and fastened it to my bum with a lot of twill tape and safety pins! Nobody could tell it wasn’t a proper bustle, and it held the butt of my skirts high and proud!