
Am I done yet? Ugh! The never ending strip of fabric kept coming over the ironing board edge where I was hunched over pressing and pressing up one long edge for a hem.
Have you made a petticoat and just gone crazy with getting the thing decorated with ruffles? Or do you shy away from even attempting a ruffled petticoat because the ruffles get the better of you?
Use these tips the next time you sew a petticoat for smooth sailing through the waves of gathers & pleats.

Ruffles are really simple. Really. Think about it –
1. You cut strips of fabric and piece them together (basic seam, no problem).
2. Then you hem one long edge (lots of variations here but still not too hard).
3. Next you gather up the other long edge (ok, this might launch some people into orbit).
4. Finally you pin and attach the ruffle to your petticoat or skirt or bodice or whatever and stitch down. (And here’s where we lose people.)
I’ve been sewing ruffles since I was about 12. I LOVE ruffles! There’s just something romantic and girl-y about them… and Victorian.
It was that overly challenging project I just HAD to sew – a dropped-waist bodice with long sleeves and a skirt comprised of three tiers of VERY full gathered ruffles (think square dance skirt).
Yep. That was me and my grandmother on step 3 and 4 stretched across her back room – all 17 feet of it – with each tier in a loop we were trying to gather up to fit the hem of the one above it. We laughed ourselves silly it was so long.
But I loved it. Too bad the dress has been lost to time for I dearly cherished it. I made that dress before I could even hand tack the bias hemmed edges at the wrists, neck, and yes, the bottom ruffle hem.
I’ve learned quite a bit since that ruffle wrestling. Ruffles, despite their incessant length, go together quite effortlessly.

Let’s take, for example, a plain, mid-19th Century ruffled petticoat with one deep ruffle (or flounce – which is just a deep ruffle). The tips here can be applied to most ruffles but we’ll discuss a simple garment to learn the essence of Royal Ruffles.
Step 1: Cutting the Strips
Measure the line on your petticoat skirt where you’ll sew the ruffle on. Depending on the silhouette you want, multiply the line measurement by 1 ½ to 3 times. I usually go with double (x2). This figure is how many inches you’ll need to cut, or how long your ruffle needs to be before gathering.
The ruffle strip width is from the stitch line down to the hem (maybe a ½” below but not more than that) plus allowance for a hem and top fold-down.
Use a long ruler to draw cutting lines straight across your fabric or use a rotary cutter & ruler to cut the strips. Keep the lines perpendicular to the selvedge/grainline.
Keep the selvedges intact and piece your strips together to equal your measurement.
Step 2: Hem One Edge
For a period correct petticoat hem, turn up the raw edge, press and turn up again. Sew down. This is called a double hem.
This is where it can take FOREVER to finish. I usually press that first edge up along the whole length of ruffle then go back and press the second fold.
This regular, consistent motion will get it done faster than making both folds and pressing only an ironing board’s width at one time.
Step 2B: Hem Other Edge, if desired
On some of my petticoat ruffles, since they won’t be seen, I serge both long raw edges then turn under the hem ½” and stitch down. The top is left as is. You can double hem the top too if you’ll be sewing the ruffle down flat on the petticoat or it’ll be seen on a dress.
If you want to cheat a little, serge the edges or even pink them with shears or a shaped rotary blade.
Step 3: Gather
MOST IMPORTANT: quarter mark your ruffle and petticoat. Break your gathering stitches at these marks. If your ruffle is really long, further mark into eighths and break stitching here for eight sections.
A. Run 2 rows of the longest machine basting stitch, one on each side of the stitch line. Match quarter marks to petticoat. When pulling up the threads, wrap them around pins at the quarter marks to hold.

OR
B. Fold top edge over a string, yard or cord and sew (regular stitch length) near the cord as you would when making piping. Your stitching should be on the seamline. But DON’T sew the cord in tightly. Push the fabric along the cording to gather up.

OR
C. Set your machine at the widest and longest zigzag stitch. Very carefully sew OVER buttonhole thread or dental floss with the thread/floss on the seamline. Pull up the thread to gather up. Pin and top stitch to petticoat.
OR
D. Use a ruffler foot on your machine to pleat up the ruffle.

Step 4: Sew On Petticoat
Match the seamline on the ruffle to the stitch line on the petticoat, pin and topstitch down.

Another trick I like to do is to place the ruffle right sides together with the petticoat, stitch then flip the ruffle down. I do this for two reasons.
One, if I DID serge the top edge or even left the edges raw and don’t want that showing, this hides them under the ruffle. Two, this seaming method gives a little “kick” to the ruffle at the stitch line.
I adore ruffles. They’re so much fun and give your costume “bounce.” And once you know how to zip through the construction process you’ll start controlling the ruffles instead of them controlling you.

Do you find yourself wrestling with ruffles? What issues do you come across? What have you found to help you get them done and still have your sanity?
Hello Jennifer
I was wondering: for gathering you mention a ruffler foot as method D in Step 3. I have this foot too. But how do you match your skirt when using this method? You cannot know in advance how the pleats will work out? If you have tips, I would like to hear :-).
Kind regards
Isabelle
When I’ve used the ruffler foot, I set the pleating around 2.0. Next, I simply pleat the ruffle first, single layer. Then I pin and sew to the skirt. Although a ruffler foot can be used to ruffle AND sew on at the same time, I don’t use that method.
liquid stitch or even slightly water down tacky glue brush onto a clean, non fraying edge can keep it from falling apart. use it when i have over 200 feat of tiny ruffles for a cosplay.use the fold-casing for them and just glued the raw edged bottoms
im cheating with my petticoat for civil war reenactment and using nylon netting gathered on top of a cotton, ankle circle skirt.
it gives me the volume i need to i can wear fewer garments that can get tangled up and get very hot as i’m running on the field as a nurse, also less expensive being i’m a college student >_<
to at first glance it looks closer to accurate undergarments I put a single layer of slightly gather cotton over the top of the netting long enough to cover it. Its my first petticoat and im going without a pattern.
The netting or tulle works wonderfully though because theres no need to hem the edge. one simply cuts a length of the netting/tuller to twice the length they need the ruffle to be. fold in half. then baste stitch a 1/4-1/2 inch seam on the folded side of material.
i then thread a ribbon or smooth twine through the casing to easing arrange and pin the "ruffle" to the skirt base. After pinned well sew to skirt base.
cover if desired with fabric.
Its historically accurate in the least as far as i know but its turning out so much lighter but with all the volume i need.
Having inherited a late Victorian sewing machine, I notice it came with an early ruffler and a narrow hemmer. I also have a small text book for dressmakers published in 1894, which extols the virtues of using the machines and their attachments whenever you can. I don’t use that machine but a relatively modern one (early 1950s’s) with later versions of the same attachments. I love them. Those yards and yards of ruffles come out perfectly with superb 1/8″ hems and totally even ruffling, attaching to the garment in the same step. I love them. They are my two favourite sewing machine attachments and I can’t recommend using these two in combination enough, pre-starching the material (cotton or linen) and tearing rather than cutting to make sure that I get the ruffles on the straight grain.
Another thing I like to do is finish the ruffles properly at the top. My favourite method for this is to allow extra fabric where they are being attached and basically encase the ruffle head in that, if possible. Otherwise cover it with either home made self bias tape or ribbon. Much neater. Knowing I have quality undergarments on underneath makes me feel more beautiful even though only I know about them.
My difficulty with ruffles is that the thread breaks when gathering. I’ve taken to doing it by hand with gutterman strong thread, but as I do more, that will take forever.
I’d like to weigh in on the zig zag stitch over dental floss technique of gathering. I recently used it (with slight modification) to gather a 5 yard flounce into a 2.25 yard skirt, and it worked like a dream!
My modification is this: set the zig zag as large as you want it (mine was wide but shortly spaced) and just run it through the machine, carefully maintaining your distance from the edge. Then, AFTER you’re done with that, thread the dental floss or strong thread through the zigzag stitches using a dull needle. I used this one from Tandy https://www.tandyleatherfactory.com/en-usd/search/searchresults/1192-030.aspx, but any blunted needle should work (even the plastic yarn needles from big box stores).
This way you don’t have to fight with the dental floss or worry about it wandering away.
Hello,
I wish to make a cancan petticoat with plenty of frills. The idea I have is to lay fabric 6″ in width and then attach it to the petticoat. The next ruffle would still be 6″ but would be attached 3″above the previous ruffle and so on. When lifting the skirt you would only see the 3″ overlap, something like your pic of “gathered ruffle on taffeta”
Questions. What material/fabric would you use for petticoat and frills?
To add ruffles onto my knickers, would I have to make my own knickers?
What system of ruffle would you suggest?
Dance hall skirts were originally the petticoats worn under the skirts of the time. If you wanted to go that direction I’d suggest using the same basic cotton fabric for both petticoat and ruffles. Lace edging ruffles would be nice too but will increase the cost due to the amount of ruffle length you need. Depends on how “costume-y” you want to be with the project. As for gathering, honestly, I’d run all ruffle strips through my machine ruffler foot then tack on where I wanted them.
Thanks for your email. In your email you mentioned using basic cotton material, would it not be to heavy for a cancan petticoat. Although I am newish to sewing would you advise me on using the drawstring effect for it won’t take as long. All info I can pass onto other girls who wish to join our little group
I have seen other cancan dancers, but the frills are just gathered onto the skirt and not the petticoat. To me it looks terrible
Thanks again for the information, and carry on your good work
Barbara
You don’t want a heavy cotton but a good muslin or quilting cotton would be just fine. You can gather the ruffles directly to the underside of the petticoat then baste it into your skirt at the waistline so there’s no stitching on the skirt itself. A drawstring method of ruffling would work too.
I can never get my ruffles even, to my liking. So, when I wanted to add eyelet ruffles to my petticoats, I came up with a great idea. Since pre-gathered eyelet ruffle is so darned expensive, especially in long lengths, I went to the local Goodwill store and picked up a king-sized eyelet bedskirt and took off the middle sheeting. Automatic long pre-gathered eyelet ruffle ready to be sewn on the petticoat. I even had enough for more than one project.
The MOST FOOL-PROOF (trust me – I am a fool – okay – maybe a dolt) I have found to make ruffles is to get a ‘braiding foot’ attachment for your machine. Most all feet are snap-on these days and you can get one of these for less than $10.00. (On-line or sewing machine store) I use dental floss from the dollar store – 1400 feet for a buck isn’t bad!! Adjust the braiding foot way narrow for the floss – and your zig zag to widest setting – feed the floss through the foot – then go like the wind!! I use this technique to make the gathers for sleeve heads and cuffs as well. The floss is slick because it is waxed – but after you are done stitching your seam you can just pull it right out. And – you are ready to use your braiding foot for attaching braid too – YOU WILL LOVE IT!!
I’m actually doing a shirt with ruffles for a Steampunk costume. It’s something that’s taking quite a long time, as it’s also my first foray into drafting a blouse pattern from scratch–at least, one that’s more complicated than a Renaissance square-shapes thing.
My ruffles are going to be of a sheer material, so I’ve looked into several other ways of dealing with the non-gathered edge. For a while, I was thinking of buttonhole- or satin-stitching with cording, but I decided that would take me FAR too long. I’ve finally settled on doubling my stip width and doing a tube out of it–fold it in half, stitch the narrow ends (for my finished neck ruffle, a French seam, but down the front I don’t even need more than a basting stitch since it’ll be caught in the neck seam and in the hem), then baste the long edge. Then gather as normal. It looks really nice in my muslin, at least!
http://varika.pair.com/livejournal/Front%20ruffle%20sm.jpg <–See?
Hi, love the blog post. I am an ex-square dancer and have made lots and lots of ruffles. (I have even worn out ruffler attachments, sigh.)
I also use my “rolled hem” foot for hemming because it basically does make a double folded hem. You can also find them in different sizes, I used to have a set up to at least half inch. (That machine was borrowed back by my mother to loan to someone who never returned it. Really miss that old Commander(?) machine.)
For a sort of scalloped hem edge try using a narrow hemmer foot and a zig-zag or blind hem stitch that goes over the outside folded edge. It takes a bit of practice but can look lovely. You can also, with practice add a bit of cording inside the hem of the ruffle to give it a bit of extra oomph.
Although I haven’t tried it on cotton, with our nylon crinolines we found a wonderful starch substitute. Acrylic floor finish.(Future brand name????) A clear liquid we would put it in a spray bottle and spray our petticoats thoroughly and let them hang until almost dry. Then spread them out with the waist line in the center of the circle mad by them, and let them finish drying.
Because it was meant to hold up for a while on floors, we found that we could keep our light colors clean by swishing in cold water. and only need to really wash them and re-coat about once a year, or so. (And we wore these every week.)
Another way to gather ruffles…try this on your machine w/ “extra” fabric, NOT your good fabric …to begin with, pls.
You set your upper sewing thread tension as LONG as it will go. Then you set your bobbin tension as SHORT as it will go. Mark your ruffle-to-be at intervuls of 3′ with a marking pen.
Then run the unhemed side through the machine. The TIGHT bobbin thread and LOSE sewing thread will automatically gather the light weight fabric into ABOUT a 1-2 ratio. In other words, every two inches will end up being about one inch long. This is the way I have been gathering ruffles for years and years!! Just remember to return the setting on your machine back to NORMAL before continuing to stitch your garment together!!!
I just recently learned a handy crazy easy ruffle technique. It’s all over pinterest. Leave a long tail of thread. Set your stitches to the longest stitch. Set your machine tension (not bobbin tension) to the highest setting. Get your ruffle fabric ready – double hem, serged edges, etc. Start sewing just your ruffle fabric – do NOT sew it to the garment yet. You will see your fabric begin to ruffle behind your foot. I had to gently tug the ruffle out as I sewed so it didn’t bunch up too much. Leave a long tail at the end. You can now adjust the amount of ruffle you want then pin it to your garment. Easiest ruffle EVER.
Excellent – thank you. I was confused, lol. I did read the blog on organdy – I’m intrigued and plan to try it out. Another question for you – if you had to make a silk petticoat, what type of silk fabric would you use? Taffeta? Satin? Something else?
Thanks again!
Depends on what kind of petticoat (shape & time period). Today’s silk taffeta is too expensive for a petticoat. But historically it was lighter weight and was used for fancy petticoats. Silk organza would be lovely and hold well. Satin is the same as taffeta – too expensive. I know peau de soie and crepe de chine were silks used for undergarments in the early 1900s. I generally use cottons for all my petticoats – muslin, polished, organdy – and use starch on some of them too for a papery finish.
This would be early bustle period, perhaps natural form, but not late bustle or later. Somewhere around 1875-1878.
Thank you for sharing your knowledge so freely. I had assumed taffeta would be the one to use (based on stiffness). Your comment about cost is a fair one. I hadn’t thought of organza – I would have thought it not quite stiff enough. And it is a pain to work with sometimes. I have some very light weight taffeta (not too cost prohibitive, thankfully), which is what I will most likely use.
Thanks again!
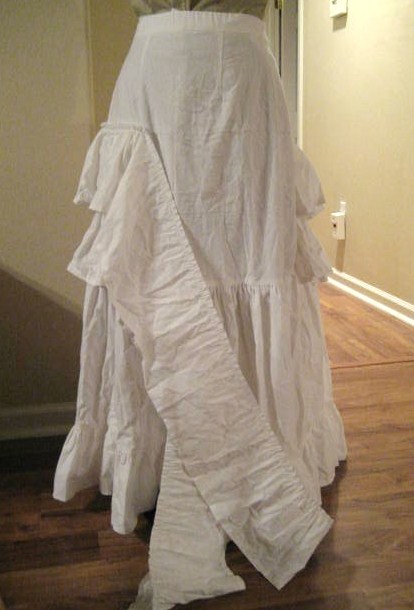
What fabric were you using for the ruffles on the petticoat in this blog post? At first I thought it was satin, then I thought maybe organdy. Can you enlighten me?
Well… the first pic and one of the petticoat back with ruffles is plain ol’ cotton muslin (a heavier weave) from JoAnn Fabrics. The second pic is a petticoat from poly taffeta lining. The green example is a sheer voile cotton. No organdy here I’m afraid. This was before I decided organdy was THE fabric for petticoat ruffles as it’s sheer and light and stiff.
I’ve been using 3C or 3D for years now, depending on the project. My question is about the double hem. I typically use the 1/4″ rolled hem foot on my machine to give a nice finished hem to my historical ruffles or pleats, and then iron it down. Is that too fine a hem for the period or should I take that extra time to iron down the edges and then straight stitch a slightly deeper hem?
Depends on your fabric and also the time period you’re doing. The 1/4″ rolled hem is fine for delicate ruffles. I tend to make mine a 1/4″ double hem sewn flat (not rolled). I have seen some ruffles with larger hems, like 1″ to 2″ on deep ruffles of the 1850s & 60s. The hems seem more narrow in the bustle periods.
Step 3…I hate it. It’s a necessary evil, but it takes SO long. Hemming anything really. Probably the most boring aspect of costuming, especially if done by hand.
I recently threw a project into the “I might finish you if I don’t burn you first” pile because of step 4. I felt a bit dumb since how hard can it be to sew on a flounce? But sewing on ruffles isn’t like sewing on nice, straight knife pleats. I wanted the flounce to overlap the hem by a half inch or so, but when I tried to do that, visually it looked crooked when I tried it on. Any tips on trying to put on a flounce without sewing the right sides together approach?
I adore your blog – thank you so much for sharing all this information.
Under step 3, did you mean to say to pick one method – either A,B,C,OR D for gathering? I was trying to do them all in my mind one after the other and could not follow!
Thanks, Joanna
Yes! Only pick one for how you want to gather up the ruffle. Doing all four on one ruffle could get quite confusing!