
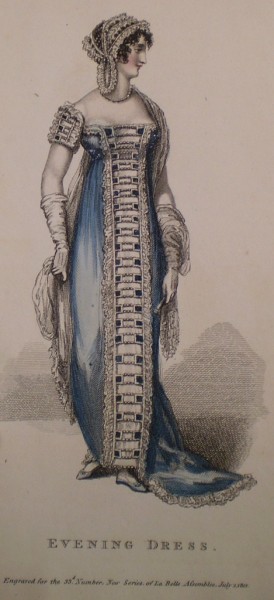
This plate from July 1, 1812 La Belle Assemblee was so well received on the Facebook page that I though we’d take a closer look at the wonderful trimming and how to replicate it.
The basic trim effect looks to be made separately then mounted onto the dress fabric. The dress fabric could be an Indian cotton muslin or even a silk taffeta (which was softer than our taffetas today).
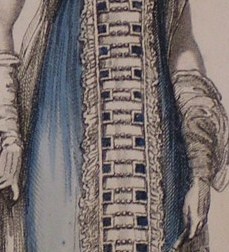
The panel is formed onto a backing of white – a cotton organdy or silk organza would work beautifully here.
Along the long sides of the panel are square cutouts that show the blue fabric – either from the dress fabric or squares mounted individually onto the white panel. Each square is bound with the white and most likely has a piping cord for an embellished 3-D look.
The edge of the trim panel is also bound with piping and a soft embroidered ruffle added. My guess is that the ruffle is around 1″ wide. The squares are linked by three-piece rows of beads. They could be pearls too. They are most likely mounted to the white panel backing for security.
The trim panel looks like it was made the full length from the top of the bodice to the skirt hem. (Center front panel trims like this were quite popular in the 18-Teens and well into the 1840s.) Then the whole thing mounted onto the finished dress along the ruffle edges.
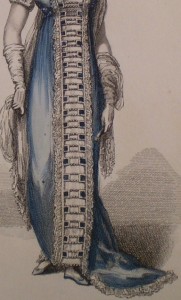
Another point to notice is that the square cutouts are the same size from the bodice to the hem. Many times you’ll see the trim a smaller proportion on the bodice and get larger toward the skirt hem. You can see this method on many 1770s gowns.
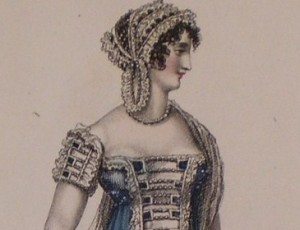
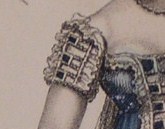
The sleeves mimic the dress trim. However, I’d guess that there may not be any white panel under the bead rows. A tab of blue fabric is bound and attached to the back side of the sleeve where it’s attached to the front side of the sleeve with the beading. The arm would show underneath. Or not.
I think this is a very beautiful gown. Lots of work but Oh-So-Stunning if done well. The beads or pearls would sparkle in the candlelight.
What do you think?
I strongly suspect that the front is actually a network of dark blue tabs & beads that holds the lighter blue outer dress over a sleeveless shell of white. One clue is the top of the dress: the white undress is not necessarily 100% lines up with the top of the overdress. The shadowed corners of each trim section, especially on the left, would also tend to corroborate that idea.
I think that it would be amazing to do but the making the trim panel lay flat is, as I see it, would “fight” with the softness of the gown as a whole.
Great observation! The dress cut is smooth around the front waistline on the bodice as well as the skirt. As long as your support panel is made from a soft fabric (organza) that works well with your dress fabric it would work. Also, you couldn’t stitch it down tight. I’d do long hand tacking stitches next to the piped edges (near the lace) so the entire dress would move together. Oh, and you’d want to take it firmly at the waistline too.
Oh for a personal dressmaker that could sew it on while you’re actually wearing the dress!